Underbed piezo holder for z-probe
thingiverse
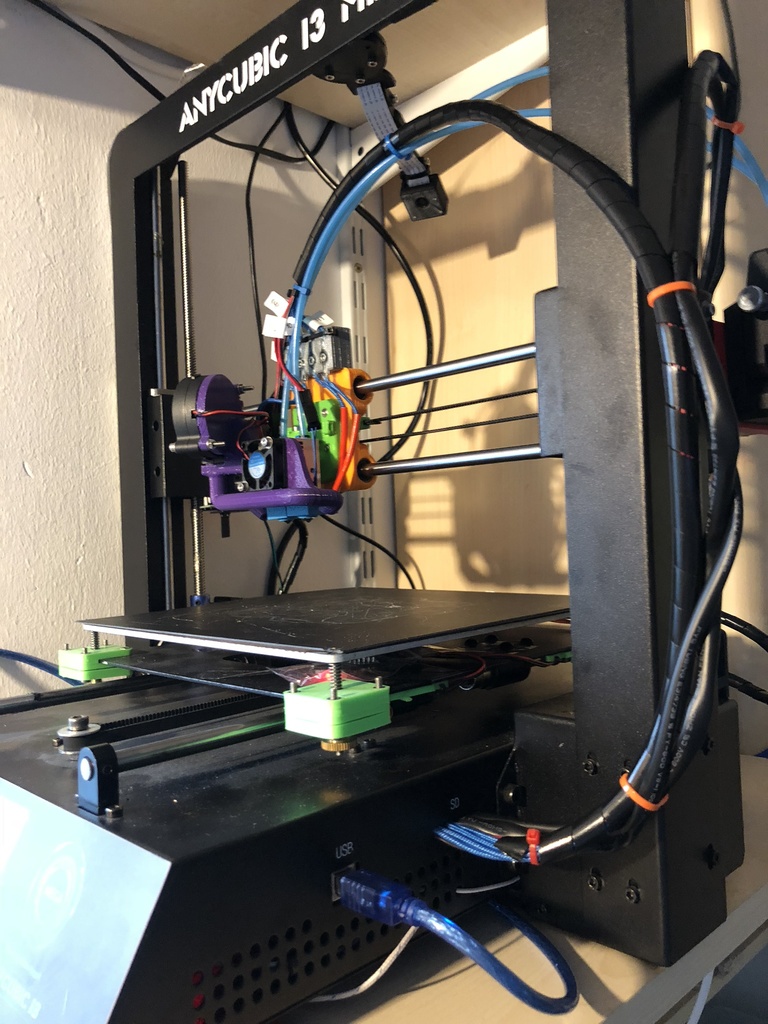
<h1>Description</h1> The is my piezo disc holder to use as a z probe. I have mounted it on a Anycubic I3 MEGA. And I was able to reuse the leveling screw and the springs. The more you tighten the screws the better it behaves. During ABL you have to decrease z and y acceleration. At 500mm/s^2 it works flawlessly. I recommend to heat the nozzle to 130°C in case you have still plastic on the tip. The small tail can be used to clip 2 pin dupont sockets and to fasten the cables with cable ties. Update: 2018-11-24: aproemel has made a modified version of the UpperFrame for those printers with a thicker y-carriage. <h1>You need</h1> - 4 Drilled 27mm Murata7BB Piezo (I use the ones from precisionpiezo.co.uk) - 4 M3x40 DIN7991 or longer to connect the heated bed - 16 M3x16 DIN912 + nuts or longer to close the frames - a hole in the y-carriage for the fourth hole... or just screw it with 3 screws - 100mm cable ties - the electronics for the piezos <h1>Assembly</h1> - Put the "stamper" in the lower frame. The chamfer should face in the piezo room. - Put the piezo in the mid frame. The crystal should face in the piezo room. - The wires have to face in the direction of the holder. - Press the nuts in the upper frame. - Stack lower, mid and upper frame together. The nuts in the upper frame have to face outward. - Put in the three screws on the "outside". Don't tighten them yet. - ... do the electronics stuff ... - Push the stack over you carriage edge till the hole match. - Mount you printbed with you springs. - Tighten the screws. - Tighten the printbed screw and level you bed roughly. <h1>Stuff</h1> Makes and remixes are welcome.
With this file you will be able to print Underbed piezo holder for z-probe with your 3D printer. Click on the button and save the file on your computer to work, edit or customize your design. You can also find more 3D designs for printers on Underbed piezo holder for z-probe.