Undershelf Magnetic LED Lamp
prusaprinters
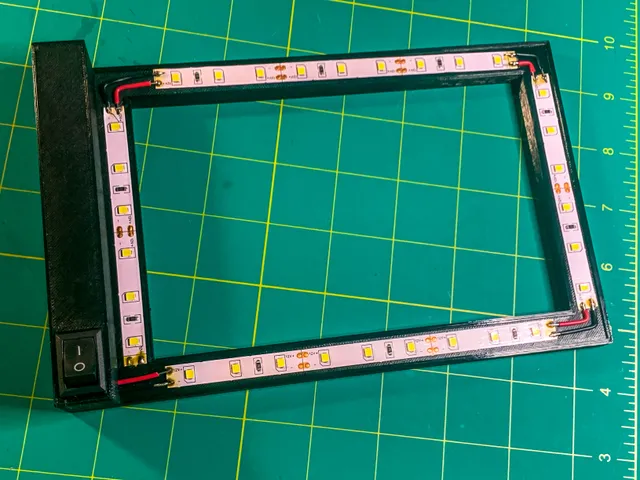
Materials Needed:12 Volt LED Strips with Adhesive Backs (what I used)5.5mm x 2.1mm DC Jack (what I used)19 x 13 mm Rocker Switch (what I used)60 x 10 x 3mm Neodymium Bar Magnets (what I used)12V 2A Power Supply (what I used)A few inches of 22 AWG wire (what I used) Solder Iron and SolderGlue (I used clear Gorilla Glue, but 5 min epoxy or Super Glue would also work) Step 1: Print the Model and Remove Supports (if used)I used black Prusament PETG with 15% infill and 4 walls for extra strength. I also used supports for the magnet slots (but I think it would bridge the gaps if you printed without supports). Step 2: Glue in Magnets Glue in both of the 60mm x 10mm x 3mm Neodymium Bar Magnets. Step 3: Prep LED StripsDepending on the strips you use, you will have to cut slightly different length stips to maximize the number of lights you can fit. In total you will want 4 strips (one for each side). Before you attach them you will want to pre-solder the pads to make attaching the wires easier in the next steps. Step 4: Attach LEDsRemove adhesive backing and attach LEDs to the print. To make it easier try to line up the polarity of the stripts to make it easier to solder them in the next step. Step 5: Install DC JackIf you bought the pre-soldered DC jack, just screw it in and extend the wires down to the rocker switch port. If you bought jacks without wires, solder enough wire to reach a bit past the rocker switch mounting point. You should be able to screw the jack in (I used some needle nose pliers towards the end). Step 6: Solder Rocker SwitchSolder the positive wire from the jack to the first prong of the rocker switch. Solder a short length of wire to the second prong of the rocker switch. Feed both wires (positive and negative) though the port at the bottom of the rocker switch mounting cavity and clip rocker switch into place. Step 7: Solder wires to LEDsI found it help to measure out, strip and prebend the wires before soldering. Work your way through the LED strips soldering positive to positive until you reach the last strip.At this point you should be good to go :)
With this file you will be able to print Undershelf Magnetic LED Lamp with your 3D printer. Click on the button and save the file on your computer to work, edit or customize your design. You can also find more 3D designs for printers on Undershelf Magnetic LED Lamp.