Unifi Drywall Mounting with Keystones - tested with AP AC Pro
prusaprinters
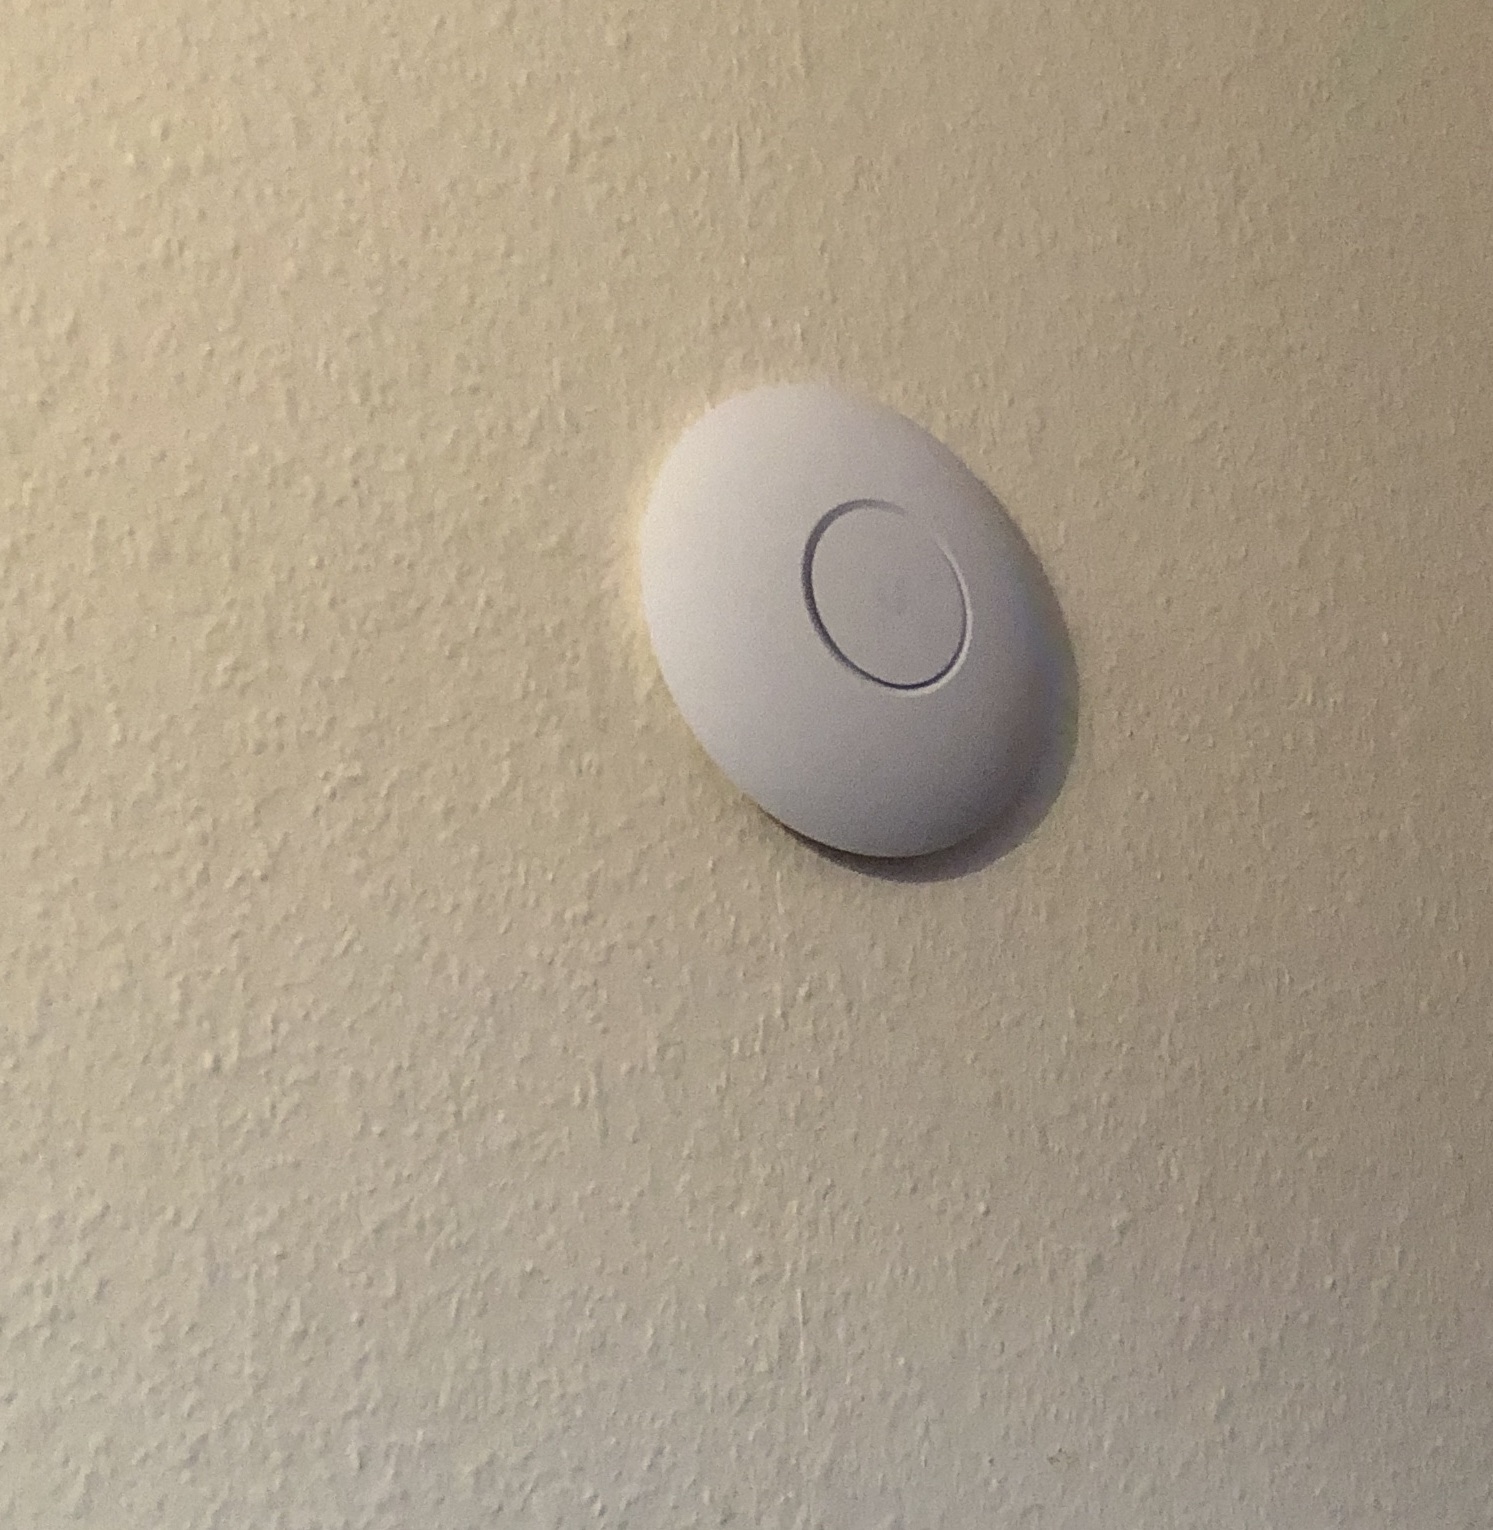
<h5>Description</h5><p>This took me quite some time to model.</p><p>With this print consisting of 3 parts, that slide together easily, you can mount your Unify Accesspoint on a drywall without visible cables. </p><p>It uses the same hole pattern as the one provided by Ubiquiti and uses the included plastic peace for mounting.</p><p>Make sure that your drywall is not thicker than 2 sheets and you have some space for the cables behind. </p><p>The model consists of 3 parts that slide together easily</p><ul><li>The main body (Einsatz Rigips…)</li><li>the back cover (Rückseite)</li><li>the panel for the Keystones / other plugs (Anschlussplatte Keystone/blanko)</li></ul><h5>Additional parts needed</h5><p>You will need at least:</p><ul><li>2 Keystone Cat6 Connectors</li><li>2 short Network cables (I used 0,25m)</li><li>1 Access-point (of course ….)</li></ul><h5>Printing</h5><p>I printed the white parts in BASF Ultrafuse PET and the orange part in Prusament PETG</p><p>All parts can be printed on the mini without support, on some parts I used ironing to get the parts to slide together easier.</p><h5>Modifying to your needs? </h5><p>I included an additional insert without any cutouts so that you can modify this part to your needs e.g. if you don't want to use a keystone adapter and just want to have a hook that fixes your ethernet cable in place until final installation.</p><h5>Tips for Installation</h5><ul><li>Use the plastic mount from ubiquiti to find a suiting place for your Access-point</li><li>mark where to drill</li><li>Use pegs that are matching your drywall</li><li>Use the provided pdf to know where to cut a hole in your drywall (Anschlusskasten.pdf)</li><li>I used a multitool (e.g. fein multimaster) to remove the drywall and finished with a file</li><li>Get your cables ready. You can run the cables through the hole, and connect & test the keystones before final installation. When you are ready just push the keystones in the panel for the keystones</li><li>Slide the back cover into the main cover</li><li>Slide the keystone panel into the main assembly and push everything in your hole</li><li>add the original ubiquity mounting plate and secure everything with fasteners</li><li>connect the network cables and clip on your Accesspoint</li><li>enjoy</li></ul><h5>Additional tip</h5><ul><li><strong>!Test the keystones connectors before installation to ensure you have a proper connection!</strong></li><li><strong>guess where that last tip came from … -.-</strong></li></ul><h4>Good luck!</h4><p> </p><p>If you have questions, feel free to post them in the comments :)</p>
With this file you will be able to print Unifi Drywall Mounting with Keystones - tested with AP AC Pro with your 3D printer. Click on the button and save the file on your computer to work, edit or customize your design. You can also find more 3D designs for printers on Unifi Drywall Mounting with Keystones - tested with AP AC Pro.