Universal Buttonbox (for OctoPrint)
prusaprinters
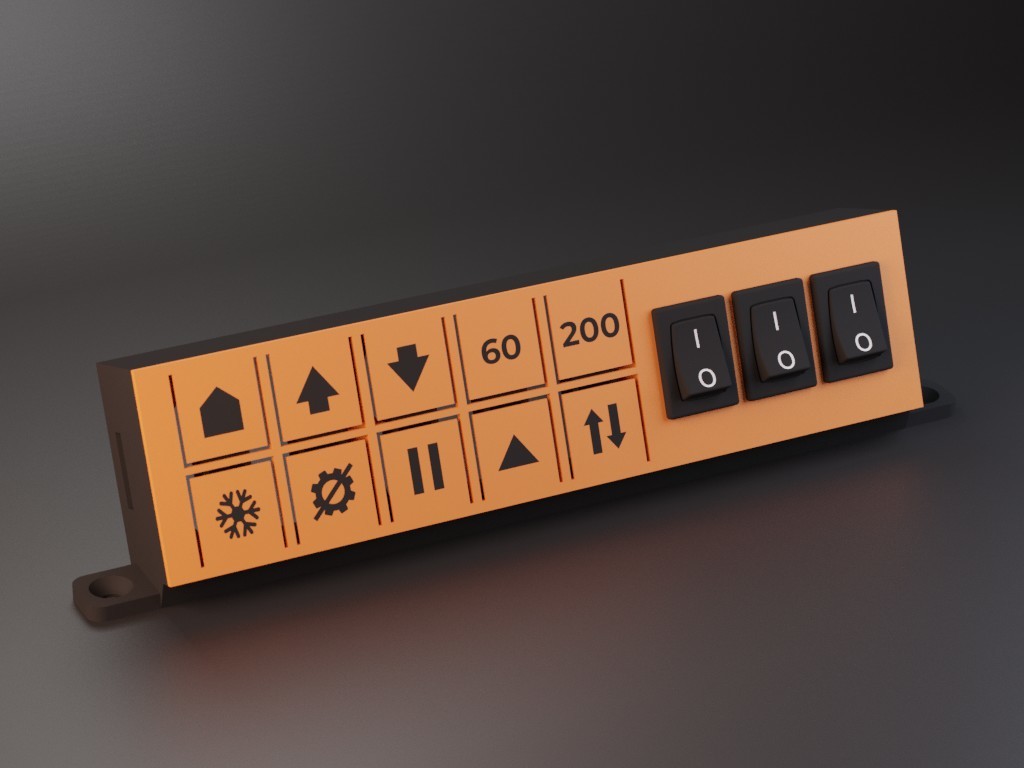
<h3>Now on Printables! Check the Thingiverse page <a href="https://www.thingiverse.com/thing:4567163">here</a> to see previous makes and remixes.</h3><p> </p><h4>See also:</h4><p><strong>ENDER-3 VERSION ON </strong><a href="https://www.thingiverse.com/thing:4024711"><strong>THINGIVERSE </strong></a><strong>OR </strong><a href="https://www.printables.com/model/189691-creality-ender-3-buttonbox-for-octoprint"><strong>PRINTABLES </strong></a>(Original design, made specifically to bolt to the Ender-3 LCD)</p><p> </p><h3><strong>Universal Buttonbox (for OctoPrint)</strong></h3><h5>Currently 2 versions:</h5><ul><li>10 buttons</li><li>10 buttons + 3 rocker switches</li></ul><blockquote><p><strong>Note:</strong> the rocker switches are not effective if used with the same plugin as the buttons. I used them in combination with custom Python scripts that detect whether they are switched. This is relatively complicated. If you don't have a use for them or don't know how to use them with your Raspberry Pi, you can use the version with just the 10 buttons or reach out to me or others in the comments.</p></blockquote><p>After the succes of the <a href="https://www.thingiverse.com/thing:4024711">Ender-3 Buttonbox</a> on Thingiverse and me needing the same kind of device for my enclosed CR-10S, I present you the Universal Buttonbox. It is highly versatile as it can be mounted to whatever you want.</p><p>The new approach of incorporating the buttons in the top plate only requires printing two parts and makes for easy assembling.</p><p> </p><figure class="image image-style-align-center"><img src="https://media.printables.com/media/prints/189699/rich_content/fb59c8dd-bf5b-4574-bbd3-26c48eabf742/universal-buttonbox-assembly-gif-reduced-file-size.gif#%7B%22uuid%22%3A%22e165a66b-986d-4936-a2fb-b408e2a41cb4%22%2C%22w%22%3A600%2C%22h%22%3A450%7D"></figure><p> </p><h3>How does it work?</h3><ol><li>Push-buttons and rocker switches <i><strong>(optional)</strong></i> act as inputs for a Raspberry Pi running Octoprint</li><li>Button inputs are processed by the <a href="https://plugins.octoprint.org/plugins/enclosure/">Octoprint-Enclosure plugin</a> to activate an output. In this case sending your own custom GCODE to the printer</li><li>The printer does what you want it to do (hopefully)</li></ol><p> </p><h3>What do you need?</h3><ul><li>2 printed parts based on your desired version</li><li>10x Tactile push-buttons (6x6x5mm)</li><li><i><strong>(Optional)</strong></i> 3x rocker switch (19x12mm) (<a href="https://www.tinytronics.nl/shop/en/components/switches/standaard-built-in-rocker-switch-normal">example</a>)</li><li>4x longer M3 bolts (+- 5-12 mm long)</li><li>2x shorter M3 bolts (+- 4-6 mm long)</li><li>A resistor and wiring to connect the buttons and switches to the Raspberry Pi</li></ul><p> </p><h3>How to make it? (see animation above for assembly guide)</h3><ol><li>Choose your version (with or without rocker switches). If you want to make your own custom buttons, use the top plate of your version ending with "BLANK".</li><li>Print the two parts.<ul><li><strong>How to print the button inlays? </strong><br>To get the colored inlays, align the button inlays 3D model with the top plate 3D model in the slicer. Note down the top plate position and move it away in order to first only print the button inlays (one layer, ideally 0.3mm). Afterwards, without removing the physical inlays from the buildplate, print the top plate in its previous position in order to print it over the already printed inlays (use the same initial layer height).</li><li><strong>Do the parts need supports? </strong><br>The mounting parts only needs supports underneath the two mounting screw holes on the sides. Ideally, you add these as custom supports in your slicer since the rest of the models can be printed without supports.</li></ul></li><li>Insert the tactile push-buttons</li><li><i><strong>(Optional)</strong></i> Insert the rocker switches </li><li>Clear the bolt holes and bolt the top plate to the base</li><li>Connect one end of all push-buttons together</li><li>Via a current limiting resistor (resistance does not really matter, I used 1k Ohm) connect this side to the 3V3 of the Raspberry Pi</li><li>Connect the other ends of the push-buttons each to a separate GPIO pin of the Raspberry Pi (remember which goes to which)</li><li>Install the <a href="https://plugins.octoprint.org/plugins/enclosure/">Octoprint-Enclosure plugin</a> in Octoprint</li><li>Define your outputs (for example GCODE scripts and the ones I use, see the file section) </li><li>Define your inputs as GPIO Inputs <strong>(making sure to use the following settings: </strong><i><strong>Output Control, Input Pulldown, Rise</strong></i><strong>)</strong> and associate them with a corresponding output</li></ol><p> </p><p>-------------------------------</p><p> </p><p>Feel free to remix this design as you wish. It would be nice if you upload the remix so we can all benefit. Also feel free to comment with button ideas, ideas in general or your custom GCODE scripts so I can add them to the example document.</p><p>*<strong>Disclaimer:</strong>* <i>This design has overlapping geometry. I know Cura has no problem with the files, but I cannot guarantee that other slicers don't either.</i></p>
With this file you will be able to print Universal Buttonbox (for OctoPrint) with your 3D printer. Click on the button and save the file on your computer to work, edit or customize your design. You can also find more 3D designs for printers on Universal Buttonbox (for OctoPrint).