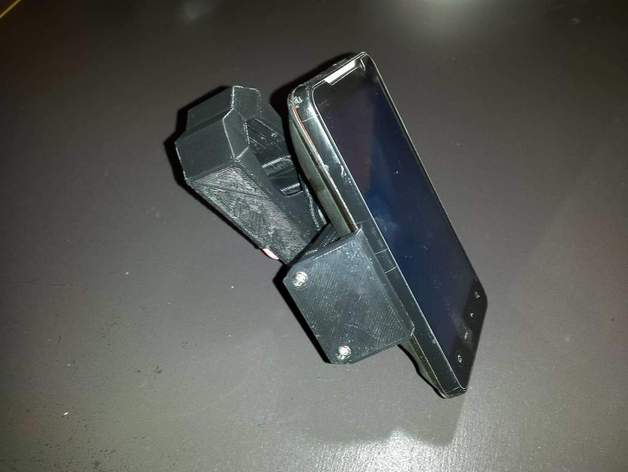
Universal Microscope and Telescope camera Mount for phone or camera
thingiverse
This is an updated version of item 59344 submitted by cswaim Revisions have been made as follows: Center slide length has been increased for easier phone insertion and removal. The clip's shape and size have been modified to ensure a solid grip on the site bore. A rubber washer has been added between the bushing fit and the clip-slide holder. This change requires an additional hardware store component not included in cswaim design Instructions: Printing with 10% fill, 300 micron resolution without rafts resulted in smooth parts. I've included a pre-designed file for the Maker-bot to save printing time. The modified parts list is similar to original specifications 59344 with the addition of a 3mm rubber spacer for bushing adjustments. Parts List: Quantity 6: 4-40 x 1/2 Socket Head Cap Screw (McMaster Carr item 92196A110) Quantity 1: 2.5" x 1/4" OD Spring (McMaster Carr item 9657K171) Quantity 1: 1/4" x 1-3/8" Clevis Pin (McMaster Carr item 97245A242) Quantity 1: 1/16" Cotter Pin (McMaster Carr item 98335A044) Quantity 1: .56" Dia x .063" wire x 120 deg Torsion Spring (McMaster Carr item 9271K641) Assembly Instructions: 1. Secure the left cap onto the left slide and right cap onto the right slide. It is beneficial to start screwing a few turns into each hole first, then remove screws for easy assembly. 2. Fit the recessed center of the right slide over the square piece of material under the left slide. The two parts can slide together once aligned correctly. 3. Carefully thread the spring through the bottom hole in the right slide, wearing protective glasses to prevent eye injury from the escaping spring (you will need protection).
With this file you will be able to print Universal Microscope and Telescope camera Mount for phone or camera with your 3D printer. Click on the button and save the file on your computer to work, edit or customize your design. You can also find more 3D designs for printers on Universal Microscope and Telescope camera Mount for phone or camera.