Uno card caddy
prusaprinters
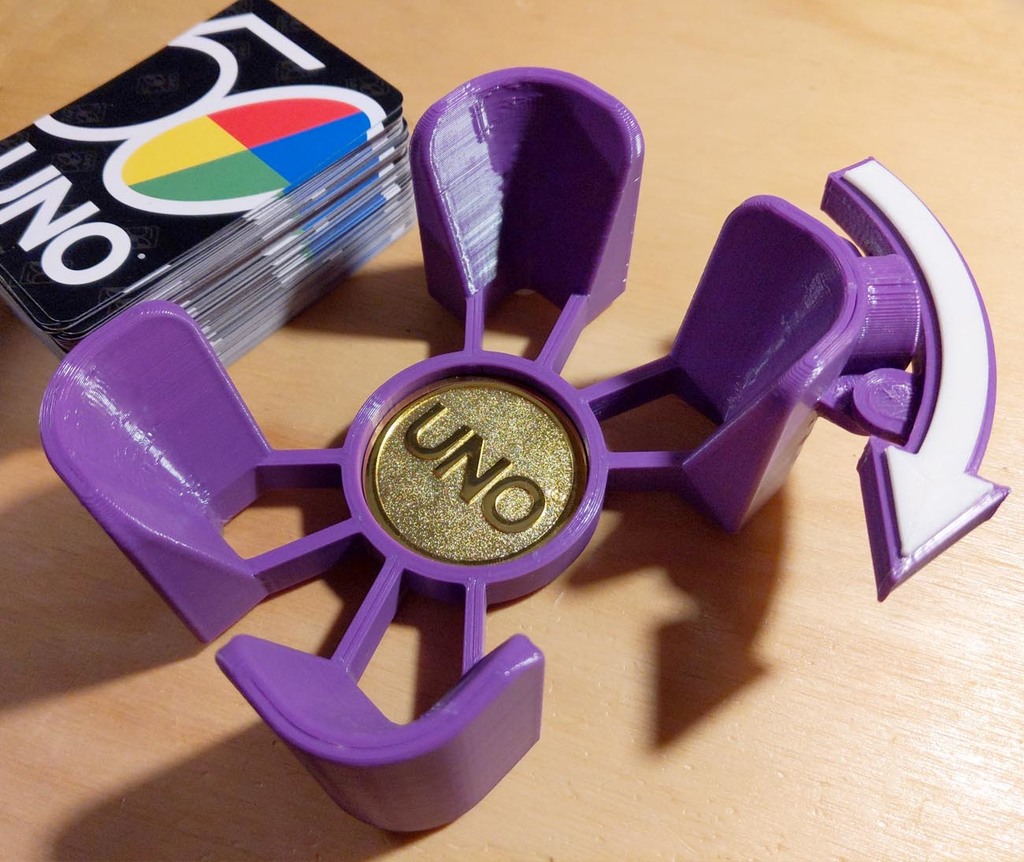
<p>Uno card caddy. Keep the discard pile tidy. No more forgetting which direction the action is going. Wrap with a rubber band to store cards when not in use.</p><figure class="image"><img src="https://media.printables.com/media/prints/157075/rich_content/9be8808e-b001-439b-b2b1-fa9c15b62b4f/uno_flick.gif#%7B%22uuid%22%3A%2218e7cec5-6553-4cd5-a4e8-bdbcc2e93792%22%2C%22w%22%3A600%2C%22h%22%3A338%7D"></figure><p> </p><p>Update Feb2022: Optional dealer dial. We are getting old and our brains don't work like they used to. Five people can't remember who dealt the last hand [the weed is not helping]. Glue/screw the mount on and pop in the dial.</p><p>What you need for the full experience:</p><p>1 X 688 bearing 8x16x5mm</p><p>3 X magnets 9x1.5mm</p><p>4 X kitchen cabinet bumpers</p><p>superglue/epoxy</p><p>Cementall/plaster of paris</p><p> </p><h3>Print Settings</h3><p><strong>Supports: </strong>Yes</p><p><strong>Resolution: </strong>.2</p><p>set wall count to 15 so everything prints solid</p><p>create "pause at layer" gcode to insert the magnets in the caddy and arrow. Use a sharpie to mark correct polarity.</p><p>Only the arrow needs a little support.</p><p> </p><h3>Post-Printing</h3><p>Insert the cabinet bumpers in the base</p><p>Mix up Cementall/plaster of paris and pour into the upside down base.</p><p>Glue the 2 filler pieces in the arrow</p><p>Glue the bearing to the base</p><p>Glue the arrow in the bearing</p><p> </p>
With this file you will be able to print Uno card caddy with your 3D printer. Click on the button and save the file on your computer to work, edit or customize your design. You can also find more 3D designs for printers on Uno card caddy.