UNOFFICIAL Mosquito Hot End Silicone Sock Mold
thingiverse
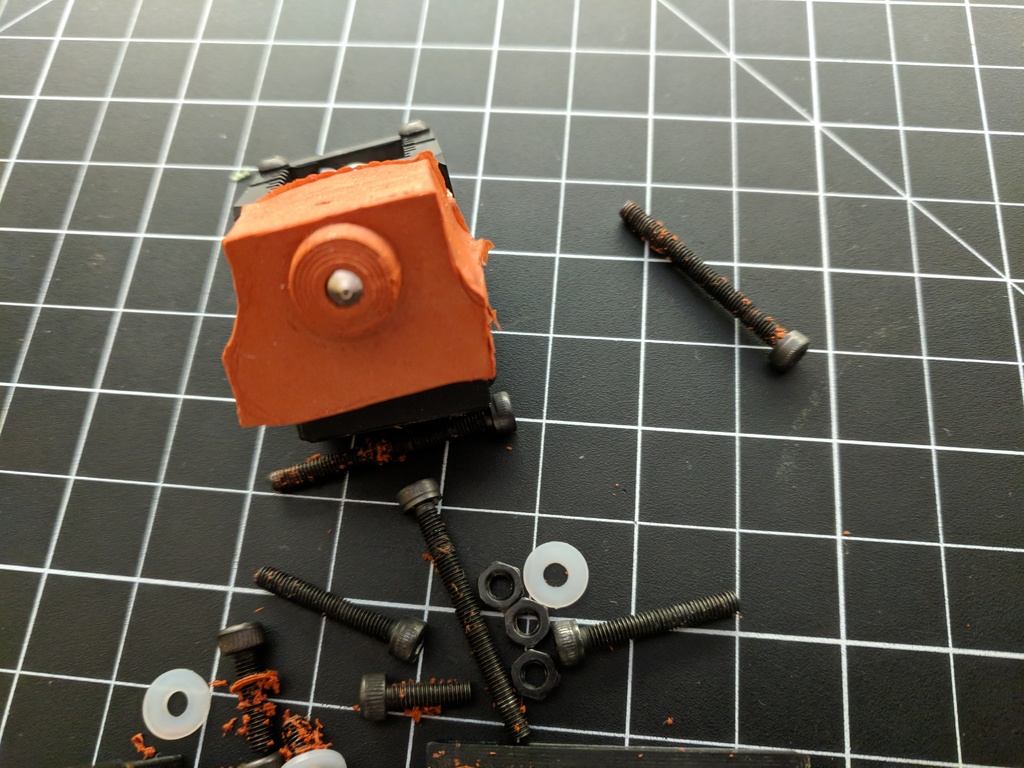
This is, theoretically, a mold for making a silicone sock for the Mosquito hot end. Disclaimer: I have no idea what I'm doing. I've never done silicone casting before, though I have watched a bunch of youtube videos on it, which makes me an expert in internet terms, right? ***Removed old attempt documentation, to avoid more confusion than is necessary. Update 3: This version has actually created a successful sock. The V3 stl is the plate of the four printed pieces you need. What you need (assuming you're using the v3 files): - Whatever kind of silicone you're going to use to make these. I used this one because it's cheap and rated for the temperatures and others on the internet have suggested it: https://smile.amazon.com/gp/product/B0002UEOPA - Three M3x30 screws with M3 nuts for attaching the two outer plates (these screws go through both plates and the center casing part, through the three holes indicated in the "screws.png" picture. - Three M3x10 screws for attaching the heater block bit to the plate that has the three holes for it. - One M3x6 (or M3x8 with a couple of washers, if you're like me and that's all you have) screw for attaching through the "nozzle". This screw is for alignment rather than clamping. - Two M3x16 screws for going into the end of the housing and heater block where the heater core and thermistor wires go. - Some of this silicone gasket material: https://smile.amazon.com/gp/product/B0002UEOPA - Some sandpaper - Some wax to keep the silicone gasket material from sticking terribly to your plastic while it cures. I used this because I already had it from woodworking projects, but some mold release would probably work even better: https://smile.amazon.com/Minwax-785004444-Finishing-1-Pound-Natural/dp/B000LNOZAW I got the screws from various M3 assortment packs off of amazon (though apparently not enough, since there are sizes that would have worked better that I didn't have). So, putting this thing together is a bit of a puzzle (mostly because I'm not great at designing these things yet). I've included a picture that has arrows for which holes take which screws. I don't have a picture or video showing how all the pieces orient, but it's a four-piece puzzle, and if you're installing a Mosquito hotend on something, I have faith you can figure out how all the bits line up. You'll want to sand all the places that the silicone will touch, then wax them. Otherwise you'll end up with a bit of silicone in the right shape, but which is permanently stuck to the mold and will shred if you pull hard enough to remove it. Do a practice run before you put it together and open the silicone tube to do it for real. I attach the (plastic stand-in) heater block to the center box section with the screws in the end (the m3x16 or m3x18 with washers) first, then squeeze silicone into the spaces around the block, and put the sides on. It's a little bit tricky, but the silicone takes ages to set, so you've got time to make sure you don't leave bubbles. Then let it sit for a few days. I tossed it into the space under the printer in my enclosure so the heat might help it cure. Take it out carefully, and you'll have a silicone sock for you Mosquito. Feel free to ask questions, and I'll answer what I can.
With this file you will be able to print UNOFFICIAL Mosquito Hot End Silicone Sock Mold with your 3D printer. Click on the button and save the file on your computer to work, edit or customize your design. You can also find more 3D designs for printers on UNOFFICIAL Mosquito Hot End Silicone Sock Mold.