UP Printer Table Wire Re-route
thingiverse
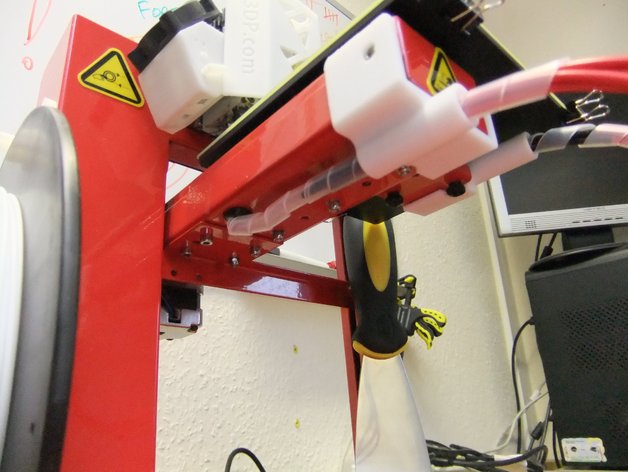
Method for re-routing the wires that go to the table heater to make them less prone to breaking. Instructions Print the two parts included in the files for this thing before disassembling your printer. Remove the table and x axis arm cover. Unclamp the drive belt and take the heater element and sensor out of the table. They should now be free but still connected to a plug near the z axis. Replace the belt clamp and make sure there is still a complete and free movement available to both ends of table travel. Splice in a new length of wire into each existing wire, about 14 inches (350mm) long, I used a wire similar to that used for probes on multimeters, it is very flexible and has a rubbery outer sheathing. Make sure each joint is well insulated with heatshrink. Trim off the end of the original plastic wire guide inside the axis arm in the position shown in the pictures. Drill a hole in the bottom of the x axis arm where shown in the pictures, I used a 10mm rubber grommet so a 10mm hole was required, drill a 3mm hole first then open it out to 6mm then 10mm to finish with. I used a friend and a block of wood to help hold the printer steady while I drilled. Make sure you do not damage the belt and other working parts in the arm. Vacuum out the swarf and deburr the hole to a clean finish. Fit the rubber grommet to protect the wires from the sharp edges. Feed the heater and sensor through the grommet and out under the table arm. I used some cable wrap to keep things tidy(ish). Feed the wires through the table cable guide you printed earlier and clip the guide over the two bolts at the front of the arm, see pictures for more detail. Feed the wires through the second printed guide part and slip the heater and the sensor back into the table on the opposite side from which they came. Clip the second printed guide part to the table bracket under the table as shown in the pictures. I used a second piece of cable wrap to keep that end of the wiring tidy as well. The wires are now a lot less stressed than when they were fed through the table arm and mine have now lasted quite a while without any problems. Please be aware that drilling holes and cutting wires will probably void your warranty!!! Test your printer for full and free movement then replace the arm cover and table. Make sure to re-calibrate your machine before printing again. STL and STEP files are in the downloads.
With this file you will be able to print UP Printer Table Wire Re-route with your 3D printer. Click on the button and save the file on your computer to work, edit or customize your design. You can also find more 3D designs for printers on UP Printer Table Wire Re-route.