(UPDATED!) 3 in 1 150W Discharger Voltage Tester Balancer For Lipo Battery
thingiverse
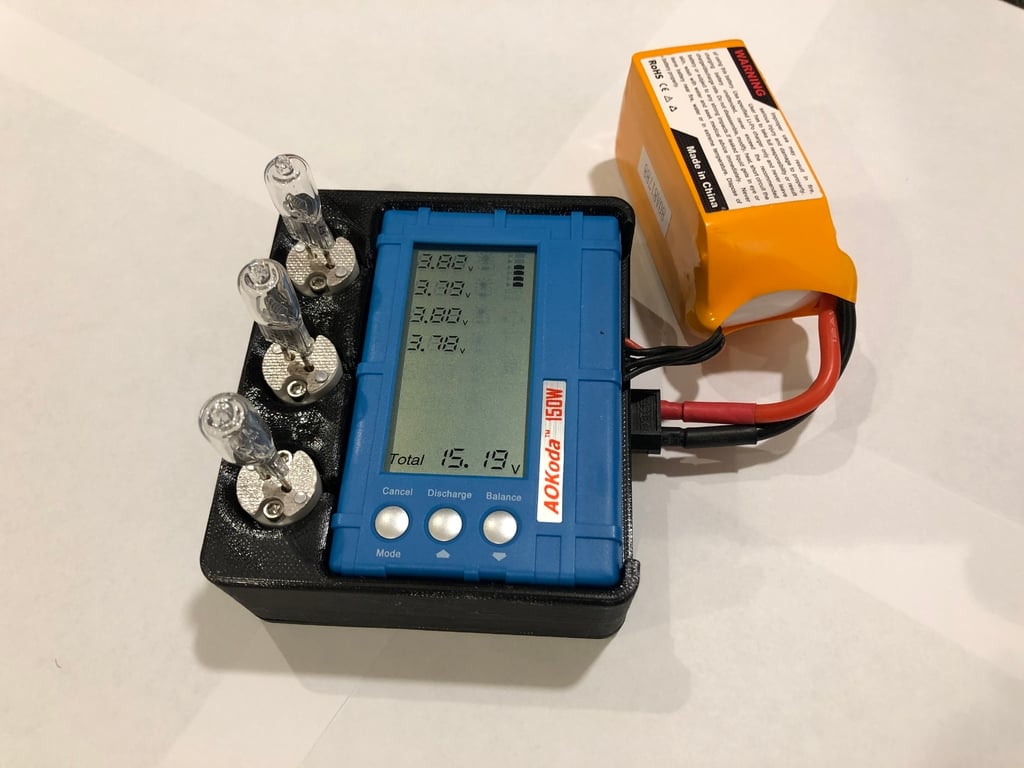
Updated version of my 150W lip discharger housing. Features 1. Snug fit housing for the discharge controller 2. Light bulb fixture holders 3. Light bulb storage compartment 4. XT60 panel mount for battery connection Components Qty 1 - Battery Discharger Body V2.0 Qty 1 – Battery Discharger Cover V2.0 Qty 1 – Battery Discharger Slide V2.0 Qty 1 - 3 In 1 2S-6S Discharger Voltage Tester Balancer for Li-Po Li-Fe Battery https://www.banggood.com/3-In-1-2S-6S-Discharger-Voltage-Tester-Balancer-for-Li-Po-Li-Fe-Battery-p-1050814.html?rmmds=search&cur_warehouse=CN Qty 1 - CellMeter 8 150W Battery Discharge Module Set https://www.banggood.com/AOKoda-CellMeter-8-150W-Discharge-Module-Set-for-AOKoda-Discharger-p-1196377.html?rmmds=search&cur_warehouse=CN Qty 1 – AMASS XT60E-M Mountable XT60 https://www.banggood.com/AMASS-XT60E-M-Mountable-XT60-Male-Plug-for-RC-Drone-FPV-Racing-Airplane-Battery-Cable-p-1238483.html?rmmds=search&cur_warehouse=CN Qty 1 – 150mm XT60 Female Plug To T Male Plug Adapter Connector https://www.banggood.com/150mm-XT60-Female-Plug-To-T-Male-Plug-Adapter-Connector-p-1137559.html?rmmds=search&cur_warehouse=CN Qty 18 - 4-40 Socket Head Cap Screws 0.5” long https://www.boltdepot.com/Product-Details.aspx?product=4835 Qty 6 - 4-40 hex nuts https://www.boltdepot.com/Product-Details.aspx?product=4115 Qty 2 – M2.5 Button Head Cap Screw 6mm long https://www.boltdepot.com/Product-Details.aspx?product=24855 Prices are based on what was available at the time of posting, other sources are available with a little searching. Printing Print in the orientation shown and use supports where needed. Ensure that the supports don’t interfere with the 3d printed threads in the main housing. I have tested with PLA and have successfully discharged 4S batteries without any overheating of the plastic parts (all 3 bulbs were on). The bulbs get VERY HOT, DO NOT LEAVE UNATTENDED. I have not tested higher voltages than 4S. Assembly 1. Using 6x 4-40 cap screws and 6x hex nuts assemble the bulb holders onto the main housing. Be careful not to over-tighten as the ceramic housings can crack. 2. Remove the housing from the 150 discharger module. 3. Connect the two pin pwm cable to the controller. 4. Carefully rout the light bulb wires in the slots and line up the two pin pwm cable from the controller with the slot in the housing. 5. Press the controller into the main housing, ensure that no wires are pinched. 6. Plug in the 2 pin pwm cable on the discharger module. 7. Either plug in the XT60 cable to the discharger module or cut and direct soldered to the xt60 pads. 8. Cut and solder the opposite end of the xt60 cable to the xt60 panel mount. 9. Install the xt60 panel mount using the 2x 2.5mm screws. 10. Tidy up the cabling so that the lid fits without pinching or compressing anything. 11. Install the lid using 12x 4-40 cap screws. 12. Place the light bulbs in the storage compartment and install cover. Notes: 1. I lined the storage compartment with foam to keep the bulbs from rattling. 2. The discharger module design has changed, it used to come with a different connector. In this case direct soldering is the only option. 3. My pictures show additional red and black wires, ignore these as they are not required. Design files are included for easy modifications
With this file you will be able to print (UPDATED!) 3 in 1 150W Discharger Voltage Tester Balancer For Lipo Battery with your 3D printer. Click on the button and save the file on your computer to work, edit or customize your design. You can also find more 3D designs for printers on (UPDATED!) 3 in 1 150W Discharger Voltage Tester Balancer For Lipo Battery .