Upgrade CNC 3018pro Y/Z Axis (RESIN PRINT)
thingiverse
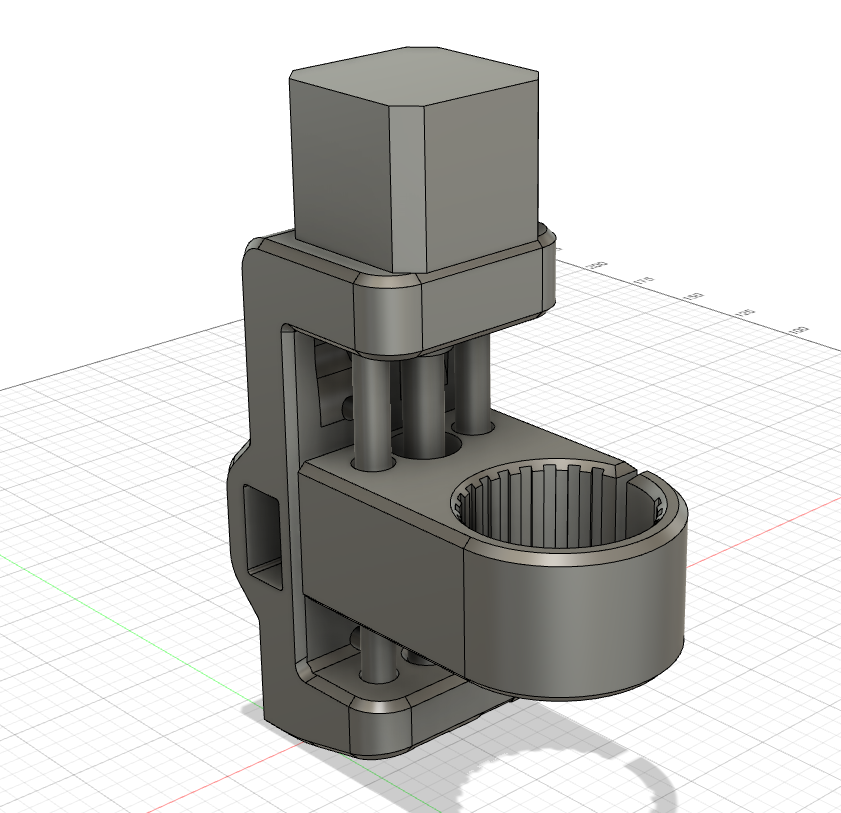
PLEASE NOTE: This is designed for resin printers. Allthough it could be possible to print on an FDM printer, resin printers are perfect for this. Let me know how it worked i case you tried it. Not all 3018pro´s are the same, i bought the RATTMMOTOR CNC 3018 PRO MAX ------------------------------------------------------------------------------------------------------------------------ This thing is a big upgrade to stiffen up your 3018pro CNC with linear rails and a 50mm z-axis movement. ADDITIONAL EQUIPMENT NEEDED - 2x MGN12 350mm + screws/bolts - 2x quality LM8UU bearings PRINTING There are only 2 parts to be printed seperately. They are designed to be printed without any support structures. I used black Weistek resin. These are pretty solid structures and you will need a lot of resin, so maybe take a look every few hours how much resin is left in the tank. It has to be printed slowly to prevent overheating due to the high energy of the curing resin and to give the resin enough time to flow under the parts after every layer. Because of the purpose of use, it doesnt make sense to save resin and print it hollow. It should be as stiff as it could be. My settings on the Elegoo Mars 2 Mono in CHITUBOX: Layer Height: 0.1mm Bottom Layer count: 5 Exposure time: 3s Bottom exposure time: 30s Light-off Delay: 5s Bottom Light-off Delay: 5s Bottom Lift Distance: 15mm Lifting Distance: 15mm Bottom Lift Speed: 25mm Lifting Speed: 25mm Retract Speed: 50mm ASSEMBLY Most parts are took over from the original and i had to break them out. To give the spindle bearings less wiggle, i slightly hammered on them:) They are glued into the new parts. Both MGN12 are screwed directly onto the aluminium profiles of the cnc, you dont need the wobbly thin bars anymore. If printed correctly, most parts should be plug and play. Start with putting together the z-axis wagon and screw the y-axis wagon onto the linear rails. They should be loose and tighten after that. Put the z- onto the y-axis wagon with the 8mm rails and attach stepper and spindle. Last thing should be the motor.
With this file you will be able to print Upgrade CNC 3018pro Y/Z Axis (RESIN PRINT) with your 3D printer. Click on the button and save the file on your computer to work, edit or customize your design. You can also find more 3D designs for printers on Upgrade CNC 3018pro Y/Z Axis (RESIN PRINT).