Upkie Wheeled Biped Robot
prusaprinters
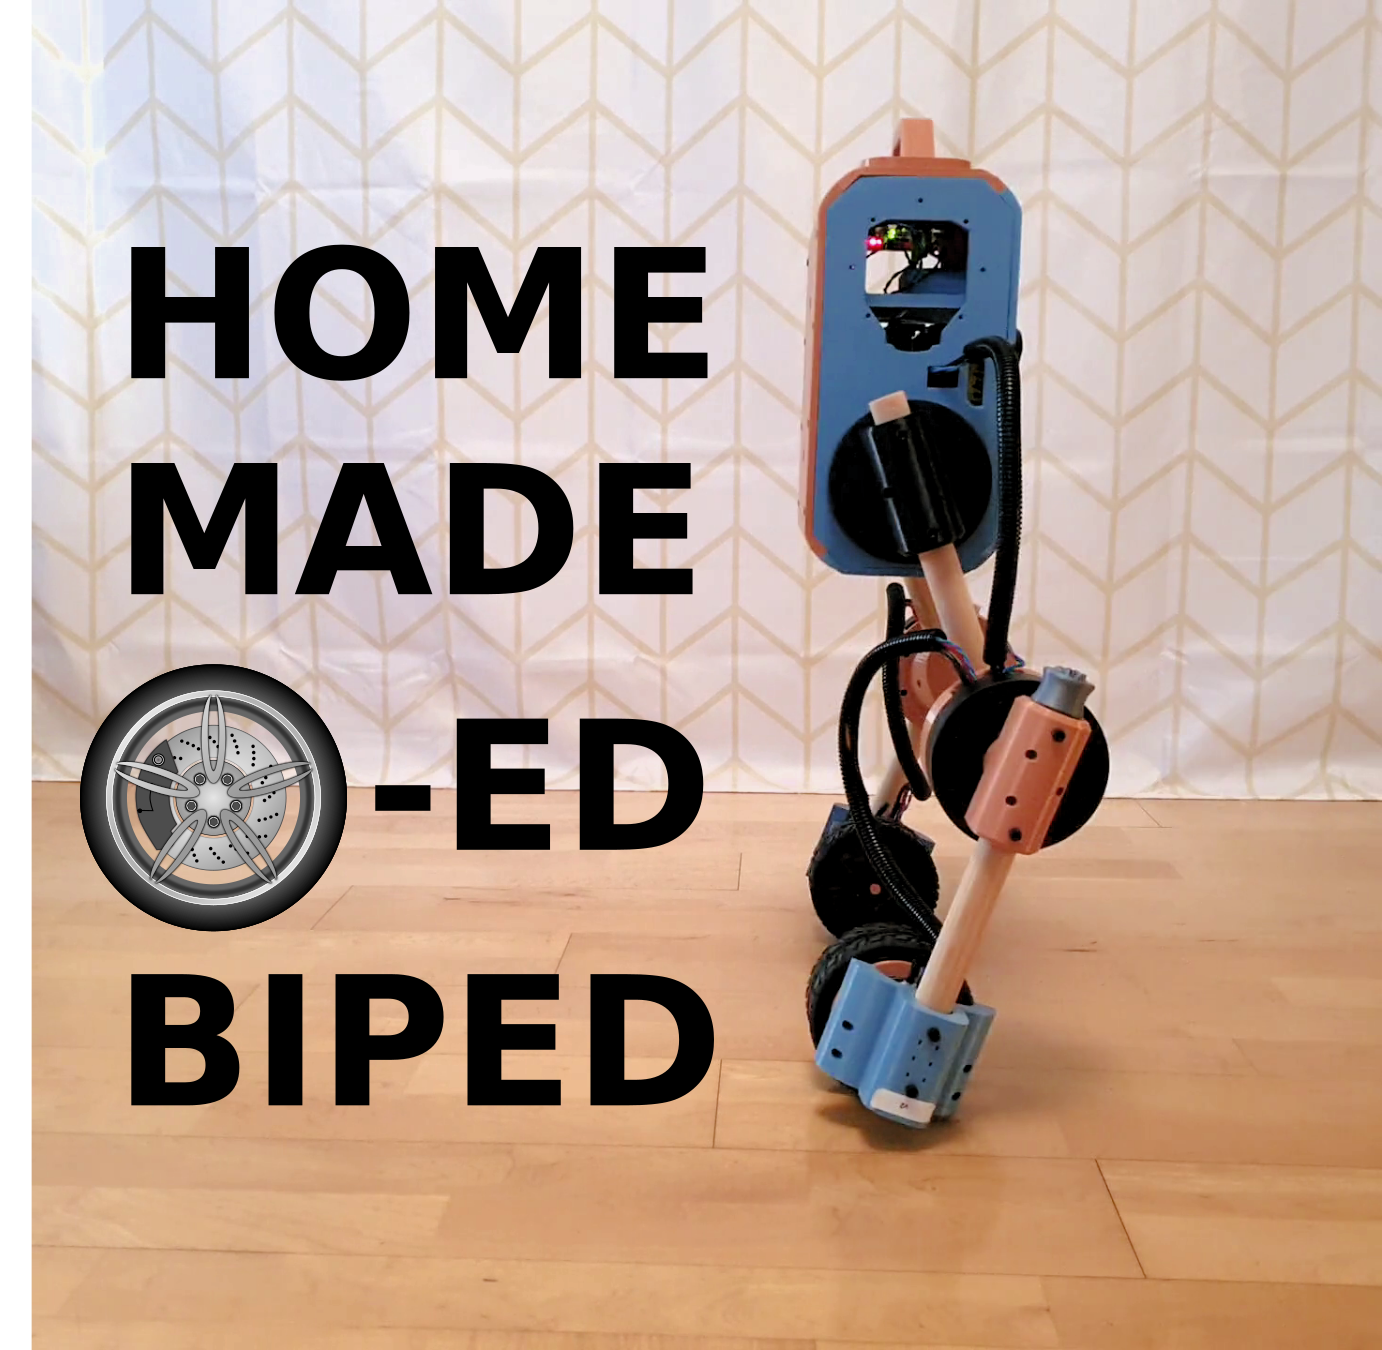
<p>A homemade wheeled biped robot that can balance, crouch and turn around. It is named Upkie, and proudly stands on broomsticks and 3D printed parts.</p><p>Here it is in action:</p><figure class="media"><oembed url="https://www.youtube.com/watch?v=NO_TkHGS0wQ"></oembed></figure><h3>Bill of materials</h3><h4>3D printed parts</h4><figure class="table"><table><thead><tr><th>Part</th><th>Source</th><th>Quantity</th></tr></thead><tbody><tr><td>Ankle</td><td><a href="https://www.prusaprinters.org/prints/127831-upkie-wheeled-biped-robot/files">Files</a></td><td>2</td></tr><tr><td>Knee</td><td><a href="https://www.prusaprinters.org/prints/127831-upkie-wheeled-biped-robot/files">Files</a></td><td>2</td></tr><tr><td>Handle</td><td><a href="https://www.prusaprinters.org/prints/127831-upkie-wheeled-biped-robot/files">Files</a></td><td>1</td></tr><tr><td>Head plate</td><td><a href="https://www.prusaprinters.org/prints/127831-upkie-wheeled-biped-robot/files">Files</a></td><td>1</td></tr><tr><td>mjbots qdd100 horn</td><td><a href="https://drive.google.com/file/d/1Uup_2laLZXq2O5Lu7b4f5lgfOKkbsESV/view?usp=sharing">mjbots</a></td><td>4</td></tr><tr><td>mjbots quad A1 chassis</td><td><a href="https://github.com/mjbots/quad/tree/main/hw/chassis/3dprint">mjbots</a></td><td>1</td></tr><tr><td>Wheel hub</td><td><a href="https://www.prusaprinters.org/prints/127831-upkie-wheeled-biped-robot/files">Files</a></td><td>2</td></tr></tbody></table></figure><p>The head plate is a remix of the pi3hat side plate from the quad A1 chassis. It adds a screw pattern for the handle, stronger support for heat-set inserts and text annotations for the pi3hat orientation.</p><h4>Other parts</h4><figure class="table"><table><thead><tr><th>Part</th><th>Source</th><th>Quantity</th></tr></thead><tbody><tr><td>CAN-FD cables (25 cm)</td><td>Custom</td><td>7</td></tr><tr><td>Corrugated pipe (1 m)</td><td>DIY store</td><td>1</td></tr><tr><td>M3x4x5 heat-set insert</td><td>DIY store</td><td>~50</td></tr><tr><td>M3x8 screw</td><td>DIY store</td><td>~50</td></tr><tr><td>moteus r4.8 developer kit (with mj5208 brushless motor)</td><td><a href="https://mjbots.com/products/moteus-r4-8-developer-kit">mjbots</a></td><td>2</td></tr><tr><td>qdd100 servo</td><td><a href="https://mjbots.com/products/qdd100-beta-2">mjbots</a></td><td>4</td></tr><tr><td>RYOBI 18V 5.0 Ah battery</td><td>DIY store</td><td>1</td></tr><tr><td>Tyre for 1/8 RC cars</td><td><a href="https://www.amazon.de/gp/product/B07TMPLWLJ">Amazon.de</a></td><td>2</td></tr><tr><td>Wheel hex coupler (17 mm)</td><td><a href="https://www.amazon.de/gp/product/B07ZQGC4WH">Amazon.de</a></td><td>2</td></tr><tr><td>Wooden sticks (length: 250 mm, diameter: 22 mm)</td><td>Broomsticks!</td><td>4</td></tr><tr><td>XT30 power cable</td><td><a href="https://www.youtube.com/watch?v=f6WtDFWuxuQ">Custom</a></td><td>7</td></tr><tr><td>XT90 power cable</td><td>Custom</td><td>1</td></tr></tbody></table></figure><h4>Tools</h4><p>The following tools come in handy:</p><figure class="table"><table><thead><tr><th>Tool</th><th>Source</th><th>Comments</th></tr></thead><tbody><tr><td>Raptor Gauge</td><td><a href="https://www.prusaprinters.org/prints/27244-raptor-gauge">PrusaPrinters</a></td><td>It's always good to have a raptor around. Also, helps position the wooden sticks inside the output horns.</td></tr><tr><td>Wheel Wrench Tool for 17 mm Hex Nuts</td><td><a href="https://www.prusaprinters.org/prints/59120-17mm-rc-hex-wrench">PrusaPrinters</a></td><td>To tighten the hex couplers between the wheel hub and the RC car tyre.</td></tr></tbody></table></figure><h3>Print instructions</h3><p>All parts are printed in PETG with a 0.2 mm layer height.</p><p>Infill varies from 15% to 30%, but most of these values are guesstimates that don't come from observing parts breaking after robot falls. The only exception to this is the wheel hub, where there is an explicit infill modifier on the hex coupler connector.</p><h3>Assembly</h3><p>Help wanted! Chime in in the comments if you have started your Make of the robot by printing some parts, and wonder how to move forward. We can use your question to write down here the steps that are not self-explanatory.</p><h3>Software</h3><p>Software that runs on Upkie is maintained in the <a href="https://github.com/tasts-robots">Tast's Robots</a> space on GitHub. It includes:</p><ul><li><a href="https://github.com/tasts-robots/upkie_description">upkie_description</a>: URDF model of the robot.</li><li><a href="https://github.com/tasts-robots/aiorate">aiorate</a>: control loop frequency regulation.</li><li><a href="https://github.com/tasts-robots/pink">pink</a>: whole-body inverse kinematics.</li></ul><p>Try the software out and head for GitHub if you have feedback.</p><h3>Last but not least</h3><p>Enjoy building the beast!</p><h4>License</h4><p>The license below applies to these build instructions and the <a href="https://www.prusaprinters.org/prints/127831-upkie-wheeled-biped-robot/files">files</a> of this PrusaPrinters project. Other components of the robot such as the actuators or software have their own licenses, see the details in each project. For instance, 3D printed parts from mjbots are under the Apache 2.0 license.</p>
With this file you will be able to print Upkie Wheeled Biped Robot with your 3D printer. Click on the button and save the file on your computer to work, edit or customize your design. You can also find more 3D designs for printers on Upkie Wheeled Biped Robot.