Utility Knife / Box Cutter V.1
prusaprinters
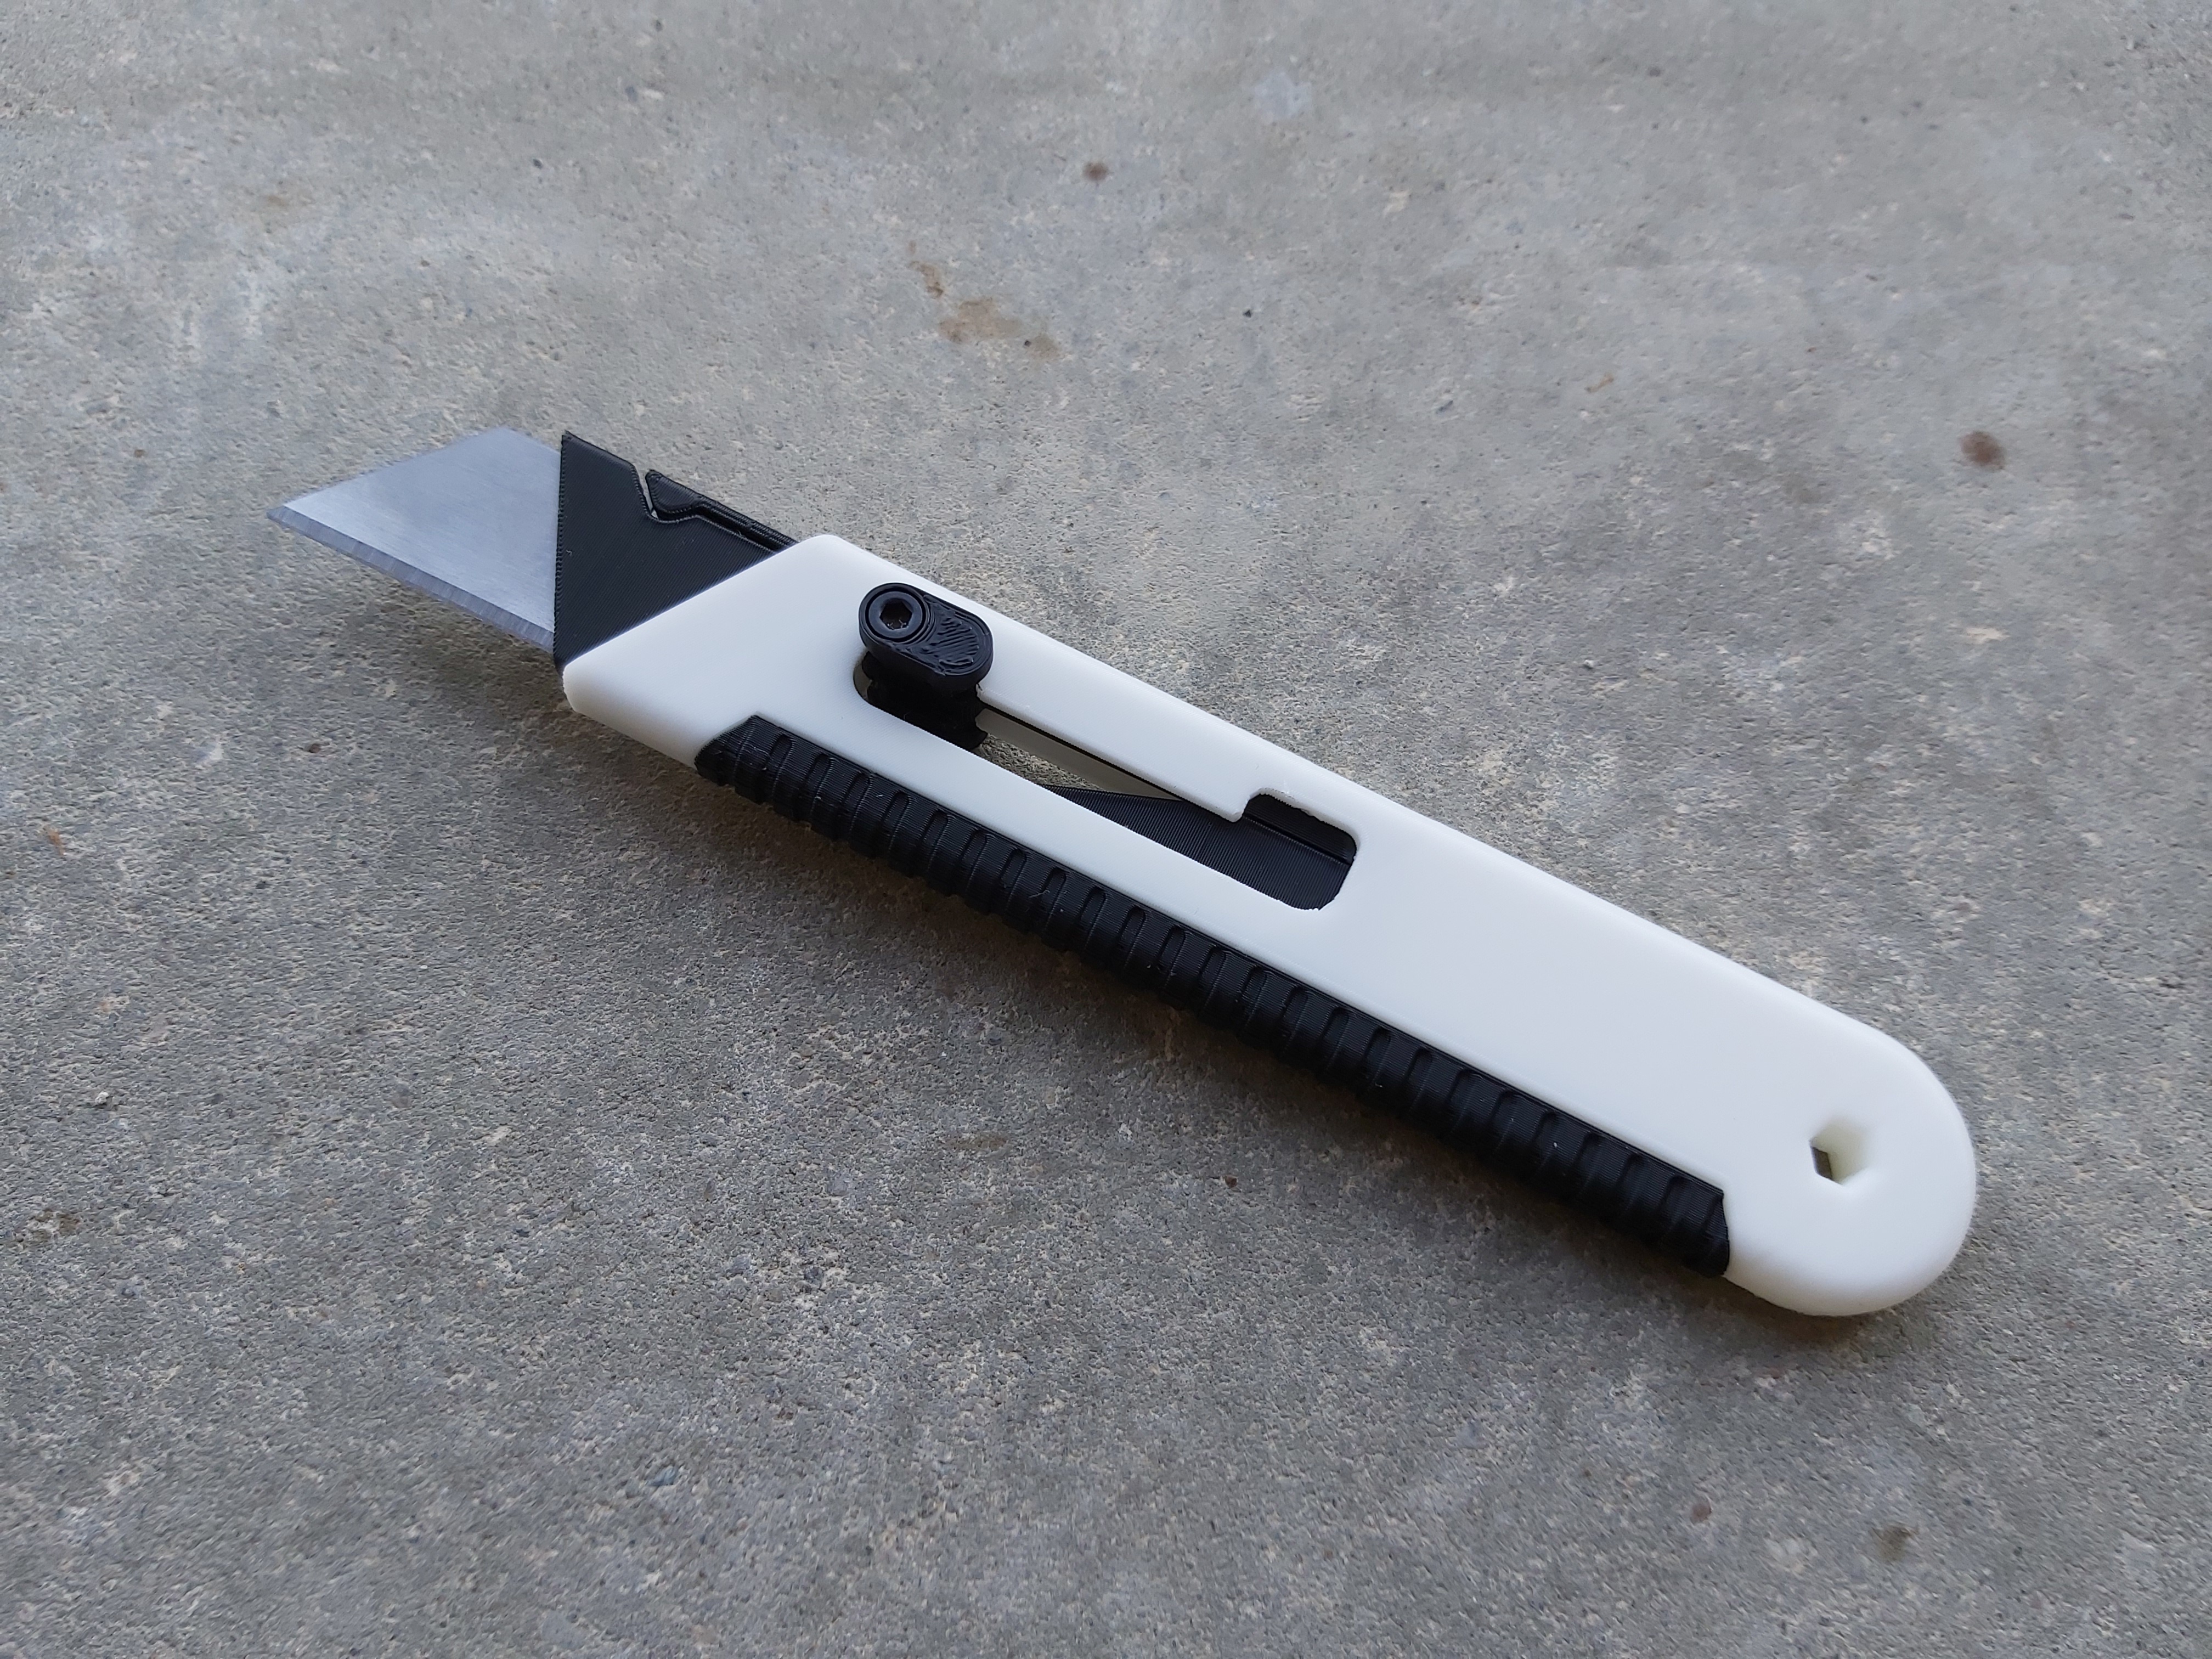
<p>This is an utility knife / box cutter i designed on tinkercad, there are still a few features that i want to add / change so i might upload a V.2 at some point.</p><p>here's a small video to maybe clear up a few things: <a href="https://youtube.com/shorts/E9ij38SsysQ">https://youtube.com/shorts/E9ij38SsysQ</a></p><p> </p><p><strong>[UPDATE] </strong>After some request i got on reddit i added 2 new main body (the white part), one with 3 positions and the other with 4, the normal one and the one present in every picture had 2 positions. I also added some custom supports to the old main body with 2 positions and i removed the weird artefacts that tinkercad left behind.</p><p> </p><p><strong>/!\ keep in mind when using it that this is 3d printed, it should only be used with light pressure as to not beak it and potentialy hurt yourself. i do not take any responsibility if you hurt yourself while using it /!\</strong></p><p> </p><p><strong>Print settings:</strong></p><p>I printed the each part with a 0.4mm nozzle on an ender 3 at 0.26mm layer height for every part exept for the grip that i printed at 0.2mm to see more details. I added some custom supports for the main body so the only supports you'll need are for the grip, you can optionaly rotate the grip part 60° to make it print standing on one of the ends (i would be careful printing like that as it may be unstable), otherwise every part should me pre-orientated in the right position for optimal printing.</p><p> </p><p><strong>Hardware required:</strong></p><ul><li>2x M3x12 screws</li><li>1x utility knife blade such as this one:</li></ul><figure class="image image-style-align-left image_resized" style="width:25.66%;"><img src="https://www.irwin.com/uploads/products/large/carbon-standard-utility-blades-929.jpg" alt="Traditional Carbon Utility Blades - Tools - IRWIN TOOLS"></figure><p> </p><p> </p><p> </p><p> </p><p> </p><p> </p><p><strong>Assembly:</strong></p><p>Here are all the parts you need to start the assembly:</p><figure class="image"><img src="https://media.printables.com/media/prints/229155/rich_content/d8278c55-6b96-4560-93d7-bcf2460602d0/all-parts.jpg#%7B%22uuid%22%3A%2237f20cc5-7b51-4063-9e74-bffbfbf88b4b%22%2C%22w%22%3A4032%2C%22h%22%3A1794%7D"></figure><p> </p><p>Once you've printed all the parts (remember to print two of the blade lockers), you first need to insert the spring inside of the inner body and secure it with the locking pin (no glue is required), you can also pre screw the M3x12 screws in the blade lockers and glue the grip to the main body:</p><figure class="image"><img src="https://media.printables.com/media/prints/229155/rich_content/531e2c62-e5b8-40cf-bfff-38eca2c0a390/assembly-1.jpg#%7B%22uuid%22%3A%22211178cc-2202-46f9-af11-931cfe0b7b62%22%2C%22w%22%3A4031%2C%22h%22%3A1195%7D"></figure><p> </p><p>After that, you just need to put the inner body assembly in the bain body assembly (you might have to sand the side of the spring a bit in order to make it fit the the main body better), screw the two blade lockers to the spring and insert the blade by lifting the tab at the front, the inner body should slide smoothly when the blade locker is pushed down:</p><figure class="image"><img src="https://media.printables.com/media/prints/229155/rich_content/07049988-249a-495d-b057-63d519ae4aa6/finish.jpg#%7B%22uuid%22%3A%22d4317932-d72b-4898-a4af-41e33cc330fa%22%2C%22w%22%3A4031%2C%22h%22%3A1387%7D"></figure><p> </p><p>Hopefully this is clear ennough lol, if you have any questions / request please leave a comment.</p><figure class="image"><img></figure>
With this file you will be able to print Utility Knife / Box Cutter V.1 with your 3D printer. Click on the button and save the file on your computer to work, edit or customize your design. You can also find more 3D designs for printers on Utility Knife / Box Cutter V.1.