Valve for Lego Pneumatic Engines
prusaprinters
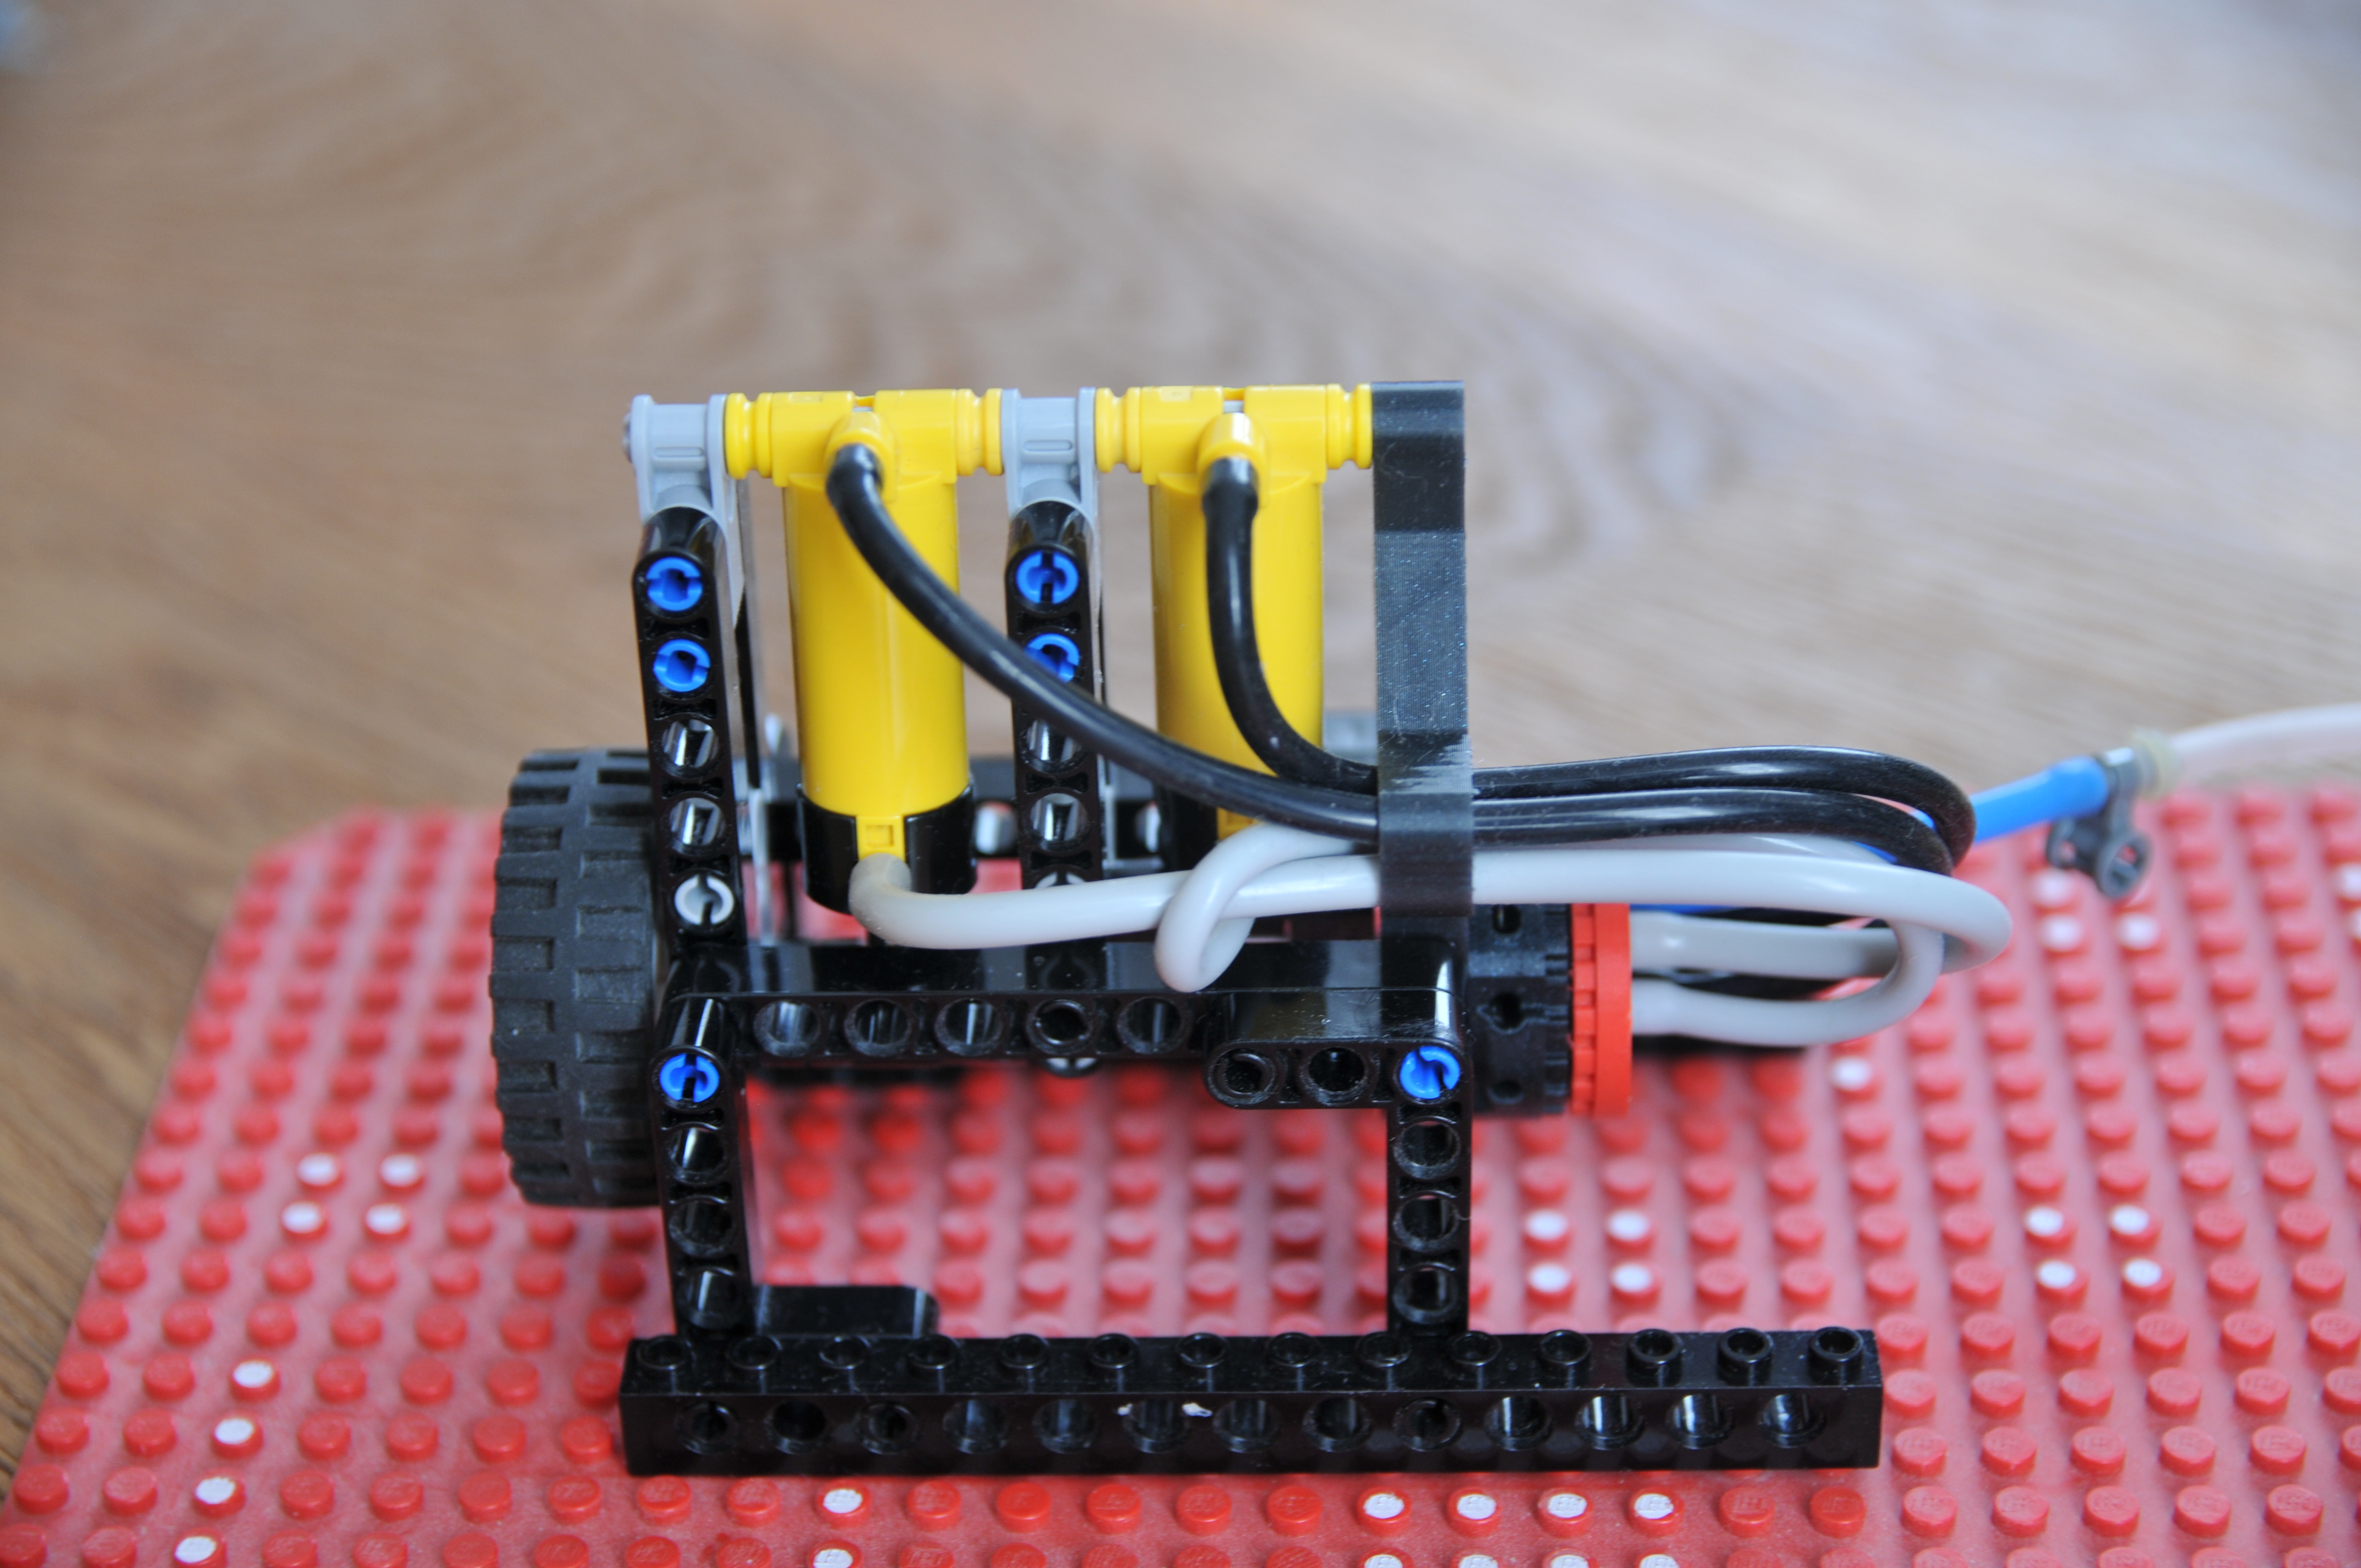
<p><strong>Instructions </strong></p><p><strong>printing</strong></p><ul><li>I'd recommend printing the Lower housing and the the cap with 0.9 flow, this seems to help with the threads</li><li>this model is designed to be printed with .2mm layers (also first layer)</li><li>I had some trouble printing this model with Prusa Slicer 2.5 and where I got some over extrusion. So for this model I would stick to v2.4 as it seems to be very sensitive to the extrusion amount.</li><li>I printed the entire model in PLA</li><li>printing the upper housing on smooth build surface and a well leveled bed helps a lot</li><li>make sure the orientation of the parts makes sense while slicing, there should not be any supports required. The pattern of the valve must face up so it probably needs to be flipped by 180°.</li></ul><p><strong>Assembling </strong></p><ul><li>sand down the top surface of the valve and the bottom surface of the upper housing to about 800 grit</li><li>optional: drill out the holes in the upper housing with a 1.5mm drill. But be careful the outer 4 holes are not supposed to go through</li></ul><figure class="image image-style-align-right image_resized" style="width:36.14%;"><img src="https://media.printables.com/media/prints/289258/rich_content/f8b3fead-919c-4179-9e27-dc2af0627b39/crosssection.png#%7B%22uuid%22%3A%22f442eb5c-e3df-4d37-8056-3b239b538c66%22%2C%22w%22%3A2372%2C%22h%22%3A1264%7D"></figure><p> </p><ul><li> how to prepare the Lego pistons can be found here: <a href="https://www.youtube.com/watch?v=pwAN-zAQxQI">https://www.youtube.com/watch?v=pwAN-zAQxQI</a></li><li>the motor itself must be assembled as seen in the pictures the axle for the valve is 4 studs long</li><li>the Valve can be built with or without an axial bearing, the dimensions of the bearing can be found in the CAD files. When not using a bearing print the “lower housing no bearing” file. But don't expect equal performance as with bearing.</li><li>for the Valve timing, position the crank so the first cylinder is at top dead center then insert the valve and upper housing as seen in the pictures now screw on the cap for tightening try the motor and see what works best. When you want to make sure the cap stays in place you can use the threadlock but it shouldn't be necessary.</li><li>the tubing must also be done just like in the pictures.</li><li>when still the valve should be air tight to about 1 bar and runs well to about 3 bar where the motor should rev over 1000rpm</li></ul><p> </p>
With this file you will be able to print Valve for Lego Pneumatic Engines with your 3D printer. Click on the button and save the file on your computer to work, edit or customize your design. You can also find more 3D designs for printers on Valve for Lego Pneumatic Engines.