VAN PI HAT Case
thingiverse
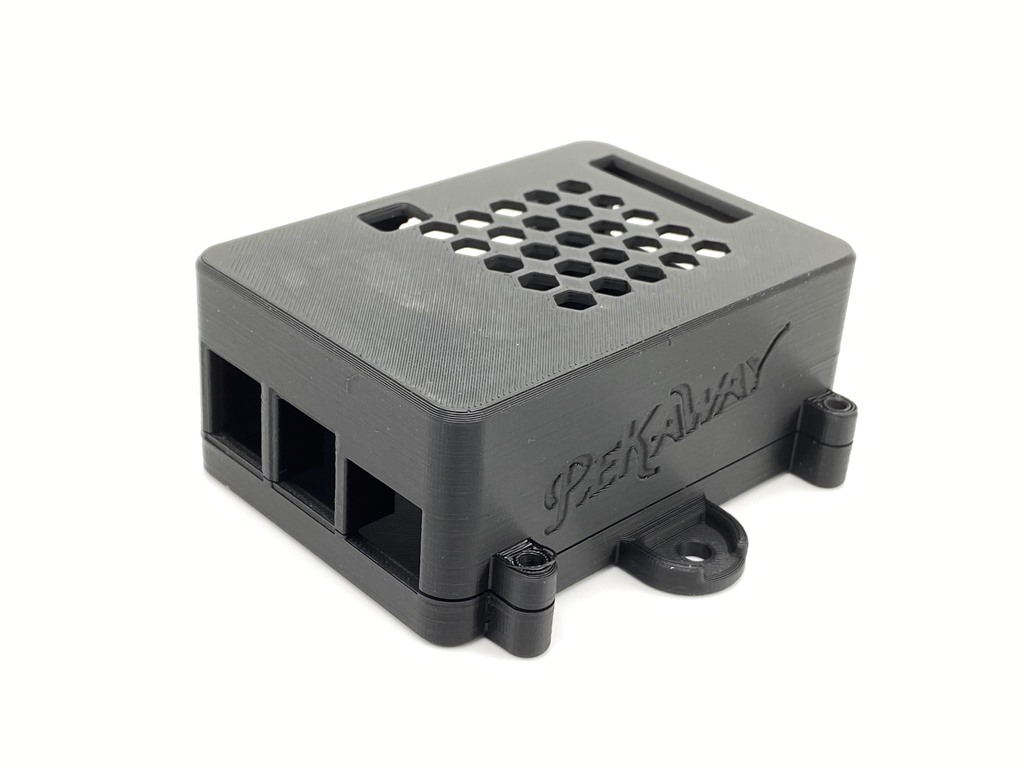
JOIN THE PROJECT https://campercontrol.pekaway.de | Bauteile: a. Gehäuse (Zero/4) oben b. Gehäuse (Zero/4) unten || zusätzlich benötigt: 4x Rändelmutter M3x5 4x Schraube M3x8 Die Rändelmuttern werden, mit einem heißen Lötkolben, in die 4 dafür vorgesehenen Löcher des Gehäuses (außen) gepresst. So kann das Ober- an das Unterteil angeschraubt (M3x8). ||| Zur Befestigung für das RPI zero und den Hat, benötigt man zusätzlich: 6x Rändelmutter M2x4 6x Schraube M2x4 2x Abstandshalter M2x11 Die Rändelmuttern werden, mit einem heißen Lötkolben, in die 6 dafür vorgesehenen Löcher des Gehäuses (innen) gepresst. So kann das RPI verschraubt und die Abstandshalter (M2x11) angebracht werden. Der Hat wird nun einfach aufgesteckt und mit den restlichen Schrauben (M2x4) an den Abstandshaltern fixiert. |||| Zur Befestigung für das RPI 4 und den Hat, benötigt man zusätzlich: 4x Rändelmutter M2x4 4x Schraube M2x4 2x Abstandshalter M2x11 Die Rändelmuttern werden, mit einem heißen Lötkolben, in die 4 dafür vorgesehenen Löcher des Gehäuses (innen) gepresst. So kann das RPI verschraubt und die Abstandshalter (M2x11) angebracht werden. Der Hat wird nun einfach aufgesteckt und mit den restlichen Schrauben (M2x4) an den Abstandshaltern fixiert. ---------------------------------------------------------------------------------- | components: a. casing (zero/4) top b. casing (zero/4) bottom || additionally required: 4x knurled nut M3x5 4x screw M3x8 The knurled nuts (M3x5) are pressed into the provided holes on the outside of the housing with a hot soldering iron. Thereby the top of the case can be screwed to the bottom (M3x8). ||| To attach the RPI zero and hat, you also need: 6x knurled nut M2x4 6x screw M2x4 2x spacers M2x11 The knurled nuts are pressed into the 6 provided holes in the housing (inside) with a hot soldering iron. So the RPI can be screwed on and the spacers (M2x11) can be attached. The hat can be attached to the RPI and screwed on the spacers with the remaining screws (M2x4). |||| To attach the RPI 4 and hat, you also need: 4x knurled nut M2x4 4x screw M2x4 2x spacers M2x11 The knurled nuts are pressed into the 4 provided holes in the housing (inside) with a hot soldering iron. So the RPI can be screwed on and the spacers (M2x11) can be attached. The hat can be attached to the RPI and screwed on the spacers with the remaining screws (M2x4). (we have also the oportunity to give you fitting files for RPI 3) ---------------------------------------------------------------------------------- How is it used? This case is designed for our Camper Control System that helps you control all your technical devices in your camper van directly with your smartphone, tablet or laptop. All you need is our Raspberry Pi Hat and a Raspberry Pi - the software for that is open source and can be downloaded on our website.
With this file you will be able to print VAN PI HAT Case with your 3D printer. Click on the button and save the file on your computer to work, edit or customize your design. You can also find more 3D designs for printers on VAN PI HAT Case.