Vaporizer - Homemade
thingiverse
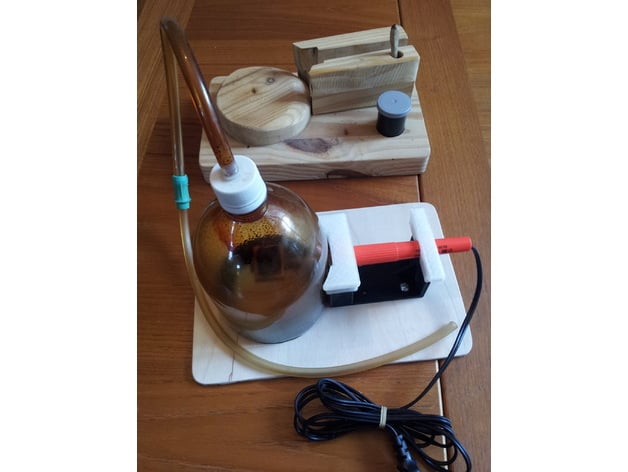
Vaporizer (for weed vaping) These 3D print parts are based on my original wood version (shown in a photo). Data points: Optimal Temperature Range of heatblock for Vaping is 355 to 375 (F). Depending on your soldering iron, time to Temp’s will vary ~ 8 min’s. After several min’s of vaping, the Temp will rise to above 375F, UnPlug it (or use a controller such as your favorite Arduino design). [FYI - I’m done vaping before it gets too hot so I don’t use a controller] When assembled, all plastic is far enough away from the heatblock and won’t cause softening/melting (PLA or ABS or bottle). The Parts: Plastic Bottle - Boss ring is sized for a 4 inch Western Family water bottle but you can use most any bottle that meets the geometry (and / or scale the Boss’s X and Y dim’s as needed). 4 inch dia bottle keeps sides away from heatblock. Make cutout as shown in photo. Bottle Cap - No 3d printers when I made the original so I used plastic from Ace Hardware (parts shown in photo). Sure, design/make your own… The Boss - Tapered and radius’d to enable slipping the bottle on with ease via tilting it from the back and slipping the bottle’s cutout over the taper/radius’s. The bottle will tend to curl inwards due to the cutout so, the taper/radius is facing the soldering iron mount). The Mount - Has an ‘Anti-rotation’ bump to limit the soldering iron from rotating. Press the Front cap into place - you can file/grind the nub if needed. Add a shim if needed… This will depend on the soldering iron. It will pull out from front entry so be sure it’s snug. Mount Caps - Sized to fit without slop; be sure to file and sand the Mount and guts of the Caps so they install and remove without too much difficulty. Plastic shrink, Extrude Flowrate/etc will affect this so, experiment until you’re satisfied. Install Rear Cap with the thicker wall facing the Front Cap (solder iron is tapered thus, so is the hole for it in rear cap). Soldering Iron - Weller SP23L 25 watts. The concept is generic so, create your own parts for your/different solder iron… And, screw the heatblock onto the iron to ensure consistant heat transfer. Heatblock - Original uses brass. New versions made for others use Alum 6061 (approx: 5/8” x 1.25” x 1.0”). No need for a recessed pocket like original brass one. Just drill the holes as shown in drawing. Better contact between Heatblock and Solder Iron means more responsive and uniform heating - better to under-size the hole and file it out as needed to make it snug. [FYI - Resin builds up in bottle and hose - after 2 feet of hose length, most of the resin is cleared out of the hose… If concerned about breathing the resin, see the JAMA report cited below. Good Vaping info here: Health Info: From JAMA, the Journal of Amer. Med Assoc.http://jamanetwork.com/journals/jama/fullarticle/1104848 Good Vape technical info (Temps, THC, CBD…) California NORMLhttp://www.maps.org/research-archive/mmj/Gieringer-vaporizer.pdf
With this file you will be able to print Vaporizer - Homemade with your 3D printer. Click on the button and save the file on your computer to work, edit or customize your design. You can also find more 3D designs for printers on Vaporizer - Homemade.