Vertical Dog Feeder (Large Food, Stepper, ESP8266 Controlled, w/laser)
thingiverse
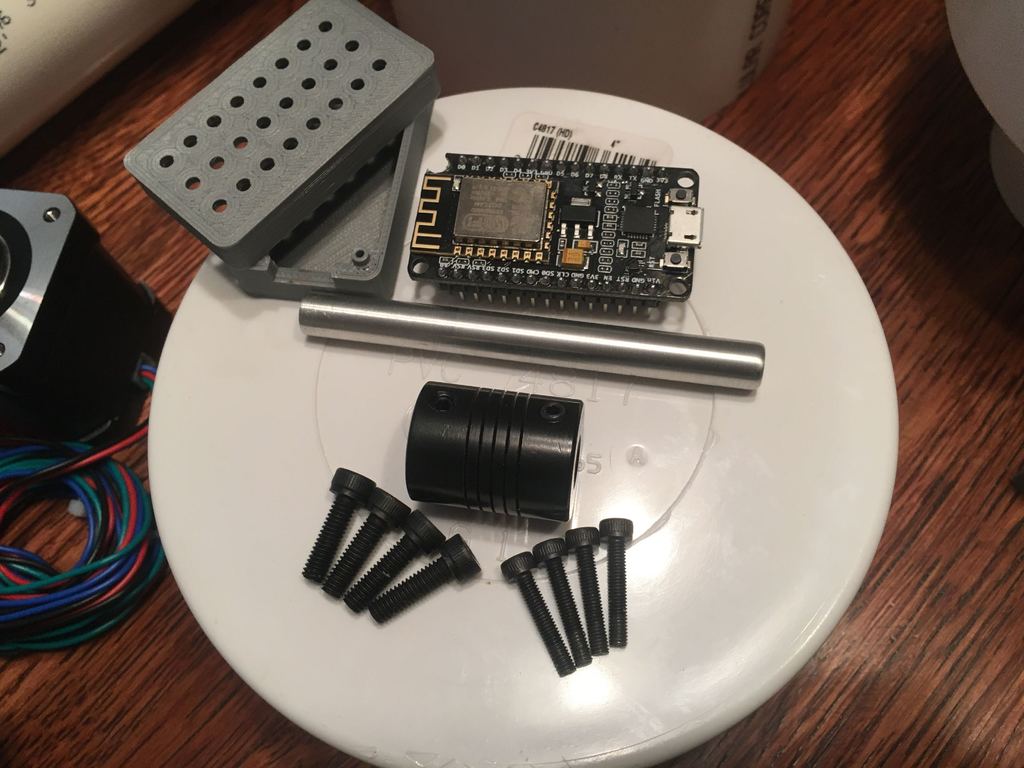
It seems like you have provided a text document detailing the assembly and programming of a 3D printing machine. The instructions cover various aspects, including: 1. **Assembly Instructions:** * Using the reducer jig to drill holes in the stepper motor mount. * Attaching the spring coupler to the stepper motor. * Inserting an 8mm rod into the feed screw and tightening it. * Assembling the cone on the rear motor cap. * Placing the PVC pipe (hopper) onto the assembly. 2. **Programming:** * Using Micropython for programming. * Basic stepper control in the code. * Voltage divider to obtain photo-resistor values via the ADC pin. * Serial plotter or OLED for plotting readouts from the ADC pin. 3. **Wiring Diagrams:** * Wiring diagram for the laser and photo-resistor. Overall, this document appears to be a comprehensive guide for assembling and programming a 3D printing machine.
With this file you will be able to print Vertical Dog Feeder (Large Food, Stepper, ESP8266 Controlled, w/laser) with your 3D printer. Click on the button and save the file on your computer to work, edit or customize your design. You can also find more 3D designs for printers on Vertical Dog Feeder (Large Food, Stepper, ESP8266 Controlled, w/laser).