Vertical Sliding Door Posts for the Ultimaker 2/2+ and Extended
thingiverse
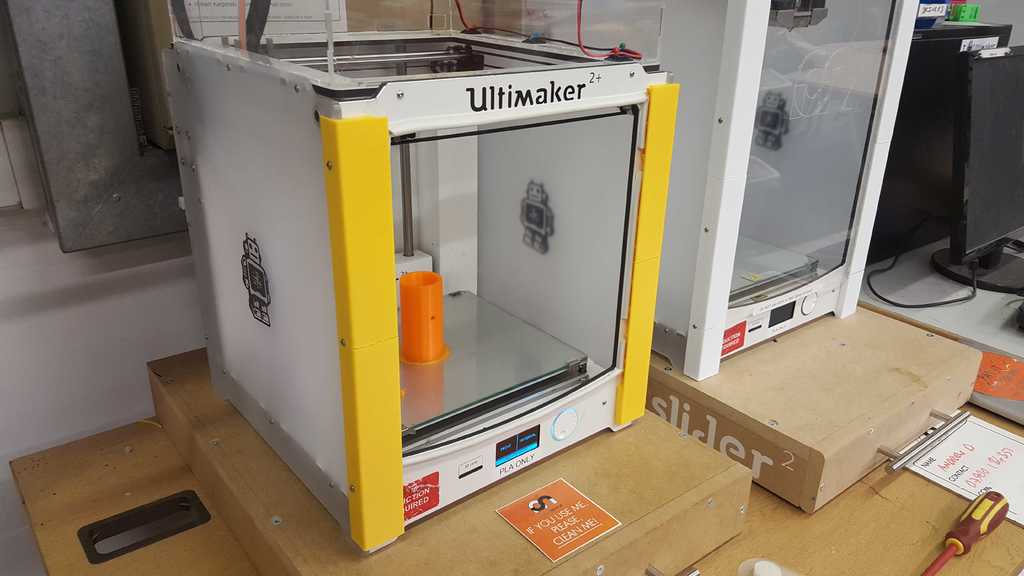
Door posts for a vertical sliding door for the Ultimaker 2/2+ and Extended printers. Fits on the left and right sides of the printer and accepts a 300mm wide 3mm acrylic sheet. (Cut the acrylic as high as you like). Many places in the UK sell 3mm acrylic in 300mm wide sections so you may get away without needing to cut it, otherwise you can laser it or regular cutting techniques. The gap is actually 4mm, acrylic isn't always perfectly 3mm and we know what 3D printers are like! 1/8" acrylic should fit (it's about 3mm). The OpenSCAD file can be adjusted fairly easily if you want to use a different thinckness. The file UM2E-DoorBlank.svg can be used for laser cutting if you have access, it has rounded corners which help the door slide :-) Be careful when the acrylic is fitted, clear acrylic looks just like an open door, particularly if you are use to just reaching into the ultimaker to get your part. No latching mechanism is provided at this time. I use a bull dog clip to keep the door up when I need it. The model includes ridges between the acrylic and Ultimaker that could be used for a latching mechanism. If you design one please share :-) White filament blends in well with the Ultimaker. Photos of Cambridge Makespace Ultimakers and my own Extended 2+ ## Files Prints in 4 parts. Lower and upper left and right segments. File prefixes: * UM2- for the Ultimaker 2/2+ * UM2E- for Ultimaker 2 Extended+ I don't have access to an Ultimaker 3 so I've not been able to try. Please comment if you get them to fit. * ....-All-3mm.stl files contains all 4 pieces. * ....-Lower-Both and -Upper-Both contain left and right for lower and upper * The the Lower-Left, Lower-Right etc. contain individual files. So if one doesn't print properly, or breaks then you can select the appropriate part. OpenSCAD file is also provided to allow further tweeking. These files have a 2mm offset from the bottom of the printer. Use the OpenSCAD file if you want less or more. End stops inside the bottom pieces prevent the door sliding all the way down so the SD card and controls are still accessible with the door closed. The ones in the photo have lower end stops. This can be adjusted in the OpenSCAD file if you wish. ## Fitting * Carefully remove the two screws for the section you are installing on the printer (The Ultimaker supplied allan key works). * Be sure to pull the bolt as you remove it to bring the nut as close to the edge as you can, the sliders are JUST thin enough to get the bolt into the nut but not if it's fallen back in the hole. * Insert bolts, leave it a little loose until the second segment is attached on the side. * Don't over-tighten. * Once all four pieces are fitted slide in the acrylic sheet (from above). * Enjoy.... ## Printer settings * Large layer heights help * Brim defiantly helps as these are tall and thin and fall over easily. * Otherwise regular print settings in Cura should work. ## Things To Note. * Don't just drop the acrylic, lower gently as when it hits the end stop it might break it off. * End stop keeps the door from going down past the SD card. I found that hitting the acrylic with my hand when forgetting it was there can cause the SD card to eject and stop a print! * Optionally fit a strip of draft excluder at the top of the opening. Latest version will be available on Github: https://github.com/Tinamous/UltimakerDoor Timelapse: https://www.youtube.com/watch?v=BP5jdTchPsw
With this file you will be able to print Vertical Sliding Door Posts for the Ultimaker 2/2+ and Extended with your 3D printer. Click on the button and save the file on your computer to work, edit or customize your design. You can also find more 3D designs for printers on Vertical Sliding Door Posts for the Ultimaker 2/2+ and Extended.