Vesa 100 Quick Release
prusaprinters
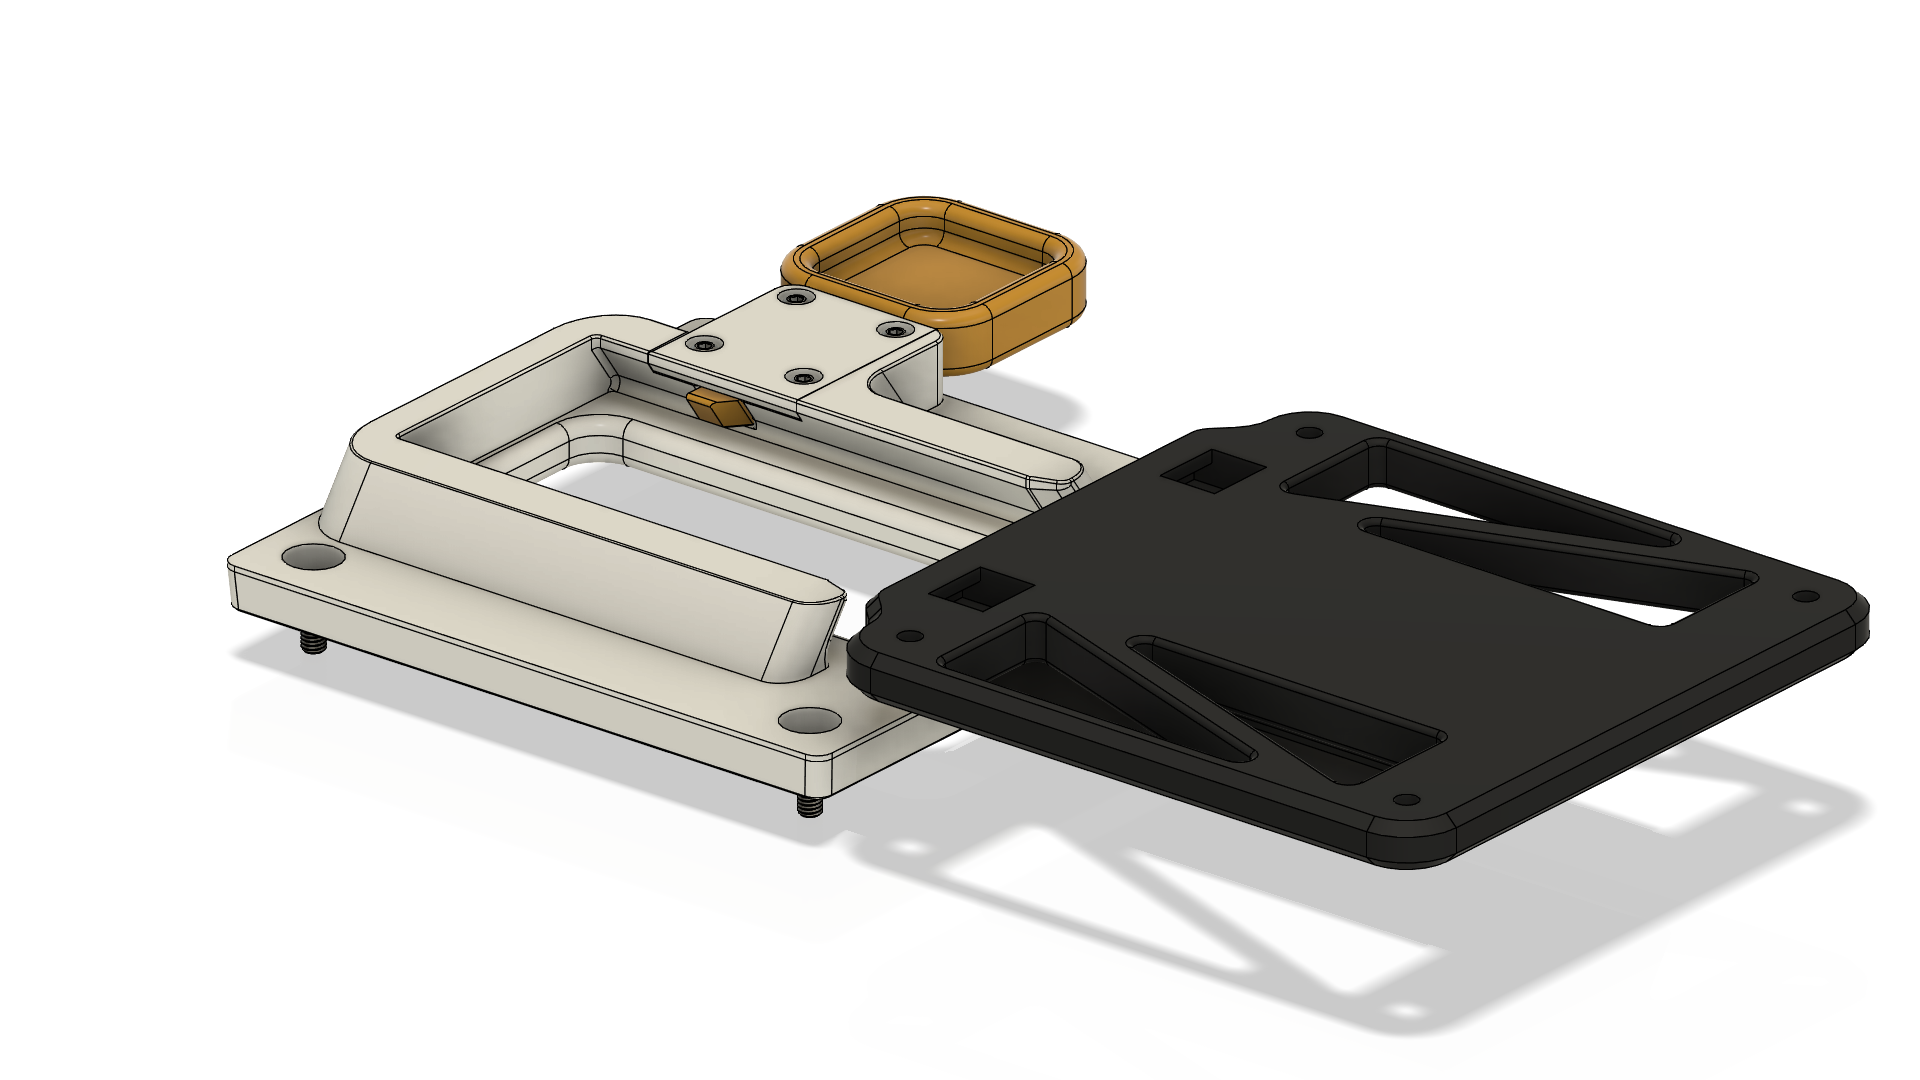
<h3><strong>1. Introduction</strong></h3><p>I needed a sturdy and reliable design to remove the Monitor stand from a 24"-ish Monitor, intended for use in a mobile stream setup (in order to fit all of the gear, including the monitor into a box, the stand has to be removed).</p><p>The design is based on a large dovetail for strength, with an additional latch to keep the backplate (in my case attached to the original stand) attached to the monitor when lifting the monitor up, without sliding off the dovetail. Inside the latch is a spring detent to keep it locked, aswell as providing a satisfying latching sound :)</p><figure class="image image-style-align-center image_resized" style="width:50%;"><img src="https://media.prusaprinters.org/media/prints/68643/rich_content/0f690371-aa52-4fed-80ac-10799a590dcd/vesa-100-quick-release-v5.png#%7B%22uuid%22%3A%2254a5f4ed-aaf7-4e07-825a-1471b367e980%22%2C%22w%22%3A1280%2C%22h%22%3A1024%7D"></figure><p>Here is a video of the quick release functioning, and some nice clicks and clacks :D</p><figure class="media"><oembed url="https://youtu.be/E3ToVC3TJhw"></oembed></figure><h3><strong>2. Printing and Assembly</strong></h3><p>I printed the large parts in Redline Filament PETG on a Prusa i3 Mk3s with ~ 20% Infill and 3 walls. The smaller Parts (latch, cover, and the 5mm ball replacement) in 100% infill. </p><p>Everything seems quite sturdy and could probably be printed with less material. I just wanted to be on the safe side, as this quick release is supposed to be used weekly and by loads of people in a “semi-professional” setting for quite some time.</p><h5>Required hardware</h5><ul><li>4x M3x10 (for the cover)</li><li>1 x pen spring (≤ 5mm dia.)</li><li>1 x 5mm Ball (or printed ball replacement)</li><li>4x M4 Nuts and M4 screws to mount your backplate and monitor</li></ul><h5>Latch assembly</h5><p>The ball detent is designed to use a 5mm ball, well at least it was primarily but after looking for 5mm bb's without much success i designed a replacement for all, without 5mm bb's in stock. </p><ol><li>Place the "latch" and the 5mm ball in their intended channels as seen on the picture. </li><li>Then try your best to persuade the spring into the channel behind the 5mm ball without it taking off at astronomic speeds.</li><li>Close everything off with the cover to secure the spring in place, then tighten it down with 4x M3x10 screws. </li></ol><p>!!! Don't screw down the cover too tight, as in my case (using the printed 5mm ball replacement) it can cause to jam up the ball detent. !!!</p><p>Now the latch should detent and snap satisfyingly, and you can mount the assembly to your monitor, and the backplate to your Vesa mount. </p><p> </p><h3>PS</h3><ul><li>The quick release is natively VESA 100 (100x100mm hole pattern )compatible on both sides. The backplate has an additional VESA 75 (75x75mm) hole pattern.</li><li>I use this quick release on a Samsung F24T450FQR 24" monitor in combination with its original stand and am very happy with the way this design turned out :D </li></ul><p>If you have some trouble etc. try reaching out to me, i would be glad to help out.</p>
With this file you will be able to print Vesa 100 Quick Release with your 3D printer. Click on the button and save the file on your computer to work, edit or customize your design. You can also find more 3D designs for printers on Vesa 100 Quick Release.