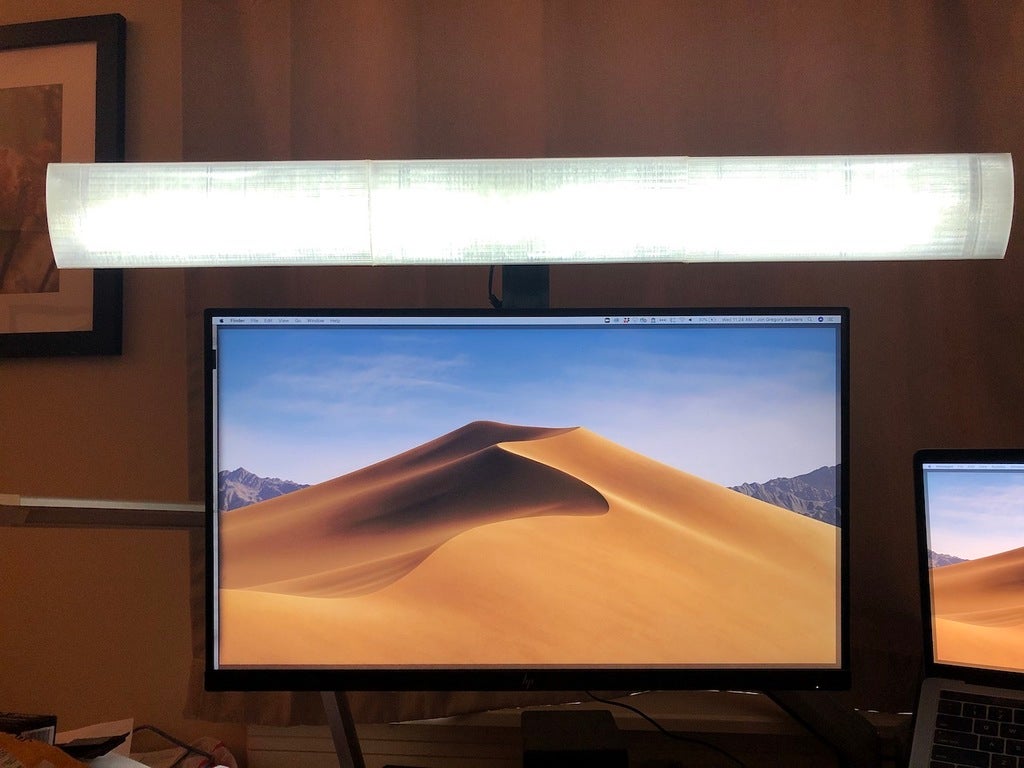
VESA mount LED light bar
prusaprinters
<p>I get terrible seasonal affective disorder (SAD) every fall. This year, I vowed, I would get a sun lamp! But, hey, why not<em>make</em> a sun lamp???</p> <p>Because I need every inch of desk space to nurture my piles of useless junk, I decided I wanted something I could attach to my monitor. This, I reasoned, would put those delicious photons right onto my brain windows.</p> <p>A couple hours of tinkering in CAD later, this is the result: a 3-foot light bar that hovers above my monitor. It turns out the big wide diffuse light also does a good job making me look less horrific in my all-too-frequent Zoom meetings! I chose some LEDs that allow me to adjust the color temperature, too, for evening use. (Warmer light <a href="https://www.ncbi.nlm.nih.gov/pmc/articles/PMC5292307/">may also be effective</a> for treating SAD!)</p> <p><strong>Update:</strong> My partner decided she wanted one too, so I've made an updated diffusor model as well as an updated mount. The 'tape mount' can be mounted to the back of a non-VESA monitor with double-sided tape or 3M command adhesive strips, or used as a foot directly on a desk. The new diffuser design now interlocks, and you need to print one center version and two side versions.</p> <p>Here's my total bill of materials for this build:</p> <p>Clear PLA for diffuser (450g; ~$13; <a href="https://atomicfilament.com/collections/opaque-pla-filaments-1/products/natural-pla-filament">Atomic Natural PLA</a> looks<em>way better</em> than other clear PLA I've tried. PLA is superior to PETG for this as it's less transparent and more diffusive.)</p> <p>Black PLA for bracket (130g; <a href="https://www.printedsolid.com/products/jessie-pla-1-75mm-x-1kg-black">PrintedSolid Jessie Black</a>)</p> <p>36"x1" aluminum <a href="https://www.heatsinkusa.com/1-000-wide-extruded-aluminum-heatsink/">extruded heat sink</a> (~$10)</p> <p>Adjustable white LED strip ($24)</p> <p>12 x 8mm M3 button-head cap screws<br/> 4 x 20mm M3 button-head cap screws<br/> 2 x 50mm M3 socket-head screws<br/> 4 x M3 hex nuts<br/> 2 x M3 nylock nuts</p> <h3>Print instructions</h3><h3>Category: Office Summary</h3> <p>I get terrible seasonal affective disorder (SAD) every fall. This year, I vowed, I would get a sun lamp! But, hey, why not<em>make</em> a sun lamp???</p> <p>Because I need every inch of desk space to nurture my piles of useless junk, I decided I wanted something I could attach to my monitor. This, I reasoned, would put those delicious photons right onto my brain windows.</p> <p>A couple hours of tinkering in CAD later, this is the result: a 3-foot light bar that hovers above my monitor. It turns out the big wide diffuse light also does a good job making me look less horrific in my all-too-frequent Zoom meetings! I chose some LEDs that allow me to adjust the color temperature, too, for evening use. (Warmer light <a href="https://www.ncbi.nlm.nih.gov/pmc/articles/PMC5292307/">may also be effective</a> for treating SAD!)</p> <p><strong>Update:</strong> My partner decided she wanted one too, so I've made an updated diffusor model as well as an updated mount. The 'tape mount' can be mounted to the back of a non-VESA monitor with double-sided tape or 3M command adhesive strips, or used as a foot directly on a desk. The new diffuser design now interlocks, and you need to print one center version and two side versions.</p> <p>Here's my total bill of materials for this build:</p> <p>Clear PLA for diffuser (450g; ~$13; <a href="https://atomicfilament.com/collections/opaque-pla-filaments-1/products/natural-pla-filament">Atomic Natural PLA</a> looks<em>way better</em> than other clear PLA I've tried. PLA is superior to PETG for this as it's less transparent and more diffusive.)</p> <p>Black PLA for bracket (130g; <a href="https://www.printedsolid.com/products/jessie-pla-1-75mm-x-1kg-black">PrintedSolid Jessie Black</a>)</p> <p>36"x1" aluminum <a href="https://www.heatsinkusa.com/1-000-wide-extruded-aluminum-heatsink/">extruded heat sink</a> (~$10)</p> <p>Adjustable white LED strip ($24)</p> <p>12 x 8mm M3 button-head cap screws<br/> 4 x 20mm M3 button-head cap screws<br/> 2 x 50mm M3 socket-head screws<br/> 4 x M3 hex nuts<br/> 2 x M3 nylock nuts</p> <h3> Print Settings</h3> <p><strong>Printer:</strong></p> <p>Artillery3D Sidewinder X1</p> <p><p class="detail-setting rafts"><strong>Rafts: </strong> <div><p>No</p></div><strong>Supports:</strong></div></p> <p>Yes</p> <p><p class="detail-setting resolution"><strong>Resolution: </strong> <div><p>0.3 mm</p></div><strong>Infill:</strong></div></p> <p>15%</p> <p><strong>Filament:</strong> Various PLA Various <br/> <p class="detail-setting notes"><strong>Notes: </strong> </p><div><p>Diffusors: printed one perimeter, 5% gyroid infill.</p> Bracket: printed 4 perimeters, 15% gyroid infill. The only part that needs support is the bracket arm, which should be printed with the long narrow edge on the bed, 'teeth' of the joint facing up.</div></p> <h3> Post-Printing</h3> <p>I lightly sanded the diffusors with 120-grit sandpaper to make the light even more diffuse, then drilled and tapped the sides of the aluminum heatsink to affix them. I needed to solder new wires onto the LED strips to fit it through the cable guide in the bracket, as well as solder the two rows of leds to each other. I also put some aluminum tape on the insides to serve as reflectors.</p> <p>If I were to print this again, I would tweak the diffusor design to interlock slightly where they meet.</p></p></p>
With this file you will be able to print VESA mount LED light bar with your 3D printer. Click on the button and save the file on your computer to work, edit or customize your design. You can also find more 3D designs for printers on VESA mount LED light bar.
