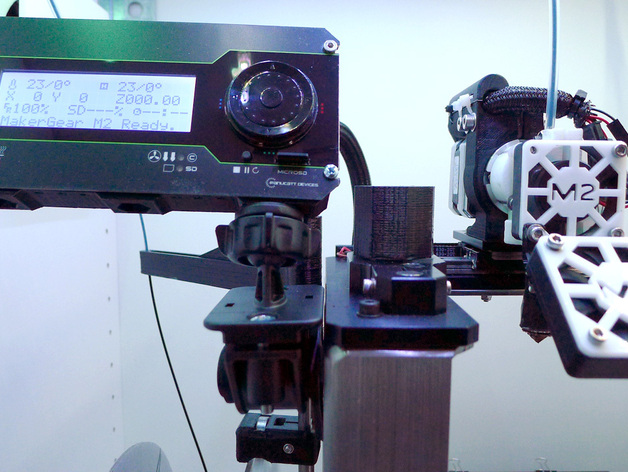
Viki LCD Tripod mount (US) and MakerGear M2 Side Bracket
thingiverse
This Viki LCD housing has three tripod mount positions, left,middle and right. You'll need stainless steel hex nuts 1/4"-20 Threads. LCD housing can be mounted on any US standard tripod head. I'm using a motorcycle handlebar tripod mount with a custom made side bracket for MakerGear M2. You'll have to make your own handlebar for your printer. MakerGear M2 setup: Please see the picture about wire position. Use Mounting Base to tie down the wires. Side Bracket design didn't quite work the way I thought it would, so use a foam mounting tape to further secure the handlebar area. Newer M2 doesn't have the middle metal rod, but don't worry about it because foam tape will hold the handlebar in place securely. Instructions I printed the LCD housing and Wire Plug with a 0.35 nozzle and hexagon pattern spacing of 2.5 mm. Side Bracket is for MakerGear M2 only. I used rectilinear support pattern of 2.5 mm. Assembly: Insert hex nuts into the wells. Insert Wire Plug to the LCD Housing from the inside (DO NOT GLUE them together). Put LCD's two sets of wires through the Wire Plug and then connect the wires to LCD connectors. Wrap the two sets of wires with electrical tape, so it has a snug-fit against the Wire Plug's opening. This prevents LCD connectors being pulled loose by its own wires. Secure LCD to the LCD Housing with screws on four corners.
With this file you will be able to print Viki LCD Tripod mount (US) and MakerGear M2 Side Bracket with your 3D printer. Click on the button and save the file on your computer to work, edit or customize your design. You can also find more 3D designs for printers on Viki LCD Tripod mount (US) and MakerGear M2 Side Bracket.
