visual bed level & nozzle height printer test
thingiverse
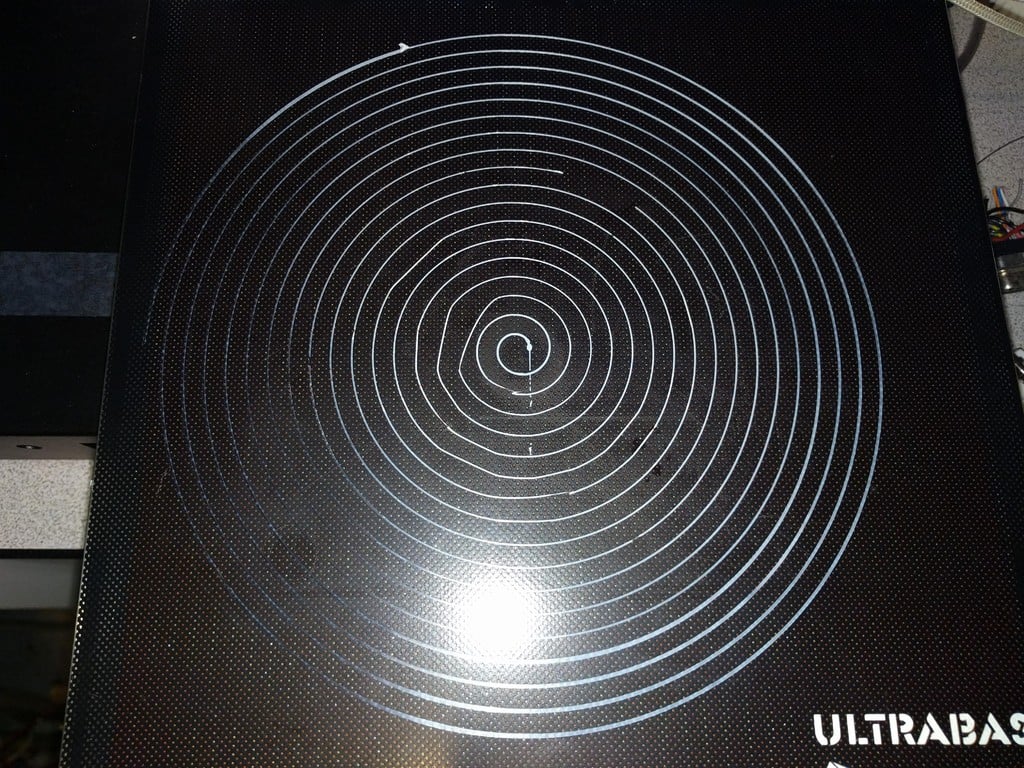
I designed a high temperature bed for printing exotic filaments on my cetus and I wanted to know what to expect from the new bed. Use this test only after you have a level bed. All beds have bumps and ditches and this test lets you see the problem locations. Knowing the locations allows you to re position your print on the bed and possibly get a successful print. The spiral has a 0.6mm square cross section with 5mm pitch. Slice it but stop the print after the first layer. The transparency of a single layer print and the changing paving width shows where the bumps and ditches are. In a deep ditch of course the PLA does not even stick to the bed. All spirals are printed counter clockwise center out and should have a constant width. If the PLA is blocked by a extremely close bed, the nozzle pressure builds up and squirts out PLA when the bed to nozzle clearance increases (2nd pic outer spirals 7 o'clock). My 4mm thick glass bed is level to +-0.002mm at the three mounting support points: front middle and back left and back right. I have measured and know the left front to left middle of the bed is high by 0.04mm. This makes it hard to print using a 0.05mm layer thickness in this location because the change in bed height is almost a full 0.05mm layer thickness. The first two pics are with a 0.05 layer The last pic is a 0.1mm layer with a slightly increased nozzle to bed clearance, ready for printing parts. Designed in fusion 360 and printed on a heavily modified cetus mk2 extended. Using a truly mediocre hobby king filament. Have fun -Peter
With this file you will be able to print visual bed level & nozzle height printer test with your 3D printer. Click on the button and save the file on your computer to work, edit or customize your design. You can also find more 3D designs for printers on visual bed level & nozzle height printer test .