Voice Controlled Drink Dispenser
prusaprinters
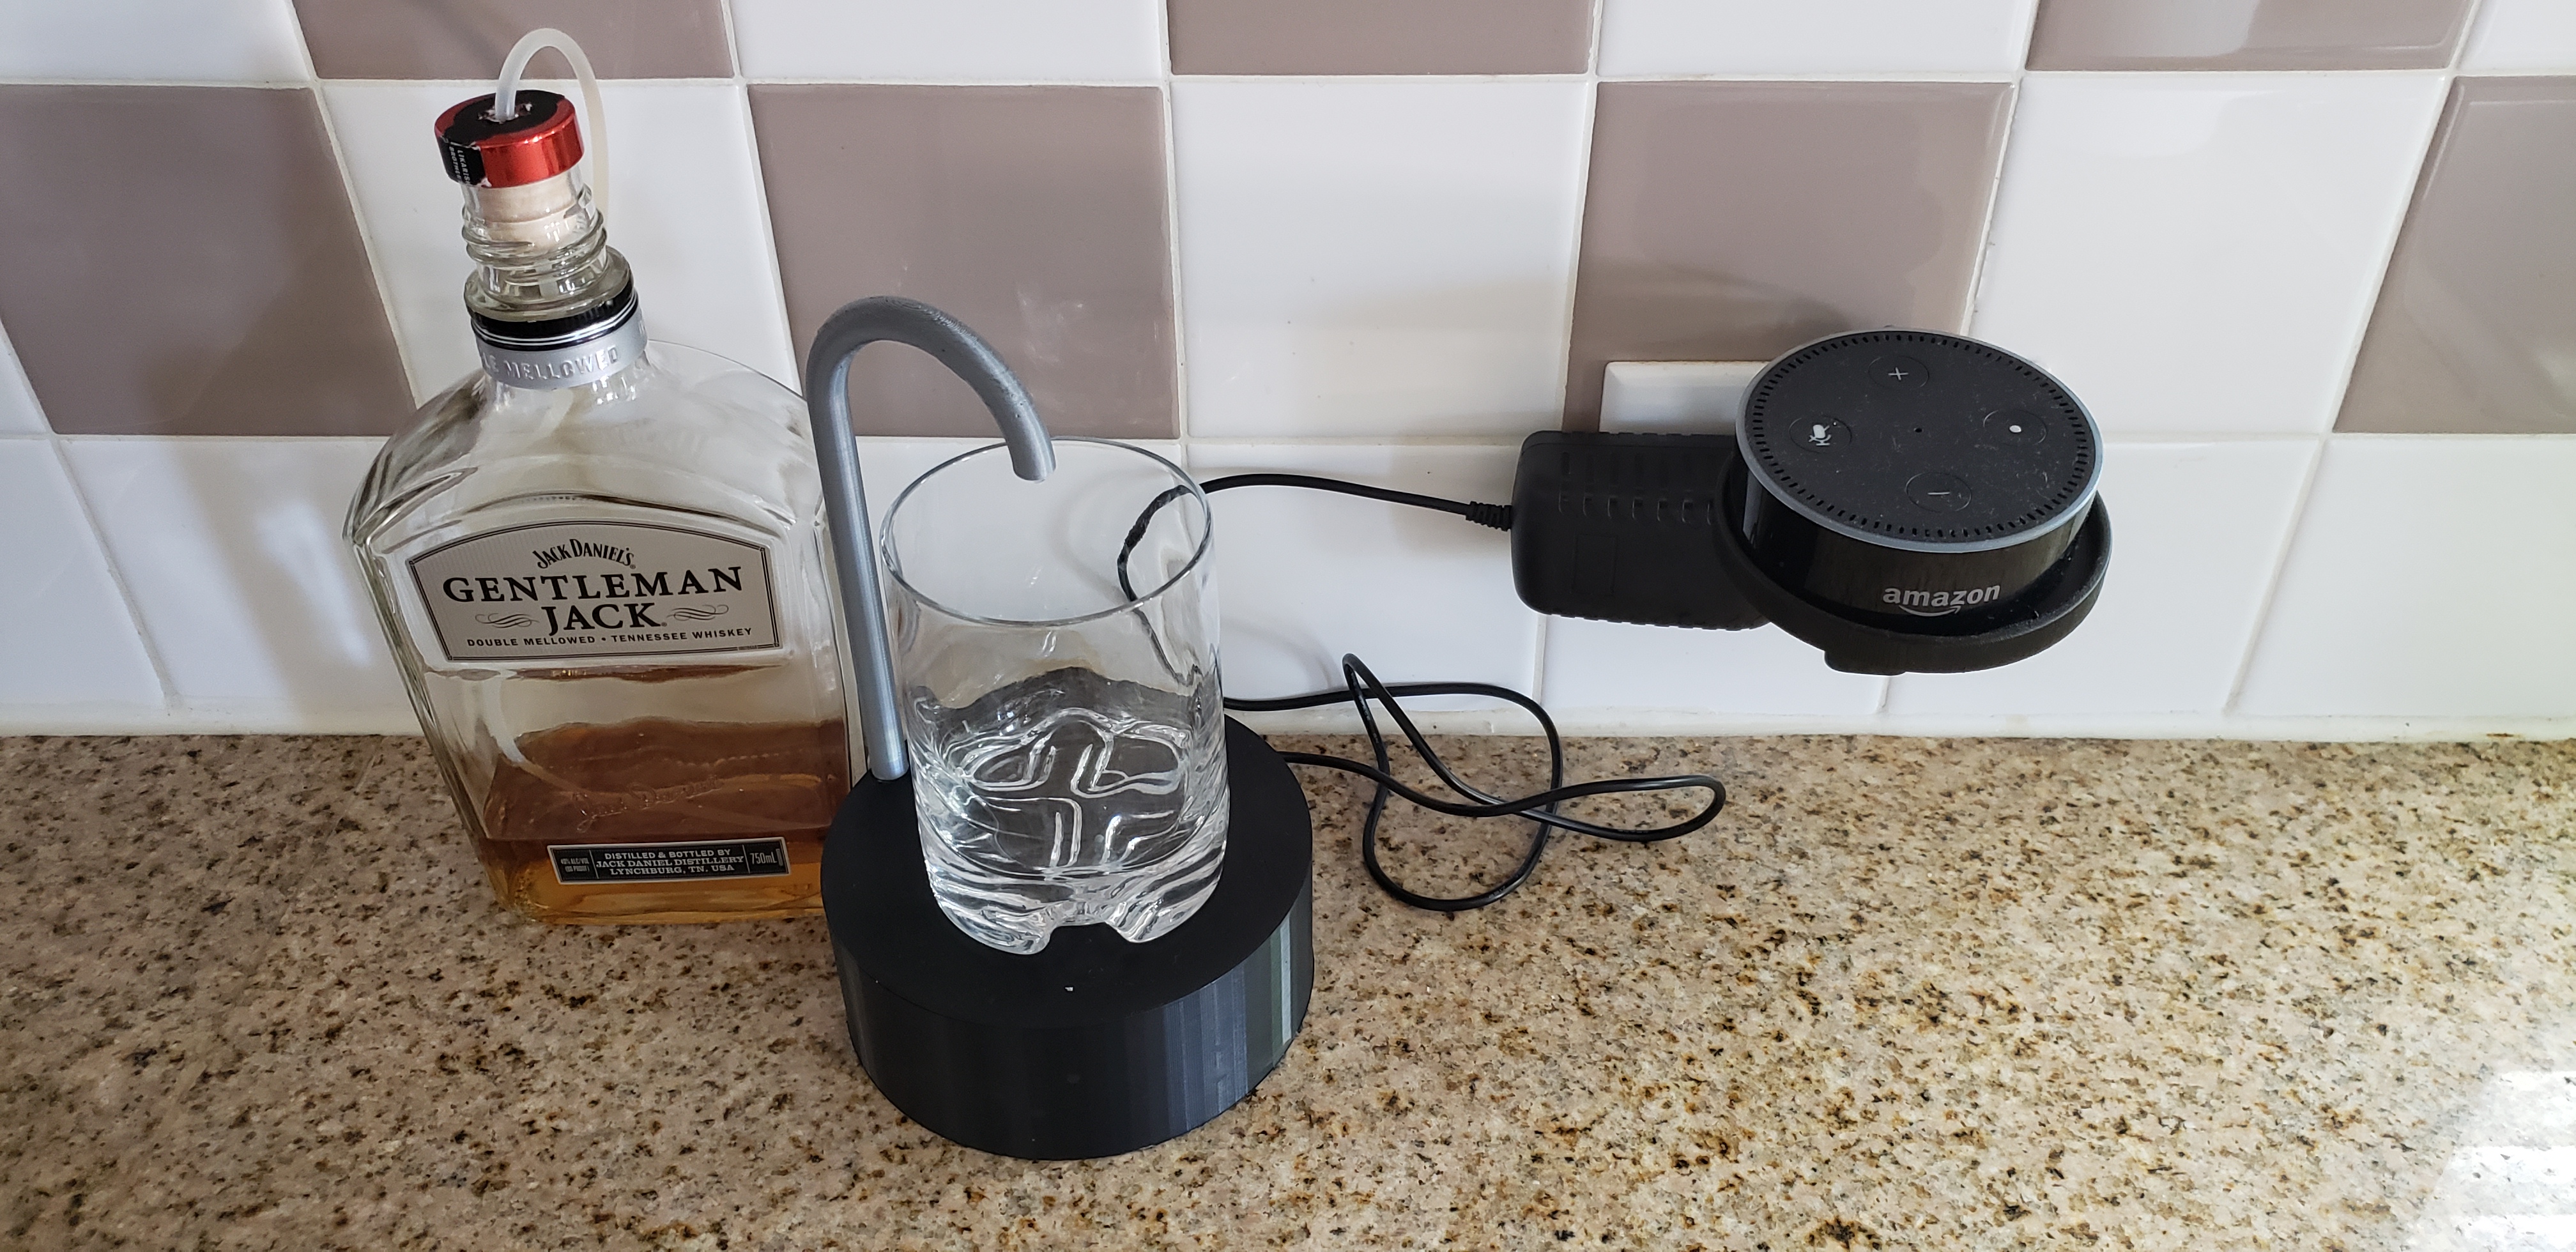
<p>For years I wanted my own drink dispenser like the one you see behind the bar. After some initial research, I found them to far exceed my budget. But now, with the power of the 3D printer, I have created my own luxury item for less than $40.</p> <p>This design is so easy that anyone with a 3D printer and a soldering iron (not necessary but desirable) can create and have their own drink dispenser at home. No software coding required, just a few app settings through your phone. Design is completely food-safe (as long as you choose the appropriate materials)</p> <p>With the power of Alex or Google Home you too can be living the good life with your own voice-controlled drink dispenser.</p> <h3>Print instructions</h3><h3>Category: Kitchen & Dining Print Settings</h3> <p><strong>Printer Brand:</strong> Prusa</p> <p><strong>Printer:</strong> MMU2s</p> <p><strong>Rafts:</strong> Doesn't Matter</p> <p><strong>Supports:</strong> Yes</p> <p><strong>Resolution:</strong> 0.2</p> <p><strong>Infill:</strong> 20</p> <h3> Materials Needed</h3> <p>The bill of materials for this project is very small. You will need the following:</p> <p>1) The brain of the operation is the SONOFF SV. They are about $10 from Amazon https://www.amazon.com/Miaomiaogo-Voltage-Distance-Wireless-Android/dp/B07RBPP7QR/ref=sr\_1\_14\_sspa?keywords=Sonoff+SV&qid=1563566880&s=hi&sr=1-14-spons&psc=1</p> <p>2) A peristaltic pump. In this design, I used one from Amazon for $13. https://www.amazon.com/gp/product/B01IUVHB8E/ref=ppx\_yo\_dt\_b\_asin\_title\_o07\_s01?ie=UTF8&psc=1</p> <p>3) A 12V power supply. Again another purchase from Amazon for $8.<br/> https://www.amazon.com/gp/product/B01GD4ZQRS/ref=ppx\_yo\_dt\_b\_asin\_title\_o06\_s00?ie=UTF8&psc=1</p> <p>4) Some silicon tubing, 2mm inner diameter (ID) x 4mm outer diameter. About $5 from Amazon. Don't go any smaller than 2mm ID or the pump won't work.<br/> https://www.amazon.com/gp/product/B01N3QDJOG/ref=ppx\_yo\_dt\_b\_asin\_title\_o06\_s00?ie=UTF8&th=1</p> <p>5) 6 x 2.5mm x 0.45mm x 10mm bolts. Holds the pump to the bottom and the bottom to the body</p> <p>6) 2 x 3mm x 5mm bolts. Holds the SONOFF to the base.</p> <p>7) Some insulated wire to connect everything.</p> <p>8) Amazon Alex or a Google Home. (not essential but certainly desirable)</p> <h3> Instructions</h3> <p><strong>Step 1 - Soldering</strong></p> <p>After you have finished printing the parts, it is time to put it all together. Firstly, solder the power to the SONOFF board and then solder the connections from the SONOFF board to the pump. The image below should help you out.</p> <p><strong>Step 2 - Fixing</strong></p> <p>Now that everything is soldered together, we need to fix everything to the bottom. But before we start bolting things down, first remove the pump head off the shaft. This will enable us to feed the tubing through the pump head later on.</p> <p>Use two 2.5mm x 10mm bolts to secure the pump and 2 x 3mm bolts to secure the SONOFF board.</p> <p><strong>Step 3 - Quick Test</strong></p> <p>With everything secure, it is a good idea to make sure the system is working electrically. You will need to download the eWeLink app to your phone and apply power to the board. Once you have downloaded the app and add the device (doesn't matter what you call it just don't forget the name) make sure you can turn the device on and off with your phone. If it doesn't work you probably connected something wrong.</p> <p>Next, with your Alexa app, enable the eWeLink skill. With the skill enable and your accounts linked, create a new routine. In the "When this happens" insert "Alexa, ". For example "Alexa, whiskey" or "Alexa, get me a drink". In the "Add action", select Smart Home and choose control device and select the SONOFF device you added (its time to remember that device name). Now give it a test e.g. "Alexa, whiskey". All things going well, the pump should start. Remove power and let's feed the tube through the pipe.</p> <p><strong>Step 4 - Insert Tube</strong></p> <p>This step can be a bit finicky. We need to feed the tube through the pipe into the main section. I have found it easier to start from the top and push it down. You might have to clean the pipe, depending on your print quality. A small wire brush will do the trick but be careful, the pipe can break.</p> <p>Now that you managed to feed it through, leave a little bit at the top (we will cut this off later) to stop it from sliding through. Feed the tube through the pump head, make sure you clamp it in place (in the pump head) and pass it through the hole under the pipe. Place the pump head back on the shaft.</p> <p><strong>Step 5 - Assembly</strong></p> <p>Insert the bottom into the body and secure it with four bolts.</p> <p>Cut the tubing to length and remove the excess tubing at the top.</p> <p><strong>Step 6 - Calibration</strong></p> <p>We are now on the final stretch. Get two cups one filled with water and the other to measure.</p> <p>Place the tube into the cup of water and place the other cup onto the dispenser. Ensure power is applied and have a stopwatch ready.</p> <p>With your stopwatch ready, "Alex, whiskey". Time how long it takes for the pump to dispense the amount of liquid you desire. For 30ml it should take about 23 seconds (depending on the pump).</p> <p>With this figure, go into the EWeLink app and select the device and click on "settings". You have to select Inching to on and the duration to the time you just determined.</p> <p>Save the setting, empty the cup on the dispenser and run the test again. Change the Inching value to get the desired amount of liquid.</p> <p><strong>Step 7 - It works</strong></p> <p>All things going well you should end up with something like this video.</p> <p>To secure the tubing in the bottle, I found a cork lid from another bottle, drilled a hole in the lid and fed the tubing through.</p> <p>Congratulations and happy consuming.</p>
With this file you will be able to print Voice Controlled Drink Dispenser with your 3D printer. Click on the button and save the file on your computer to work, edit or customize your design. You can also find more 3D designs for printers on Voice Controlled Drink Dispenser.