Voxelab Aquila - Dial Indicator Clip-On Mount
thingiverse
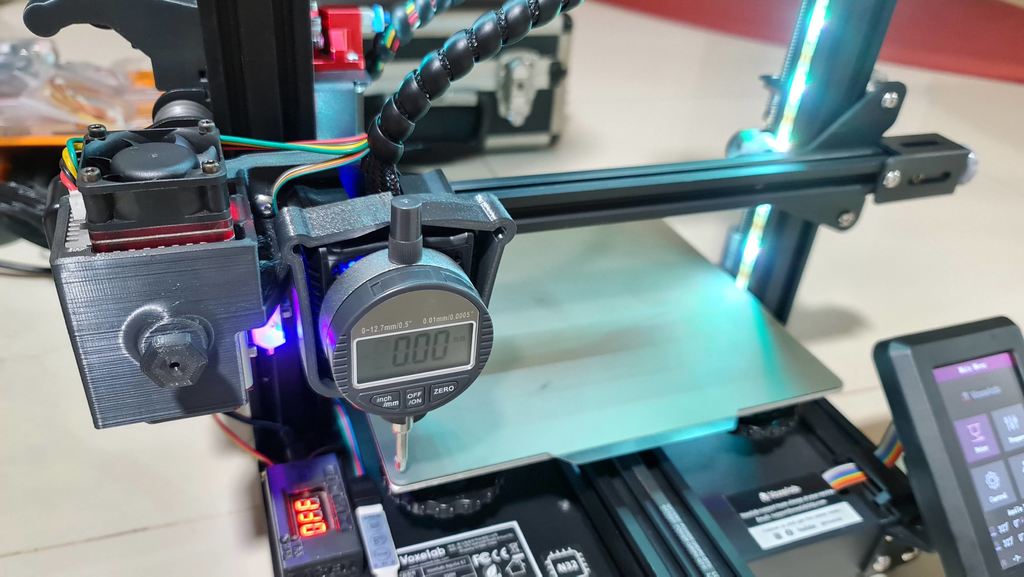
Simple Dial Indicator clip-on mount that temporarily fits to a Voxelab Aquila stock fan shroud to assist bed levelling. This should fit any similar dial indicators that has an appropriate 7.9mm diameter stem which holds the spindle/plunger. Print without support with the rear frame flat to the printer bed. Recommended usage: 1. Perform a normal all-home procedure, then raise the Z axis to about 30mm from the printer menu. 2. Slot in the dial indicator stem completely into the mounting hole and flushed into the fan shroud for a good fit (doesn't wobble when you touch the tip of the probe, fan shroud should be firmly fit in the first place). 3. Lower the Z axis to about 25mm and disable the steppers from the printer menu. 4. Manually move the printer head/bed to one of the corners then zero out the dial indicator. This first corner will be the base level. Best to place the probe directly above the bed springs at each corner. 5. Manually place the dial indicator to each corners in a circular motion few times each time adjusting the wheel level whilst ensuring the first corner stays zero. Tips: after getting a zero reading at the wheel turn, slightly tap the bed surface near the probe couple of times to zero out any slight play it has on the either bed or probe spring. 6. Finally, remember to remove the dial indicator from the fan shroud after levelling. Also don't forget to redo your Z offset after each levelings. If your bed is warped (center of bed doesn't read zero), a BL-Touch could help. I was able to get a perfect 0.00mm on all four corners of the bed.
With this file you will be able to print Voxelab Aquila - Dial Indicator Clip-On Mount with your 3D printer. Click on the button and save the file on your computer to work, edit or customize your design. You can also find more 3D designs for printers on Voxelab Aquila - Dial Indicator Clip-On Mount.