Wall behind Radiator Cleaner for Dyson Vacuum Cleaners
thingiverse
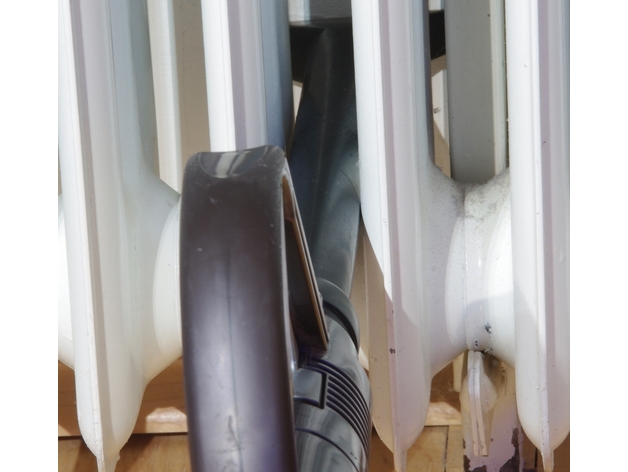
I am currently working on a version that produces manifold .STLs. This is working already but before I publish it here, I'd like to make it customizable by customizer, which also means that I have to put everything into one file. So if you want to make this thing, please contact me at WbRCfDVC@pkmx.de to ask for a current version! Important Note 1st: This thing may destroy your vacuum cleaner, if not made or used properly. If your vacuum cleaner does not get enough air, it may overheat and break. I like my Dyson vacuum cleaner. It's strong and I never have to buy bags, filters or anything. The only disadvantage is that I can't use the old equipment of my former vacuum cleaners and the original add-ons are of no great use for many places in my house. So I decided to make my own add-ons. The first should be something, that I neither had with the old Hoovers: something to clean the walls behind our radiators. If the lack of add-ons was your reason not to have a Dyson, you can now buy one. I will write some add-ons for Dyson in OpenSCAD and share them with everyone. They will be customizable to meet your needs. This is the first of this series. Your radiators may be different to mine, so I also made this thing customizable. Feel free to take a look at the different files and use them for your things and projects. Print Settings Printer Brand: RepRap Printer: Prusa I3 Rafts: No Supports: No Resolution: 0.2 Infill: 100% Notes: The main file is dys_radiator_orifice.scad. This is where you customize: Tubethickness is the outer diameter of the main tube. Measure the width of the slits in your radiator and substract a few millimeters. Don't make the tube to thin or too long, or your Dyson may die a heat-death! Length is the length of the main tube and the orifice. DysLength ovverrides a variable I defined in dys.scad, which saves us 2 mm length in the thick part. The following values' defaults should be ok. threadLength ist the length of the screwed connection. converterLength is the length of the taper between Dyson tube diameter and your tube diameter. wallThickness makes the Tube stronger, but also the inner diameter smaller. couplerLength is the length of the overlapping of both tube-parts. The more glue you want to use, the bigger the value. ;-) couplerseating The overlapping ends with a border of this width. orificeLength is the length of the orifice from the view of the tube. orificeWidth is twice the action radius behind the radiator. Watch out for the side gradient. It is atan(orificeLength*2/(orificeWidth-Tubethickness)), in this case = atan(60/72) = 39.8..° The side overhang is 90 - side gradient = 50,19..° This is okay for most printers. If you want a wider action diameter, you must find out, how overhanging your printer can print and adjust orificeLength accordingly. orificeHeigth should be big enough, that the airflow is not disturbed more than in usual use. orificeRounding is the radius of the rounding at the end. combTeeth Is the number of pinnacles on the long side. The short sides always have one. combHeight is their height. side_support_depth, side_support_thickness and side_support_height define the stabilizers, that may be necessary due to the great height in combination with very little support surface. couplerSeatingSupportAngle and couplerSeatingSupportThickness define the support corners for the seating of the overlapping. The following lines can be configured by moving "// " to other lines. If you want to view the parts as they are put together, say false here. layout_to_print = true; // layout_to_print = false; explode_factor = 0; // If you want them exploded, say something like 1.1, here. If your printer can do magic or if you prefer using your slicer's support, say false here: couplerSeatingSupport = true; // couplerSeatingSupport = false; If your slicer is cleverer than I would expect, you may also say false here: side_support = true; // side_support =false; // If you want to print the parts separately, which I would recommend for quality reasons, traverse through the parts and make a seperate stl for each. part_to_print = part_all; // part_to_print = part_dysadapter; // part_to_print = part_connector; // part_to_print = part_orifice; Post-Printing Carefully remove the little support corners and the big side-supports in the coupling for the long parts and stick the long parts together. If you print with PLA, use glue, if you print with ABS, weld with ABS-juice or acetone, whichever you like best.
With this file you will be able to print Wall behind Radiator Cleaner for Dyson Vacuum Cleaners with your 3D printer. Click on the button and save the file on your computer to work, edit or customize your design. You can also find more 3D designs for printers on Wall behind Radiator Cleaner for Dyson Vacuum Cleaners.