Wall holder for Home Depot Unbranded (Bond) Universal Ceiling Fan Remote
thingiverse
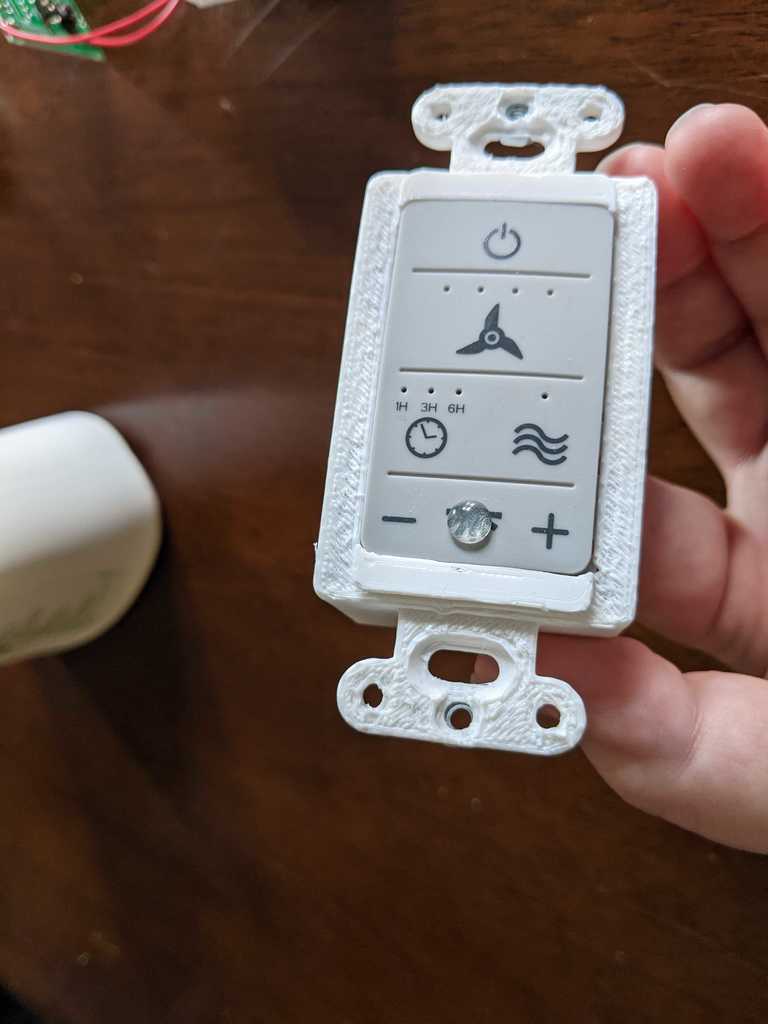
NOTE: Requires soldering. This is actually a remix of 2 separate Things, but the interface won't search properly. Parametric AA Battery Box With Contacts by Jetty: https://www.thingiverse.com/thing:1190819 Sonoff basic wallbox enclosure with decora faceplate by mmasson: https://www.thingiverse.com/thing:2804973 The original remote is here: https://www.homedepot.com/p/Universal-Smart-Wi-Fi-4-Speed-Ceiling-Fan-Remote-Works-with-Google-Assistant-SmartThings-and-Alexa-99434/311264804 I needed a universal remote for my ceiling fans that handled lights and also kept track of whether it was on or off so I could use it with my Alexa. This is the one I chose, which is fairly good except that if I have more than one fan I can't use more than one remote on a single fan (hoping the Flic 2 will help with that) and the remotes are only handheld and not in-wall remotes. I took care of the 2nd issue by 3d printing my own holder for the remote that would fit in a 1-gang wall box and could use a decora wall plate. The plastic button section on the remote is the right width, but is a little bit too short, so the printed object makes up for that by having a small section of printed plastic visible above and below the buttons. I recommend printing that part in whatever color your wall plate is (mine are white). The rest of the pieces are not visible, and fit together kind of like a puzzle, so I am including a video of myself putting them together. The battery contacts I bought for this are the ones here: https://www.amazon.com/gp/product/B072379C1R which are larger than the ones in the Thing I was remixing, so it took some finagling. The ones I used were 11.5mm wide by 13.5mm long, with a spring length of 11.5mm (according to the Amazon page). Smaller ones will probably work as long as the spring is long enough. I also experimented with using aluminum foil instead of buying contacts, but they weren't as reliable. You will also need 3 #6 size nuts and 1 #6 size screw (at least 3/8 inch long or so) for each assembly, and something like Loctite Gel Control Super Glue to hold 2 of them in place. I tried hot glue, and it worked fairly well until I started taking them in and out of the wall, when it started wearing down. Each printed piece should have the word "Top" on it somewhere, probably illegibly depending on your printer's resolution. Some of them say "back" as well. To start the process, you need to pry the remote open with a screwdriver or something similar. The circuit board and rubbery button section will pop right out. You'll need to cut the wire springs off the circuit board or desolder them. Looking at the rear of the circuit board where the "Learn" button is, with the Learn button toward the bottom of the board, the battery contact to the right is negative and the one to the left is positive. Once you have the contacts inserted into the Battery Holder printed piece, solder the contacts on the "Top" side together on the back of the Battery Holder, and then take two pieces of wire about 3-4 inches long. Solder a wire between the positive contact on the bottom side and the positive contact on the circuit board, and the other between the negative on the circuit board and the negative on the Battery Holder. Make sure on the Battery Holder that you press the ends of the contacts up against the back of the Battery Holder, especially toward the side that hooks into the Cover printed piece, otherwise the interior pieces won't fit very well into the Base printed piece. Take 2 of the 3 nuts and put them on the back of the Base printed piece, one at the top and one at the bottom (see photos). Glue these into place. They will provide the location for the wall plate to screw onto the Base piece. Wall plates generally come with #6 screws. (I also used some of the glue to attach a raised dot sticker to the light section of the plastic button section from the remote.) The rest of the assembly: take the Base and hold it front-down with the top side up (the hole in the wall should be on the right side). Take the rubbery button section from the remote and place it into the base (make sure the power symbol is at the top, and the three-button light section is at the bottom). There are ridges on the button section that should line up with grooves in the printed Base piece. Do not push too hard or it will just pop through entirely. It will fit loosely. Take the Cover printed piece and slot it into the Battery Holder piece, with the circuit board beneath them. The wire connected to the positive terminal will have a small divot in the Cover piece to guide its location. This part is a bit tricky, but lower the circuit board and the printed pieces into the Base. It's hard to line up the circuit board properly, but if you're unsure, just take the Battery Holder and Cover piece out to get a feel for where it goes. Once both pieces are in the Base, if the circuit board doesn't seem to be aligned, you can use a screwdriver or plastic pry tool to gently nudge it into place. It may or may not make a snapping noise when everything gets into place, but it shouldn't need forcing. If you need to pair this remote to a fan, now is a good time to put batteries in and pair it while holding it together with your fingers. Take the Screw Cover printed piece and slide it around the Battery Holder piece. Align the hole in the Screw Cover with the screw in the side wall of the Base piece, and use the final nut and the screw to connect the two of them together (hold the nut in place until the screw is finger-tight, and it will stay in place if you then use a screwdriver). Now it's ready to put in the wall like you would a light switch (without wiring it to anything, of course). Make sure to test it before you get it in the wall to make sure your connections are good and the buttons don't move too much (they will move a tiny bit when pressed, such is the nature of DIY).
With this file you will be able to print Wall holder for Home Depot Unbranded (Bond) Universal Ceiling Fan Remote with your 3D printer. Click on the button and save the file on your computer to work, edit or customize your design. You can also find more 3D designs for printers on Wall holder for Home Depot Unbranded (Bond) Universal Ceiling Fan Remote.