Wanhao D5S Upgrade: DuetWifi, E3Dv6, Bondtech
thingiverse
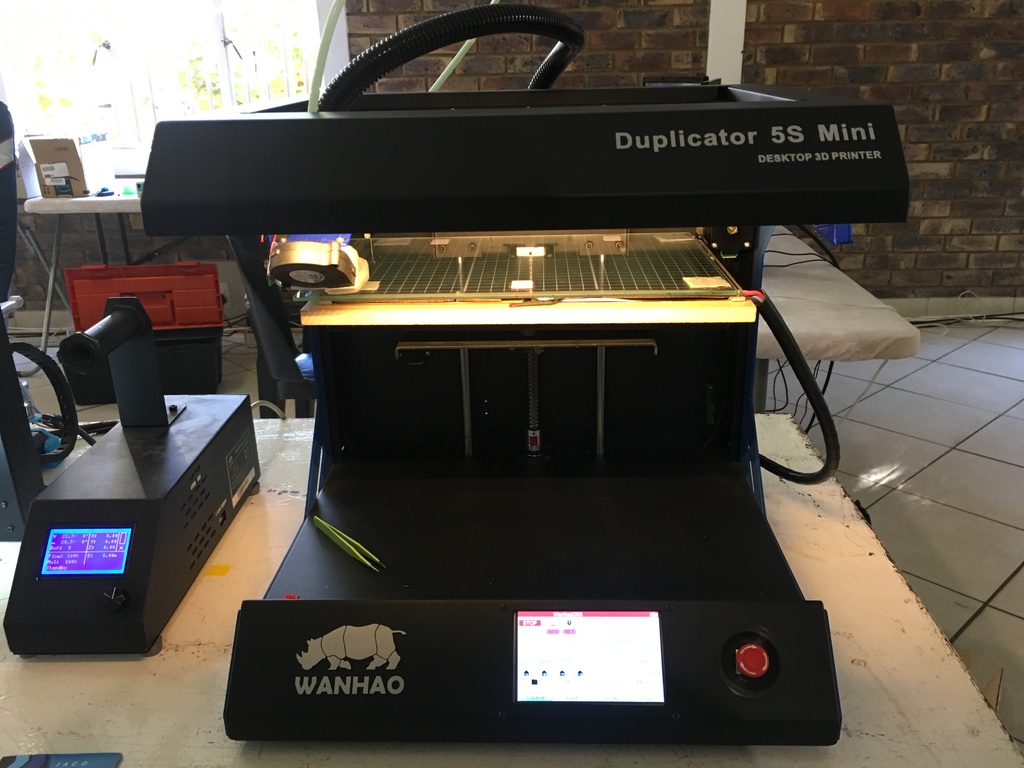
I have performed a mayor upgrade to my Wanhao Duplicator 5S Mini. The upgrade have thrown out almost all of the original electronics to get this printer to be a lot better than it was before. The included document is the process and stops just before we power it on the first time. From where I stopped in the instructions, it is simply to start and test everything. If all the movements and heaters work, we can start with calibration tests etc. Warning: This upgrade requires you to make permanent changes to your printer. After reaching the point of no return, you can't undo the changes to return to how your printer was before. This is not recommended for everyone - it is potentially dangerous (we are taking Mains power into the printer; having a good familiarity with electronics and electricity is required), cost a lot of money, is time consuming (my upgrade took more than a month after the 2 weeks I set aside for it passed) and have a high risk for permanently damaging your printer. Continue with this upgrade at your own risk. I can't be held responsible for any damage, injury etc. caused by following this guide. Also check the regulations of your country/state with regards to main wiring, earthing etc. Using this upgrade guide, one is able to make the Wanhao D5S 3D printer use 1.75mm filament (as stock, it uses the 3mm standard). Also, since we use the E3Dv6 hot-end, nozzle changes are easier and nozzles are available everywhere (hardened, coated and even ruby/sapphire inserts). In addition, my E3D bracket allows quick changing of hot-ends (I have an array of hot-ends in both 3mm and 1.75mm styles, with nozzles with varying orifices - it takes about 10-20 minutes to swap the head and extruder, though it can'e be done while the printer is on). I recommend reading through the guide before starting to ensure you have everything and understand it all. I am using an IR probe that tells me how much to adjust each leveling screw, but this is not required. If you are good with the paper method, it does not need to change. I changed the operating method of my end-stops (was Normally Open, I made it Normally Closed). This is not really required. All of the parts I attach, are my own, designed from scratch in Solidworks. For some of them I have taken inspiration from other designs, but these are my own designs. Where I recommend designs from someone else, I will have a link or description to it. The STL files uploaded here can be used and even reverse engineered free of charge and like you want, but please share yours as well (as per the Share Alike attribute of the license). Should someone need the original Solidworks files, I can provide them on request for a donation. The D5S Cross Mount is designed to fit a DiiiCooler around the E3Dv6 - other coolers may also fit, but it is designed for the DiiiCooler. Included in the Thing, is the Configuration I used for my printer. Mine have evolved further, as would yours, but this is a good starting place. You can upload the config.json into the RepRapFirmware Configurator, and it will provide you with most of the settings already in place - simply go through it, change to fit your hardware and download it. I recommend running the Duet boards on their latest version, as it is easy to remain up to date with the latest version. While I will attempt to support people in debugging their printers, I can't guarantee how fast I can get back to someone. As always, it is good to post questions in the relevant forum (anything mainboard/firmware settings related, go to the Duet Forum etc). Some printed parts will need Tapping of threads.
With this file you will be able to print Wanhao D5S Upgrade: DuetWifi, E3Dv6, Bondtech with your 3D printer. Click on the button and save the file on your computer to work, edit or customize your design. You can also find more 3D designs for printers on Wanhao D5S Upgrade: DuetWifi, E3Dv6, Bondtech.