Wanhao Duplicator 9 D9 Y axis brace openbuilds style gantry mod addon
thingiverse
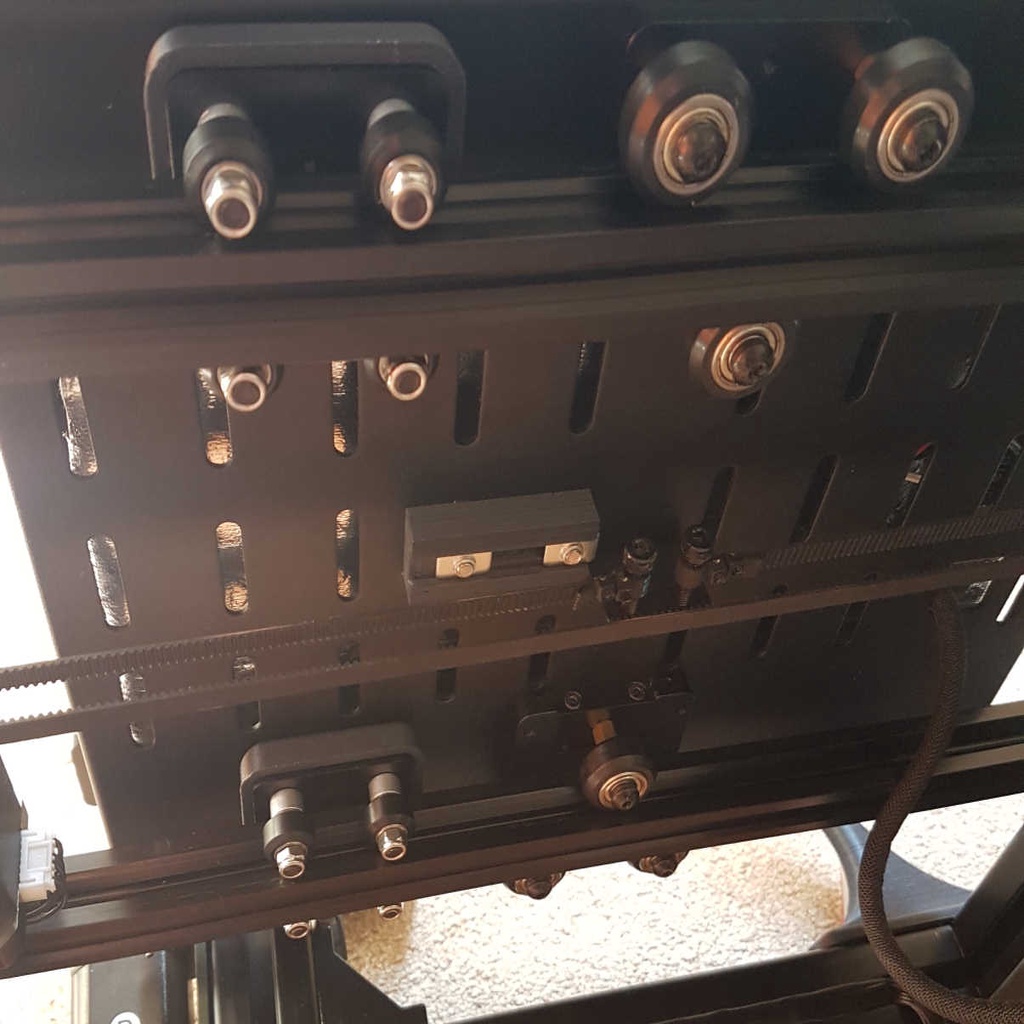
So as anyone who owns the D9 knows, the Y axis setup is a bit of a mess. Just hold it and put a little rotational pressure on it - no stiffness at all. I saw a lot of people upgrading to hiwin style linear rails, but that seemed overkill to me. They are designed for high force CNC environments, and while I am sure they are better, the existing dual aluminium extrusions should be able to do the job. With extra gantry plates built in, anyway. I had a bunch of parts for the openbuilds style mini v gantries hanging around, so I decided to mod them in. You can buy from openbuilds themselves, or go with cheap chinese clones from aliexpress etc, but bear in mind the bearings on the latter are much lower quality. Still, they do the job, and are the same bearing quality as Wanhao used for their own wheels. Huge improvement. I haven't done a great deal of printing yet since installing these, but I thought I'd upload now and let people play with it. OK so details: You'll need to drill four holes (each one through the two layers of the base at this point), suggest 5.5mm, in line with the middle of the rails. 20mm between holes, and I put the first about 66mm from the end of the plate. I think perhaps I should have put them a bit further in, as I might have lost a few mm of travel as a result. Still, not a big deal, I'll probably just end up moving the two aluminium rails away from the LCD screen a little to give me the extra travel. However, I strongly recommend you take your printer and note the exact location of the plate when it is homed. Mark and drill with that distance in mind, so that the gantry wheels don't exit the aluminium V extrusion or you lose some off your 300mm built distance. Oh and while I did two holes per gantry, a single hole in the middle would also work, albeit not quite as stiff. Perhaps easier though. And do I need to say ... measure, mark, use a sharp point bradawl etc to make a indentation, drill with smaller bit first, then drill 5.5mm? I'm sure I don't need to say that. Because of the location of the limit switch, it will also need to be moved. I've added a little holder that sits on top of the plastic stepper holder. Getting it in place with a t style nut underneath is quite the fiddle if you don't want to take everything apart, but is possible (curved tweezers or just a bent piece of plastic, tack nut in place with something). Link to OpenBuilds mini v gantry: https://openbuildspartstore.com/mini-v-gantry-kit/ Other D9 upgrades of mine: - Fan Housing - https://www.thingiverse.com/thing:3906069 - Z Braces - https://www.thingiverse.com/thing:3906124 - X axis carriage bracket to stiffen up the lower wheel axis - https://www.thingiverse.com/thing:3914066
With this file you will be able to print Wanhao Duplicator 9 D9 Y axis brace openbuilds style gantry mod addon with your 3D printer. Click on the button and save the file on your computer to work, edit or customize your design. You can also find more 3D designs for printers on Wanhao Duplicator 9 D9 Y axis brace openbuilds style gantry mod addon.