Wanhao i3 ATX PSU Upgrade
prusaprinters
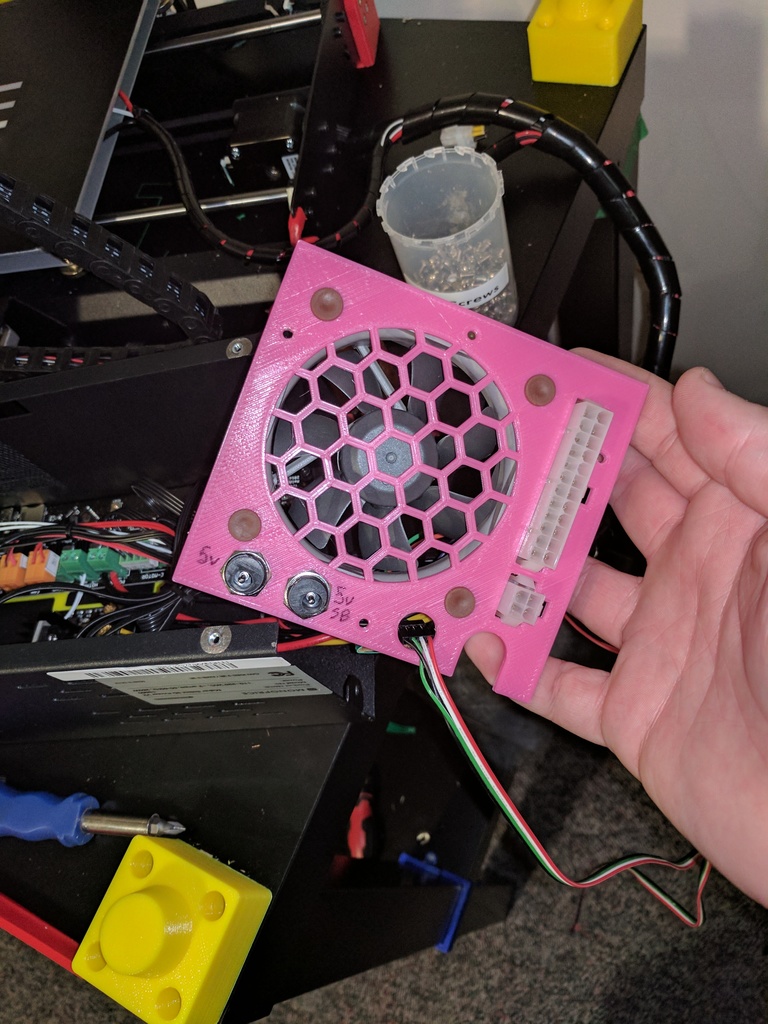
<p>This is an upgrade for the Wanhao i3/Monoprice Maker Select.</p> <p>My biggest reason for doing this is noise. The built in PSU is loud. Compared to that, most computer power supplies are practically silent. I have tons of older ATX power supplies kicking around anyways.</p> <p>As an added bonus, the power supply can provide power for a raspberry pi running octoprint, 5 or 12v lighting strips, and any other little accessories you need.</p> <p>This assumes you have already added a relay for the heated bed. If you haven't, do that first!</p> <h3>Parts Required</h3> <ul> <li>ATX power supply (I used 600W). Make sure the 5vSB can handle 2 amps.</li> <li>24 pin extension cable like StarTech ATX24POWEXT</li> <li>4 pin CPU power extension cable like StarTech ATXP4EXT</li> <li>2 chassis mount 2.1mm power jacks with 13mm mounting holes (ones I have are Mode Electronics 31-134-2)</li> <li>80mm case fan - I recommend Noctura because they are really quiet</li> <li>Optional - If you want octopi to be able to turn the power supply on and off, you'll need an NPN transistor and a 1k resistor</li> </ul> <h3>Wiring</h3> <ul> <li>Cut the male end of the extension cables off, leaving as much wire as possible attached to the female ends</li> <li>Google "ATX pinout" to determine which wire does what. Remember most show the male plug, and you are working with the female side, so you may have to mirror it. The colors below may differ if your extension cable doesn't follow the usual color scheme, so double check!</li> <li>Wire one of the ground wires and one of the 5v wires (usually red) to the first power jack</li> <li>Wire one of the ground wires and the 5v SB wire (usually purple) to the second power jack</li> <li>Wire the CPU extension cable wires to the power in on your relay board. Yellow is positive.</li> <li>Wire 12v (usually yellow) and ground to the power input on the mainboard</li> <li>Wire 12v and ground to the fan in the backplate</li> </ul> <p>If you are going to have octopi control the power supply, follow this guide for how to wire the transistor: <a href="http://www.instructables.com/id/Using-the-Raspberry-Pi-to-control-an-ATX-power-sup/">http://www.instructables.com/id/Using-the-Raspberry-Pi-to-control-an-ATX-power-sup/</a> - The base is connected to the GPIO pin on the Raspberry Pi in series with a 1k resistor. The collector is connected to PS_ON (green), and the emitter is connected to ground on the ATX (any black wire).</p> <p>If you are<em>not</em> using the pi to control it, connect the PSON and one of the ground wires to a momentary switch to turn the power supply on. If you want to modify the backplate to accomodate your switch, I've included the fusion 360 design file.</p> <h3>Final steps</h3> <ul> <li>Make or obtain a 2.1mm power jack to micro usb cable. Plug it into the 5vSB connector and the raspberry pi. Now your pi will be powered at all times, even when the power supply is "off".</li> <li>The other 5v connector is switched with the power supply, and can be used for 5v LED lighting.</li> <li>Plug the power supply into the backplate just like a computer power supply</li> <li>Connect the GPIO wire to the pi and use <a href="https://github.com/kantlivelong/OctoPrint-PSUControl">https://github.com/kantlivelong/OctoPrint-PSUControl</a> plugin to control it</li> </ul> Category: 3D Printer Parts
With this file you will be able to print Wanhao i3 ATX PSU Upgrade with your 3D printer. Click on the button and save the file on your computer to work, edit or customize your design. You can also find more 3D designs for printers on Wanhao i3 ATX PSU Upgrade.