Wanhao/Maker Select i3 Ramps Conversion for OSOYOO Ramps Kit with 2.8" Touch Screen
thingiverse
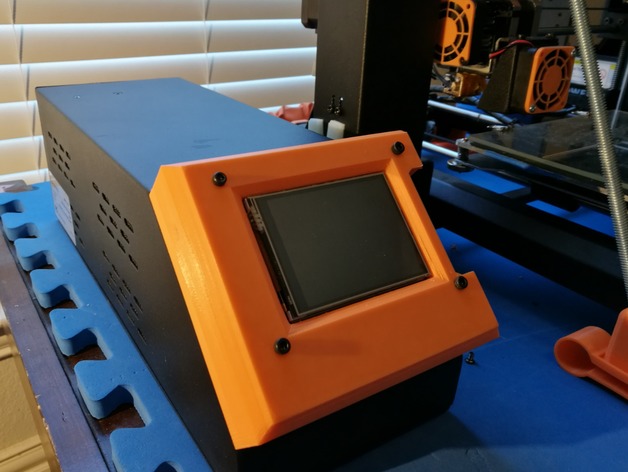
2/17/2017 I tweaked the LCD adapter to enable printing without support material. 2/18/2017 I modified the Melzi to Ramps adapter so that power cables are better aligned with the PSU and the fan is positioned for optimal cooling of the stepper drivers. 2/26/2017 I added a USB socket plug, allowing access to the main RAMPS USB connector. This project was based on the Osoyoo Ramps kit purchased from Amazon for $69: https://www.amazon.com/OSOYOO-Controller-Combination-MEGA2560-RAMPS1-4/dp/B01J9ZVPZU/ *A few users reported that the above package is no longer available. Here's a second source that looks identical: https://www.amazon.com/gp/product/B01JA5EQJG With this link, you'll need to buy the LCD board and the RAMPS board separately. They provide a link to the same osoyoo page I used - so this is a good sign. This conversion is specifically for converting a Wanhao Duplicator i3 or MonoPrice Maker Select V2 i3 to Ramps with touch screen using the kit linked above. The parts I made include: MKSTFT28_Adapter05.stl - This is the mount for the LCD touch screen, USB, and Card Reader. Melzi2RampsAdapter02.stl - This adapter allows you to use existing screws that held the Melzi board in place to hold the new RAMPS board instead. 4mm_spacer.stl - Use these between 20mm stand-offs from the i3 enclosure and the LCD board. (optional). Print 4 of these. (takes about 5 minutes to print 4). USBPort_for_MP_Case01.stl is an optional part. Parts needed: 4 qty 15mm M3 screws for LCD 4 qty 20MM M3 standoffs (Vinyl or Brass) 8 qty 10MM M3 screws for Melzi to RAMPS mount 4 qty 10MM or 15MM standoffs to raise the Ramps board. Assembly: Print the 3 parts attached. Disassemble your metal enclosure and remove the Melzi board. Carefully label connections before pulling them from the Melzi board. Before full assembly - Configure and test the Ramps board (get that working first). Guide is here: http://osoyoo.com/2016/06/30/mks-1-4-3d-printer-board-marlin-firmware-installation-guide/ Ramps Board - Do this after programming and testing your Ramps board. Eye up the location of the USB socket on the ramps connector and mark the case with a sharpie (please carefully measure before you cut). Remove all electronics from the enclosure for safe drilling (You don't want metal shavings on your electronics). Drill 4 holes ~7 to 8mm in diameter at the corners of the square you measured. They should be spaced 22mm apart horizontally and 23.5mm apart vertically. Use a jigsaw or hacksaw with a metal cutting blade to cut a straight line between each hole. It should open up to a rectangle once all 4 lines are cut. Pop in the printed "USBPort_for_MP_Case01.stl" part. The fit should be a snug pressure fit. Use Hot glue if the fit is loose. This conversion pairs nicely with this backplate for 80mm fans: http://www.thingiverse.com/thing:2137022 Post-Printing Tip! - Pull the little heatsinks off on your Melzi board and place them on the Ramps board's stepper drivers.
With this file you will be able to print Wanhao/Maker Select i3 Ramps Conversion for OSOYOO Ramps Kit with 2.8" Touch Screen with your 3D printer. Click on the button and save the file on your computer to work, edit or customize your design. You can also find more 3D designs for printers on Wanhao/Maker Select i3 Ramps Conversion for OSOYOO Ramps Kit with 2.8" Touch Screen.