Wankel Fidget 608 bearing magnets remix
prusaprinters
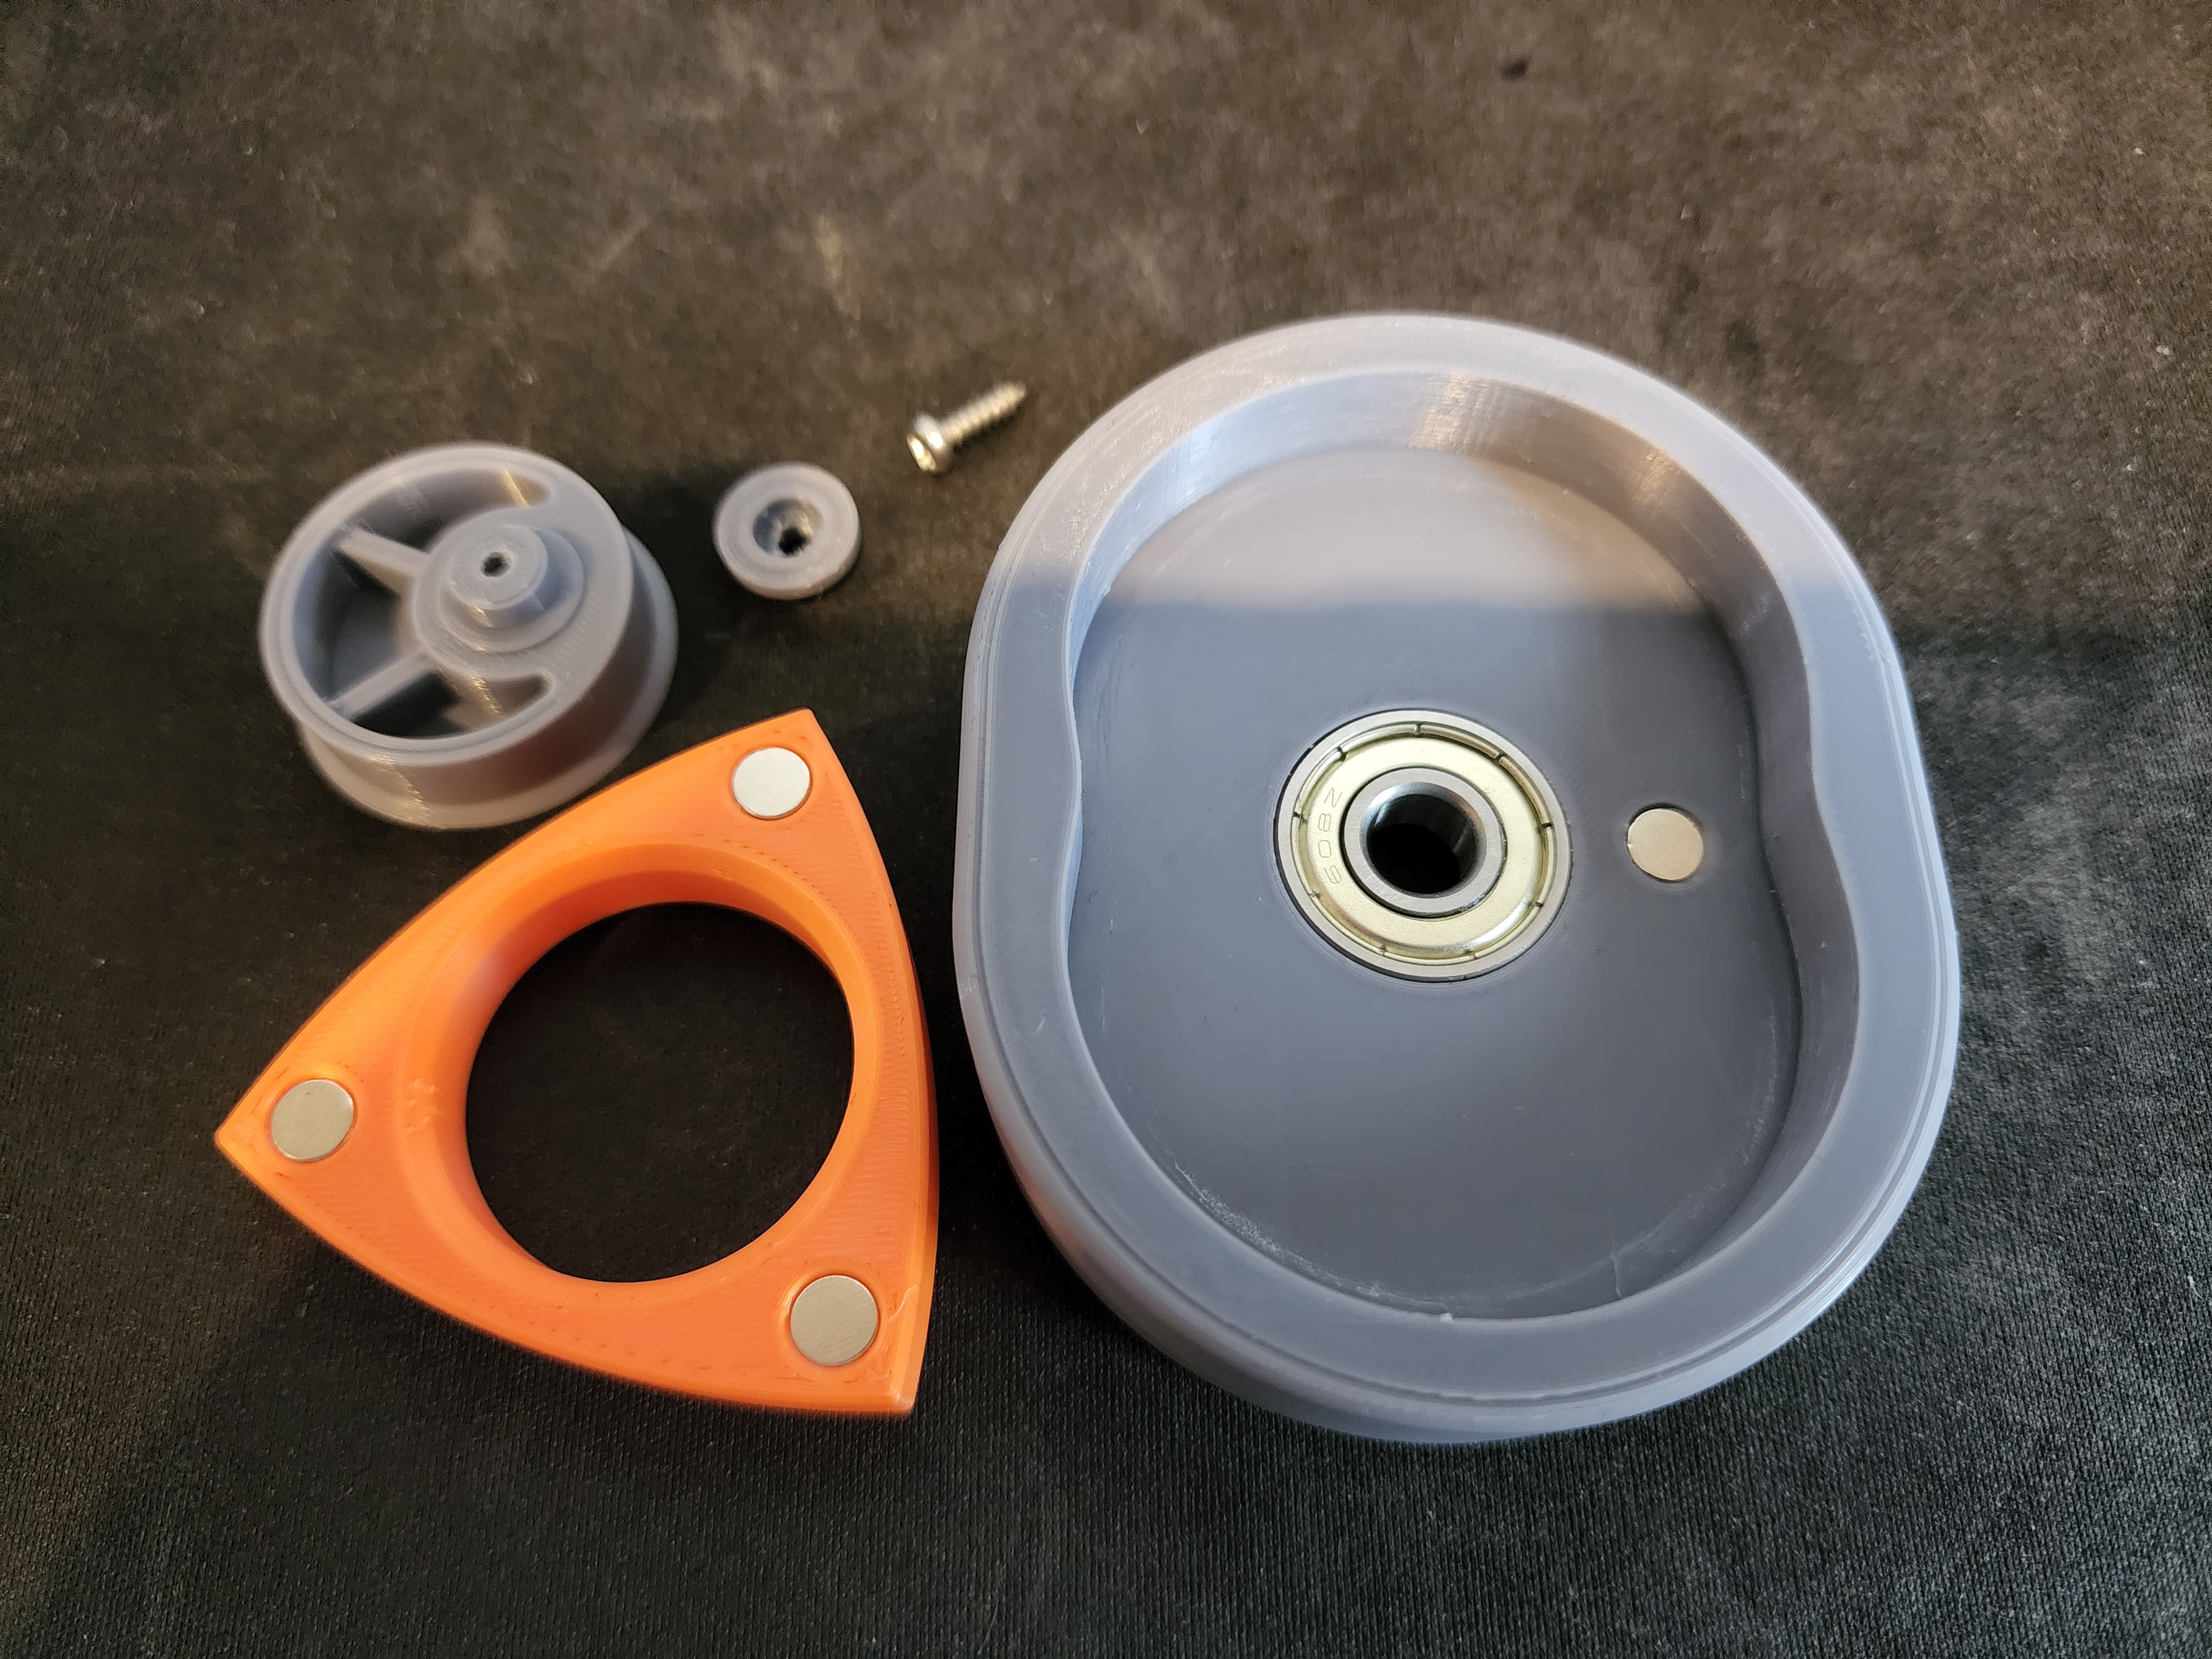
<p>I loved frez_knee's remix of mobious' original wankel fidget. I like the fact that it used a 608 bearing and had a way of captivating the mechanism so it all held in place. My first print of this is one of my favourite fidgets so far.</p><p>On using it though, I got to thinking about simulating compression/expansion within the engine. I also wanted a way to add a little tactility to the rotation. Enter… the magnet remix-remix.</p><p>I've added three 6x2mm holes to one side of the rotor, and a single 6x2mm hole to the ‘side plate’ of the housing. They are placed in a way that the magnets in the rotor <i>OPPOSE</i> the magnet in the housing. This gives some resistance as you approach the magnet (compression) and then a pushing force as you sweep past it (expansion). The housing magnet is placed on the opposite side to where the actual compression/expansion happens in the real engine - this allows for a single magnet to be used for the purpose. All the magnets are hidden from view as the rotor always covers the one in the housing.</p><p>It's not a huge force either way - this wasn't my intention. You can definitely feel the resistance, but it's not super ‘clicky’.</p><p>I've included 2 x STLs for the bearing retainer. frez_knee's original which takes a countersunk M3 self-tapping bolt, and my earlier remix of this part which takes a standard dome-headed M3 screw. All credit to frez_knee for any unmodified parts - they're just included here for completeness. </p><p>BOM:</p><ol><li>Four x 6x2mm magnets - <i>carefully placed so the ones in the rotor oppose the one in the housing</i></li><li>PLA+ or your material of choice</li><li><strong>EITHER </strong>of M3x10 countersunk bolt -<strong>OR</strong>- M3x10(or 12) self-tapping screw</li><li>Optional - diamond file or high grit sandpaper to smooth the inner walls of the housing to allow for snag-free spinning (or just do a better job of placing your z-seam than I did!)</li><li>Optional - super glue for the magnets if they're loose</li><li>Optional - some PTFE spray for the flat surface and inner walls of the housing (maybe the bearing too)</li></ol><p>I printed with a 0.3mm nozzle at 0.2mm layer height - just as I wanted a decent finish on the flat surface of the housing. 0.4mm nozzle would be fine I am sure. I turned “<strong>ironing</strong>” on for all top surfaces, just for the housing part. This gives a smooth surface for the rotor to spin on. I also used a little PTFE spray to lube things up without being greasy.</p><p>The magnet holes are all printed with a reasonable chamfer, so it should be easy to get the magnets in-place. Just make sure they are all flush, or slightly sunk below the surface to ensure they don't catch when rotating.</p><p>I've included the STEP files below (except my modified bearing retainer which I made in TinkerCAD) in-case you want to modify anything. I was thinking of slightly offsetting the housing magnet in the direction of travel (although, where it is currently means you can spin it any direction and the effect is the same). You may want to add bigger magnets for greater force - whatever, it's up to you!</p>
With this file you will be able to print Wankel Fidget 608 bearing magnets remix with your 3D printer. Click on the button and save the file on your computer to work, edit or customize your design. You can also find more 3D designs for printers on Wankel Fidget 608 bearing magnets remix.