Warhead Paint Handle
thingiverse
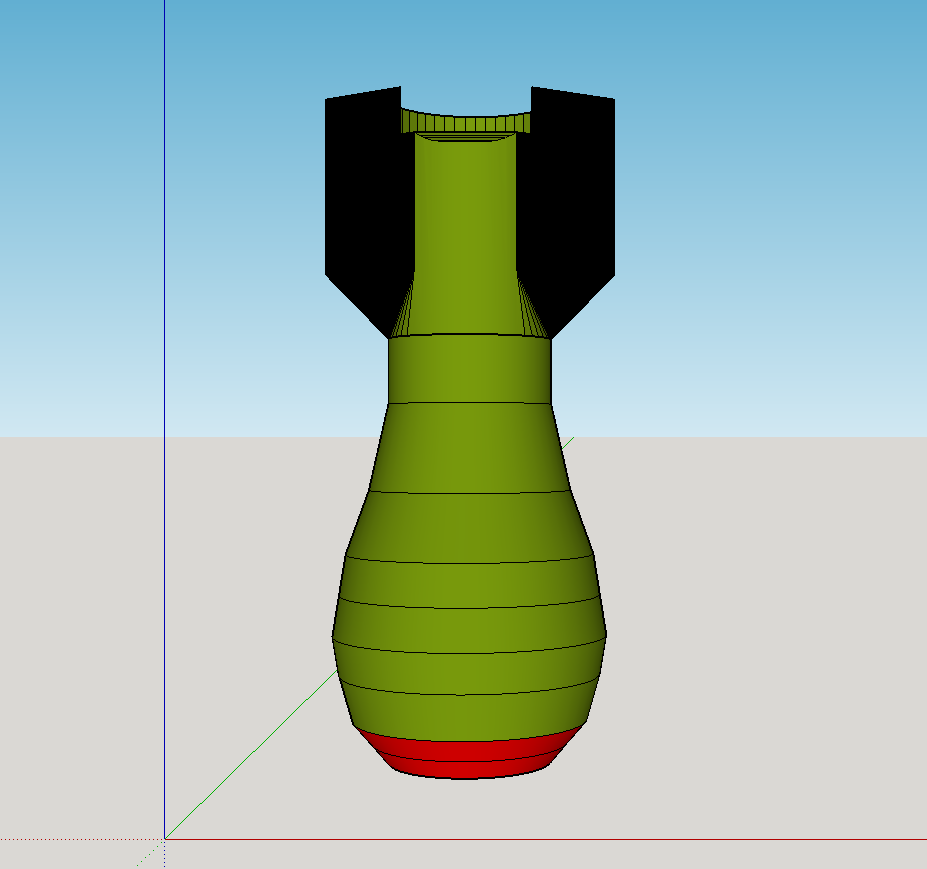
This is (yet another) painting handle. I didn't like any designs I had seen, so I made my own with the design guides in mind. - Primarily focused on 25mm bases - I paint primarily D&D minis which mostly fit on a 25mm base. However, the raised painting platform can support large models or models which have oddly shaped pudding bases. - Smooth rotation - I liked the idea of using bearings to provide a smooth rotating platform for painting. In my experience it is really helpful to have. You don't have to reposition your hand quite as much when changing orientation. - To facilitate this, the bases support a [8mm x 22mm x 7mm bearing](https://www.amazon.com/gp/product/B07TWZ7X38) which serves a double purpose: It provides a magnetic surface on the base as well as smooth rotation. - Interchangable bases - I tend to paint groups of minis, so being able to hot swap what I am working on was a must. The painting platform base has slots for 7 [3mm x 4mm rod magnets](http://www.omomagnets.com/index.php?controller=omoproduct&id_product=834). - One acts as an alignment point while the others hold the bearing. - You don't necessarily have to fill all the slots, even 4 (1 alignment + 3 surrounding) seems adequate. - Detailing ledge - I hadn't seen this on anything else, but I wanted to be able to brace my painting hand directly against the handle. This gives a lot of stability when doing detailed work. - Magnetic cradle - I added a slot for a magnet in the bottom which attaches to a magnetic cradle for added stability. The names comes from the overall profile of the design which looks somewhat like a WW2 bomb or warhead. I've included the Sketchup designs if you want to alter it. ## Instructions 1. Print the handle 2. Superglue in one magnet in the bottom, one magnet in the center of the painting stage and at least 3 more magnets around it. It's helpful to use a consistent magnetic orientation. 3. Print the cradle 4. Superglue a magnet into the cradle, make sure the orientation matches the bottom of the handle. 5. Print as many bases as you want 6. Install a bearing into each base. Depending on snugness you may want to super glue this. If you do, make sure to only glue the outside so it remains free moving. 7. Superglue in one magnet into each base, make sure the orientation matches the painting stage. 8. *(Optional)* If you want a really snug fit between the handle and the base, use a lighter to heat the bottom of the handle and the center of the cradle. Just enough that it starts to get slightly soft, but not enough that it gets liquified. Then push the two together, pulling apart and rotating before pushing back together. This ensures that the whole joint is snug and that the two don't begin to melt together. Repeat this until you're satisfied. Now you can bluetak or superglue your minis to the bases and mount them into the handle for painting. Use the lip in the handle to lift the base when you are ready to swap minis. You can also use a metal surface to store your minis while you paint.
With this file you will be able to print Warhead Paint Handle with your 3D printer. Click on the button and save the file on your computer to work, edit or customize your design. You can also find more 3D designs for printers on Warhead Paint Handle.
