Water Bottle Drip Irrigation System
thingiverse
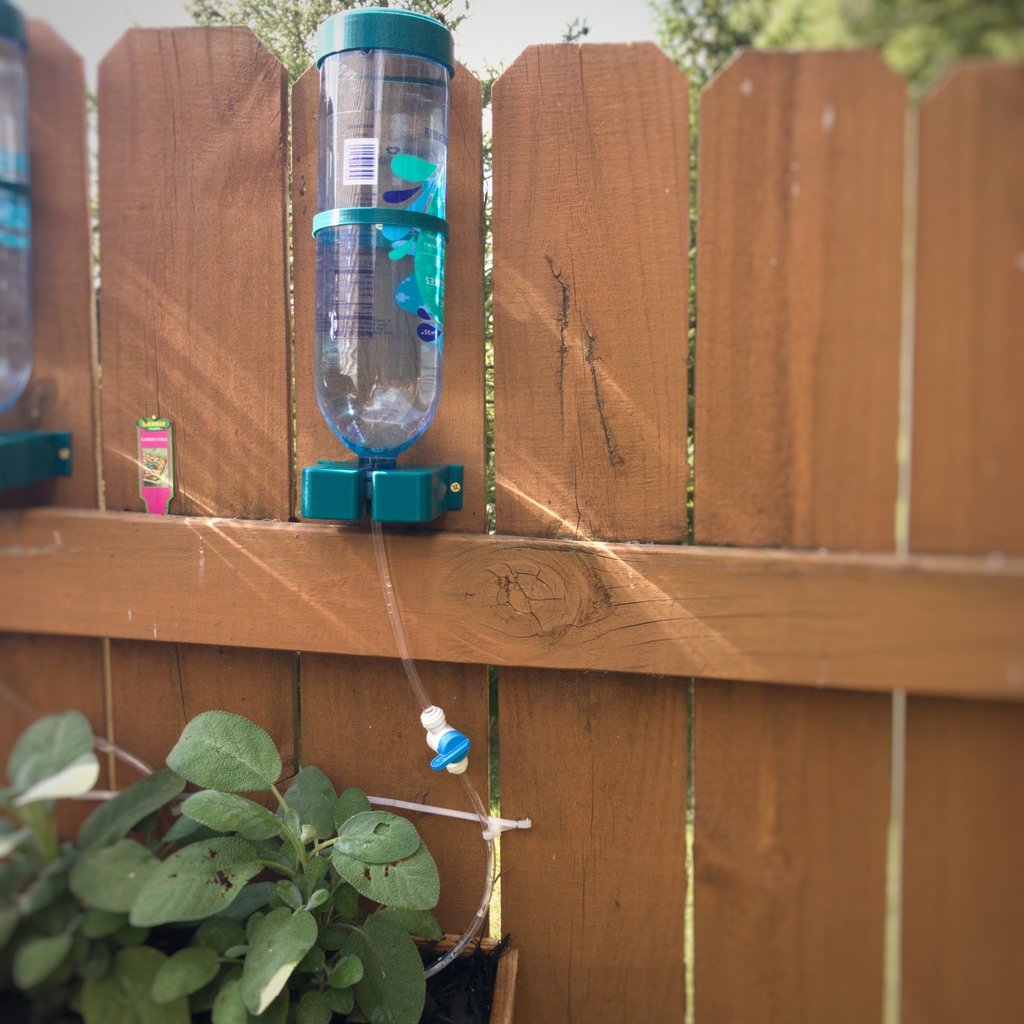
**Edit 7/4/2017**: Everyone here is super smart, so you probably already figured this out if you used it, but if you cut the tube in half (or cut it near-ish to the bottle), and place the valve where you cut, you can then run just the tube (which is much smaller than the valve) right up next to the plant's center, and even bury the bottom in soil/mulch! I've updated the first two pictures to reflect the way it should probably look. I was too lazy to change/reshoot/remove the other ones. OR...was I just giving you an opportunity to see my version history, or even choose to go back to a simpler time, when we all knew a little less than we do now? Who knows? If you secure the tube above and below the valve, you can even secure the valve, making it easier to turn on and off, maybe even one-handed? I think my next tweak will be a valve-holder. Spoiler-alert: it's probably going to look a heck of a lot like my light switch cover: https://www.thingiverse.com/thing:2295821 If you're in the U.S. and are into holidays, Happy Fourth of July! Otherwise, happy...well, I hope it's still the fourth of July wherever you are. ;) And if you're reading this on any other day? Celebrate anyway! **--End of Edits--** I like drinking alkaline water, and Trader Joe's has an inexpensive offering. I found the bottles piling up in the recycling bin (yay!) but then I asked myself: I wonder if I could reuse these bottles instead of throwing them in the recycling? This project is an on-going response to that question. To quote GlaDOS from the video game Portal: >Okay. Look. We both said a lot of things that you're going to regret. But I think we can put our differences behind us. For science. You monster. And science, we will! First, get a bottle that is very close to the bottle shown in the pictures. It should be a fairly standard 1.5L (50.7 fl oz - 1.59 qt) bottle, and you may be able to find this exact same bottle branded completely different somewhere else. I'm just going to go ahead and give you the important dimensions down in the "How to Assemble" directions below, but suffice it to say, Trader Joe's is awesome, and if you have these bottles, it'll work great! The way it works is this: You've got these rain barrels (you DO have rain barrels saving the water from your roof, right?) which fill up with water. With this system, you can use some of the overflow/excess water and pour it directly into the top (which is technically the bottom of the bottle, but the bottom faces up in this system!), where it is mechanically filtered a little through the sieve, and the holes you will have drilled in the top (bottom?) of the bottle. There's some 1/4" OD (outer diameter) tubing, which you can get at most home improvement stores, and the end of the tube will have a valve. Because water likes to go downhill, and enjoys taking a free gravity ride, try to place the water bottle as high up as you can, because pressure is caused by the vertical distance upward from your release point. A foot or two is fine. I just wanted to put my bottles just below the top of the fence line so they aren't visible from the other side. Sometimes water companies and homeowners' associations get weird about collecting rain water, and odd-looking contraptions affixed to your fences (respectively). The reason why I like this system (for now...I mean, I'm fickle, and always trying to improve things!) is that each plant gets its own reservoir of water. When I did a test install near the house, it rained, but not much got in the bottle. That's probably a combination of minimal surface area (roofs are huge, and convert about 90% of the water, bottle-bottoms are much much smaller), and how close to the house I was. So now that I have a few of these installed, I will see how a decent rain works. For now, I will happily fill all of the bottles just before it rains, that way I'm reducing stored water in my water barrels, which often overfill, and also filling my irrigation system. True, it's a manual process (for now), but it's also a good way to save water, and maximize total water stored. Right now, I have eight plants that I want to water separately. That's about 12 liters in this system (remember that each plant gets its own water reservoir), for a total of three gallons. That's three gallons I'm removing from my rain barrel before it starts to rain, so that's three extra gallons I'm storing. Once installed, it's as easy as turning on a little valve for a second, then turning it back off. Rinse and repeat with each valve, and your plants are all watered. According to a gardening buddy of mine, it's super efficient to water plants "at the root" rather than from above, because there are waterborne illnesses, and also, water droplets can act as little mini magnifying glasses on your plants, and just like when kids fry ants with a magnifying glass on the sidewalk, these little mini water lenses can also do damage. Eek! Of course, you can avoid this by watering your plants early morning, or after the sun has gone down, but with this system, the water is placed right where it needs to go. Also, because you aren't really watering the rest of the bed, it may help reduce weeds! Lastly, and this is a cool part. You can put a drop or two of your favorite fertilizer directly into the top, just before adding the water, and it will mix up automatically. Neat, eh? Things of note: * You'll notice there are six holes in the top (bottom?) of the bottle, and one in the side. The one in the side close to the top is VERY IMPORTANT, because this allows air to escape as water replaces the air inside the bottle. Without this air hole, you'll get a lot of blorping and bubbling and sadness. Make sure you put a hole there! * After you've drilled the holes, try to use thick grit sandpaper to remove the larger chunks of plastic that will inevitably stick to the bottle. You don't want anything impeding the water flow. * Things should be relatively tight when you go to screw the bottle top back on, because now you have a filter washer inside. It's okay that you only get the bottle secured about halfway. Don't cross-thread, or break the threads. It's not a big deal if you have a lot of bottles, and need to try again because you broke one, but I'm thinking just be careful. * I'm sure there are plenty of ways to improve this system. For example, the white "collar" doesn't really do anything, but I installed it anyway over the tube. I think in a real installation, that collar would go around the tube, and fit into a hole. Then, things get expanded with the metal piece that goes into the tube. * This system, as designed, uses 1/4" OD (Outer Diameter) tubing and valves and the like. It's not a high-pressure system. If you have a leak or a blow-out, you lose a maximum of 1.5L of rain water. Not a big deal. Figure out what went wrong, and re-work it. Plus, let me know, because maybe there's something we can work into the design of the next revision? You should be able to get all of these items inexpensively at any home improvement store like Home Depot, Lowe's or whatever. * You could most certainly affix the valve to the wall, and then run a drip tube directly to the plant's stem, where it just peeks above the surface. That's fine. Just remember that a full-open valve, at a foot or two above, will be empty in just a minute or two, so watch it. You probably could turn it on, wait a few seconds, and then turn it back off, and conserve water. Happy plant, happy water bill! * If you have a different size bottle, please let me know in the comments. If you run into any issues, please create an I Made One here on Thingiverse and share pictures and comments with me. Not only do I love Makes, but I also love helping people to get these things to work. * You can use any color you'd like to print. PLA is pretty good, but may melt in the sun? Who knows? ABS might be better if you want to have something that lasts longer, perhaps more durable? But I like PLA, I had a lot of green PLA, and decided that green is great for the garden. It's your garden: so pick the color that makes you happy. You could literally have a rainbow wall of these things, if you wanted to, and that would be pretty fantastic. If you do make a rainbow wall, please share pictures with me! I think that's about it. Here's a video of a raccoon playing the water harp: https://www.youtube.com/watch?v=-Z_D2IfpF3g
With this file you will be able to print Water Bottle Drip Irrigation System with your 3D printer. Click on the button and save the file on your computer to work, edit or customize your design. You can also find more 3D designs for printers on Water Bottle Drip Irrigation System.