Water Rocket and Launcher platform (Complete instructions)
prusaprinters
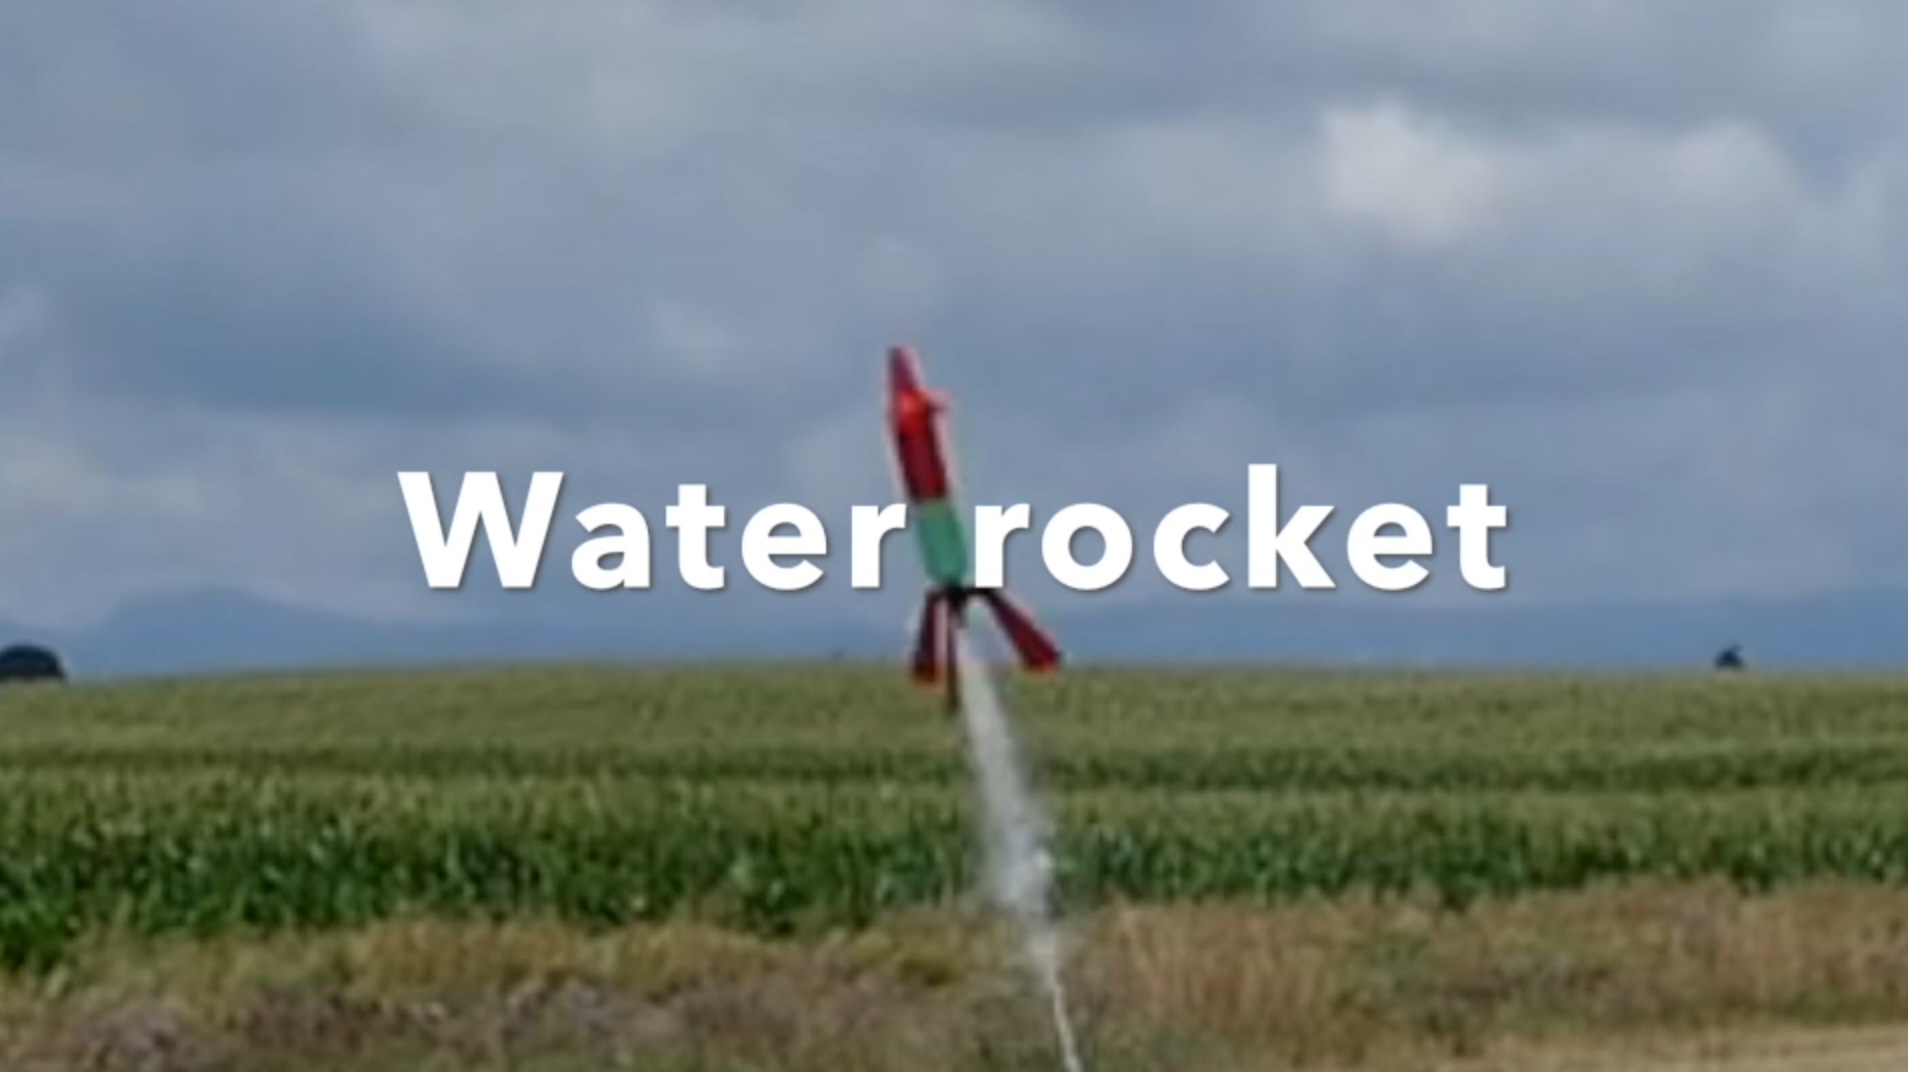
<figure class="media"><oembed url="https://youtu.be/JNP6PwhbNHg"></oembed></figure><p>Update 2021-01-31</p><p>As a small boy (a long time ago) I had a water rocket toy.<br>I decided to build one for my grandchildren. The base idea that the toy will be (relatively) safe so that young children can play with it. I do not have the ambition to set height records etc.</p><p>After looking around on Thingiverse and in the internet, I found designs based on the Gardena garden hose coupler.<br>My design is based on this Gardena coupling and on a 0.5 or 1.5 litre PET mineral water bottle.</p><p>The launcher is "universal" and can be used with different sized soda bottles.</p><p>The idea is the the air pressure pushes out water in the rocket so providing upward thrust.<br>The rocket is designed that it should stay vertically as much as possible, even at the top of the flight path, and fall down with the fins down (depending on the launch angle).<br>When falling down, the cone should come off and deploy the parachute.</p><p>So far this design is "works in progress".</p><p>If you build this, please keep me informed about your results and ideas.<br>I will update this post when I have results.</p><p>Update 2020-09-19.<br>Because the parachute deployment was not reliable, I added a "drone" parachute that should "pull out" the main parachute. I have added a picture showing the concept.<br>the "drone" parachute has a diameter of 25 cm.<br>I have not tested it yet will do so at a later point in time.</p><p>2021-01-31 This is the next instalment on this project.<br>The deployment of the parachute was not reliable. With these changes it should be better. It has not been tested yet. I will inform you about the results (probably during the summer).<br>The launcher has been proven to work well. So are the designs of the Nozzle and the fins.</p><blockquote><p>>>>>>>>>>>>>>>>>>>>>>>>>></p></blockquote><p>=================================================<br>What you need for the rocket:</p><p>Parts to buy:</p><p>1) A 500ml or a 1.5 liter PET mineral water bottle. I used the bottle from Valser carbonated mineral water with a diameter of 65 mm and one with a diameter of 88 mm. You have to scale the top and cone rocket parts to fit your bottle.<br>2) A garbage bag or plastic foil or kite nylon to cut out a parachute of approx 80 cm diameter. How to make the parachute you can find here: <a href="http://www.uswaterrockets.com/construction_&_tutorials/Parachute/tutorial.htm">http://www.uswaterrockets.com/construction_&_tutorials/Parachute/tutorial.htm</a><br>I also use a small drone parachute to get a better deployment.<br>3) Thin rope for the parachute Approx 6 meter.<br>4) The faucet counter part for the Gardena coupler<br>5) A rubber ring to seal the water bottle to the adapter.<br>6) Some silicone grease</p><p>Parts to Print:<br>1) The adapter. Print it with a wall thickness of 5 and top and bottom thickness of 4 layers. 0.1 mm resolution. 100% infill. Supports yes.<br>2) The fins. Select the smaller fin for a 0.5 l bottle and the bigger fin for a bigger bottle. Print it 3 times with 0.2 mm resolution 10% Infill and no supports because of tight tolerances you likely have to sand the parts a bit or print it with 0.1 resolution. Because these fins are printed flat, it is stronger.<br>3) The STL files of the top parts (not the coupler or fins) are designed for 100 mm outside diameter of the bottle. You have to scale it to your bottle diameter. so if the diameter of your bottle is 88mm scale all upper parts to 88%.<br>3a) The cone part of the Rocket. Print with 0.2 mm in vase mode.<br>3b) The Top part must be printed 3 times. layer 0.2 mm. Print it with a brim. Supports are not needed.<br>3c) The Bottom should be printed upright with 0.2mm. Support not needed.</p><p>Fort the launcher platform:</p><p>Parts to buy:<br>1) A Gardena garden hose coupler 0.5 inch<br>2) --deleted--<br>3) A few meters of pvc tubing approx 0.25 inch to be apple to pump the rocket at a safe distance. With a special Gardena coupler you can connect directly to 12od pvc tubing.<br>4) An air valve. I used a car type from an old bicycle tube (fitting in the 0.25 inch pvc tube)<br>5) Tube clamps for the tubing you use.<br>6) An 8 mm wooden rod for the trigger handle to be cut to size. (you can print them also. The .stl is provided)<br>7) 4 camping type thin ground pins (max thickness 5mm). To secure the launcher to the ground.<br>8) A piece of rope (max 3 mm thick) to release the rocket from a safe distance.<br>9) A M3 fastener and nut approx 10 mm. You have to cut it afterwards.</p><p>Parts to be printed:<br>1) The launcher. Print it with 0.3mm, 10% Infill and supports.<br>2) The clamping ring around the Gardena coupler. Print it 0.1mm 30% infill and with supports<br>3) The trigger ring. Print it with 0.1 mm, 30% infill and supports.<br>4) Optional the trigger rods (I used wooden pieces)<br>5) Optional tubing coupler depending on the sizes of tubing you used (1 type is here with .stl files. Print them 0.1 mm 100% Infill).</p><p>Assembly:</p><p>The rocket:<br>This is straight forward. It is advisable to (hot) glue the top part to the bottle. Before you install the top part, take the parachute lines through it and glue them with hot glue(!) to the bottle. Be careful not to damage the bottle, happily the bottom is normally the thickest part.<br>Also the cone was connected via to the bottom of the bottle.<br>Screw on the nozzle, with the fins installed and with the O-ring and other ring in place. Use a bit of silicone grease on the nozzle.<br>Connect the cone with a line to the bottom of the bottle or alternatively to the middle of the parachute or drone parachute.<br>Make a neat package of the main parachute in the top part.<br>Put the drone parachute loosely on the main parachute pac.<br>Put the cone so on the top part that it sits straight and can come off easily.</p><p>The launcher:<br>Put the short piece of the 0.5 inch tube in the Gardena coupler.<br>Mount the clamp ring on the Gardena coupler (roughly at the bottom of the orange ring).<br>Put the Gardena coupler in the launcher.<br>Put the trigger ring on top of the clamp ring around the Gardena launcher and push the trigger rods in from the side.<br>Bring the 0.5 inch tube out to the side or connect the smaller tube inside the launcher to the 0.5 inch tube.<br>Put the air valve in the 0.25 tubing.<br>Clamp all tubing connections.<br>Check if the whole system is air tight.<br>Of course you have to adapt these instructions depending on the tubing materials you found.</p><p>Operation:</p><p>This is works in progress, Deployment of the parachute is not tested yet. Please give me feedback with your results</p><p>Insure the the launching area is free. Not close to power lines, rail- and other roads or buildings.<br>Put some water in the rocket approx ⅓ ( 2 dl for a 0.5 l bottle).<br>Place it on the launcher<br>Pin the launcher to the ground with the tent pins.<br>Lay out the small tube and the launching rope.<br>Connect a bicycle pump to the valve.<br>Make sure that no-one is close to the rocket when you start pumping.<br>I did not go over 60 PSI in my tests yet, be careful. I am not liable for any accidents.<br>Before you launch make sure that no one is close (You might get wet... or worse)<br>The bottle can explode so never use any metal parts on the rocket!</p><p>Calculated/simulated height at apogee is approx. 12 meters with pressure 40 PSI (see graphs from <a href="https://cjh.polyplex.org/rockets/simulation/">https://cjh.polyplex.org/rockets/simulation/</a> )</p><p>Please post your results.</p><h3>Print instructions</h3><p>See above in the main description.</p>
With this file you will be able to print Water Rocket and Launcher platform (Complete instructions) with your 3D printer. Click on the button and save the file on your computer to work, edit or customize your design. You can also find more 3D designs for printers on Water Rocket and Launcher platform (Complete instructions).