Waterwheel Clock
prusaprinters
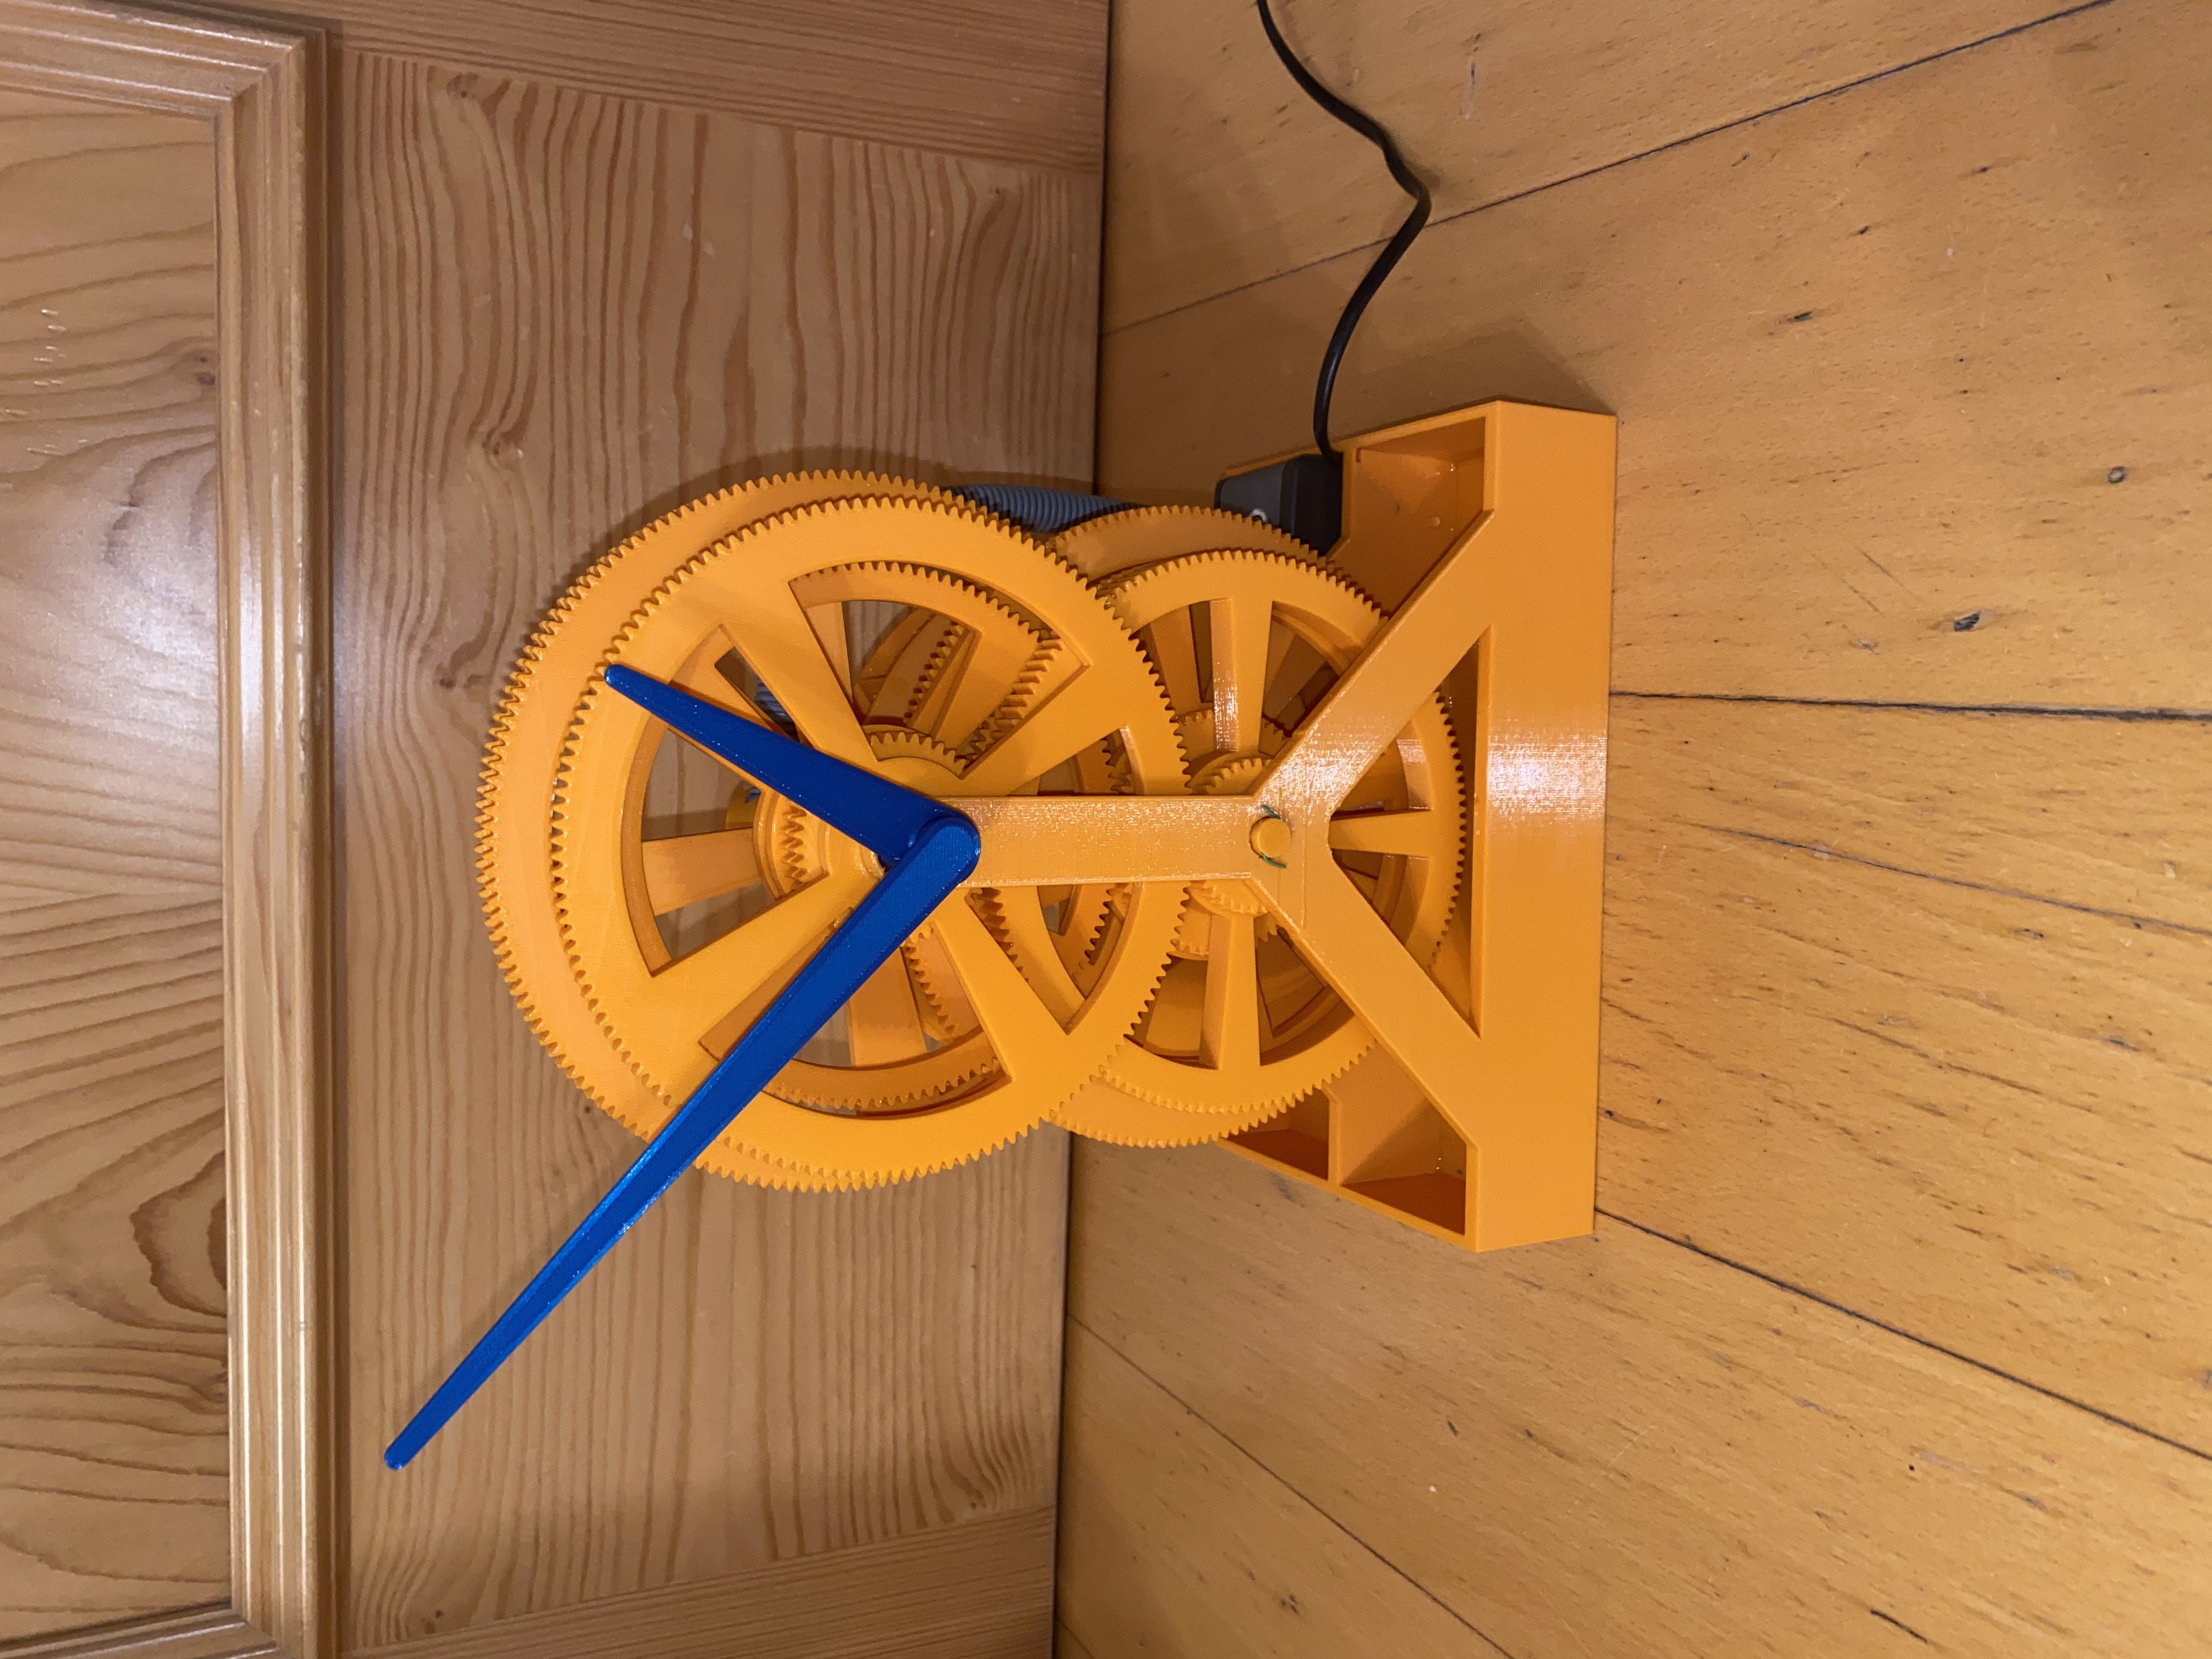
<p><strong>Disclaimer</strong></p><p>As this is my first big 3d printing project my gcode files can surely be improved. If you have a lot of experience please consider slicing yourself. The included gcodes work fine but sometimes you need to sand a part so it can rotate freely.</p><p> </p><p><strong>Assembly</strong></p><p>For the assembly you need a indoor fountain pump (one with adjustable pump rate is perfect, mine is adjustable between 2 and 5 litres/min and is set to half), a short pipe, a tub of superglue, a few paperclips and of course the printed parts.</p><p>Print out all parts, mark the gears with their numbers. The finished clock will look better if the hands are printed in a different color. Gear 2 and 3 should be the same size. Remove support material.</p><p>Start with inserting the waterwheel into the base part, it will require some bending of the support structures. Now start inserting the wheels between the two supports. Its easiest if you do the lower axle first and then start the top one. The gears should be oriented with the smaller side always facing the back. </p><p>The order is the same as the gears are numbered, take note that odd numbers are on the lower axle and even numbers are on the top. So for the lower axle its gear 1, 3, 5 and 7. Gear 1 needs to be glued to the waterwheel be fast, as you need to push the axle all the way through the second support once all gears are assembled (i will try to reprint gear 1 and the waterwheel with a hole in them to use a paperclip to, you can also drill it if you don't want to mess with the glue).</p><p>Now put in the top gears and push the axle forward as you put new gears in. Pay attention you need to start with the spacer and continue with gear 2, 4, 6, 8.1 (small single gear), 8.2 (big single gear).</p><p>Push in the hands, first the hour hand then the minute hand, they should be difficult to slide so there is no need to secure them with super glue. Make sure they are in the 12:00 position otherwise your clock will be inaccurate. To secure the lower axle put a bend open paperclip through the hole in the back. </p><p>To finish the assembly insert the pump in the deepening and secure the cable with a zip-tie if you feel the need. Insert a pipe in the hole at the top axle and connect it to your pump, if your pump is not adjustable use a soft pipe so you can tighten it with a paperclip to control the flow rate. <strong>DONE</strong></p><p> </p><p><strong>Calibration</strong></p><p>Mark your waterwheel with some tape to count the rotations. Fill the front sluice with water and switch on your pump. Now adjust the flow rate so that 10 rotations equal 8 seconds. This doesn't need to be perfect. Now turn off the pump and turn the wheel manually counterclockwise until the clock is back in the 12:00 position. Now switch the pump on and wait for one hour. Now look at your clock if it overshot 13:00 reduce the waterflow. If it undershot 13:00 increase the waterflow. Repeat the procedure until you got it right. You don't need to return it always to the 12:00 position just make sure the minute hand is facing straight up.</p><p> </p><p>If you have any other questions feel free to message me. Have fun printing!</p>
With this file you will be able to print Waterwheel Clock with your 3D printer. Click on the button and save the file on your computer to work, edit or customize your design. You can also find more 3D designs for printers on Waterwheel Clock.