Waveshare Game Hat Case Simple Design
thingiverse
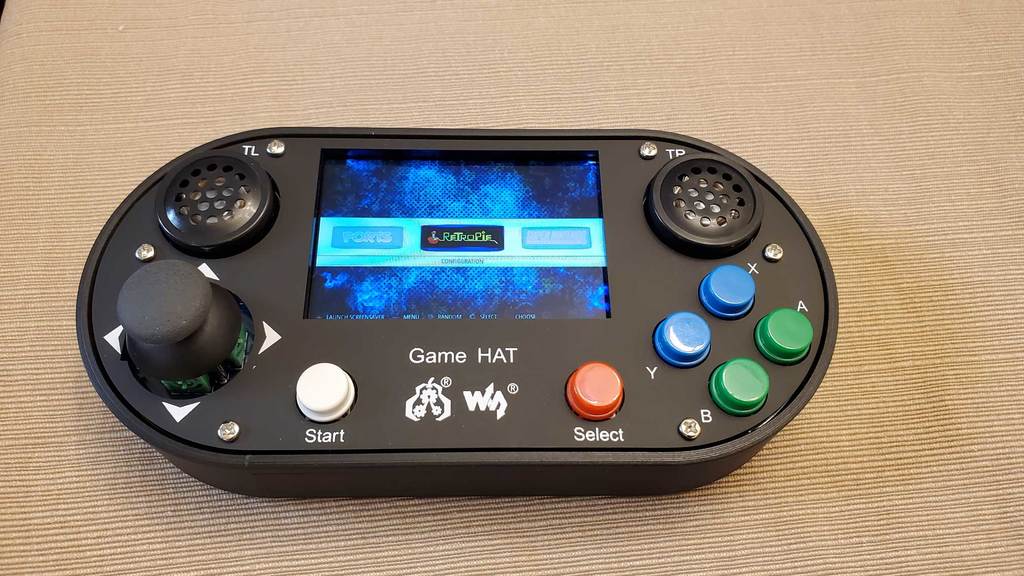
Inspired by https://www.thingiverse.com/thing:3484878 and similar cases. Designed from scratch in order to provide a simple but accurate case for the Game Hat that uses the original face plate and shoulder buttons. 3mm thick walls and base provide a rigid case to protect your unit. The original face plate provides a more refined look. Use 4 layer wall thickness in order to have solid 3mm side walls. The right side 4 button strip is optional. If you choose not to use this strip you can still use a pinky finger to depress these buttons through the holes in the case. USE CAUTION! Remove shoulder buttons and front and back plates to install Game Hat unit into case. The side 4 button strip should be pre-arced to match the radius of the slot it fits into. You do not want this strip projecting into the case when you insert your Game Hat unit! Insert the Game Hat, shoulder button side first, into the case. Be careful to align unit power button to printed power button and ensure that the 4 button side strip is recessed and not bumping the right side buttons as you seat the unit. Do not force things as you can easily break buttons off the Game Hat unit! The case can be turned up on end and slightly backward to better ensure the printed buttons stay out of the way during installation. Mine came out great and functions well.
With this file you will be able to print Waveshare Game Hat Case Simple Design with your 3D printer. Click on the button and save the file on your computer to work, edit or customize your design. You can also find more 3D designs for printers on Waveshare Game Hat Case Simple Design.