Weather Vane Spinner Project
thingiverse
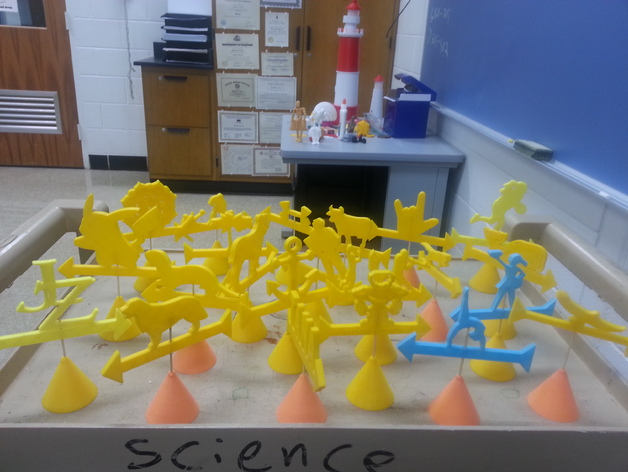
https://youtu.be/XEXLeQUbBTU This is a 6th grade project done in connection with a unit on weather. The students will design and print a spinning weather vane. The aim of the activity is for the students to become more proficient in 3D design using Tinkecad. Building weather tools is really more of an elementary science activity so this could work well for grades younger than 6. Skills / Tools emphasized in this lesson Using the shift key to resize without changing the proportions Rotating shapes Using the Adjust - Align tool to center objects The project uses 4" bamboo skewers from the grocery store as the shaft of the spinner. They fit nicely into a 4 mm socket. If you use different size skewers you may have to adjust the size of the socket. Standards NGSS Overview and Background Students will use Tinkercad to design a spinning weather vane. Lesson Plan and Activity Base - these are all the same, so you can print them ahead of time Drag a cone onto the workplane Enlarge so the base is 50 mm in diameter (if you use the shift key you can keep the base round). Drag a cylinder onto the workplane and make it a Hole Resize so the diameter of the cylinder is 4 mm and it is taller than the cone Select the cone and cylinder and use the Adjust -> Align tool to center the cylinder on the cone. Lift the cylinder 2 mm off the workplane so the hole doesn't go all the way through the cone Arrow Drag a box onto the workplane and resize to be 100 mm long (x), 10 mm wide (y), 6 mm high (z-direction). Drag a roof onto the workplane and rotate it to point to the right Resize the roof to be an isosceles triangle 16 mm long (x), 32 mm wide (Y), and 6 mm high (z) Check that the roof is on the workplane, lift it up if it's not. Duplicate the roof Move one triangular roof piece to the front of the arrow and the other to the back of the arrow. Group the box and roof pieces to complete the arrow Atop the Arrow Students can customize their weather vane by adding a design of their choice atop the arrow. This can be done by using shapes and letters from Tinkercad, or by importing a silhouette in SVG format. The objects added should be flat and 6mm in height (z) to match the size of the arrow. They should be aligned so the center of mass will be above the center of the arrow so the arrow is not front or back heavy. Add Socket to Arrow Drag a cylinder onto the work plane. Make it a hole Resize so the diameter is 4 mm and length is 40 mm Rotate the cylinder so it is parallel to the work plane along the y-axis, perpendicular to the arrow Use the Adjust - Align tool to center the cylinder on the arrow, it should be centered in the x, y, and z direction. The cylinder should extend a hole up through the bottom of the arrow and into the shape above. Make sure it doesn't go all the way through. A hole about 35 mm long will work well. Much longer and the spinner will be touching the base, too short and it won't be stable. Materials Needed Some 4" bamboo skewers from the supermarket. You can find them in various sizes, just check the fit before doing the project with the students.
With this file you will be able to print Weather Vane Spinner Project with your 3D printer. Click on the button and save the file on your computer to work, edit or customize your design. You can also find more 3D designs for printers on Weather Vane Spinner Project.
