Wer Iz Mi Mount (Bicycle Tracker Harness)
prusaprinters
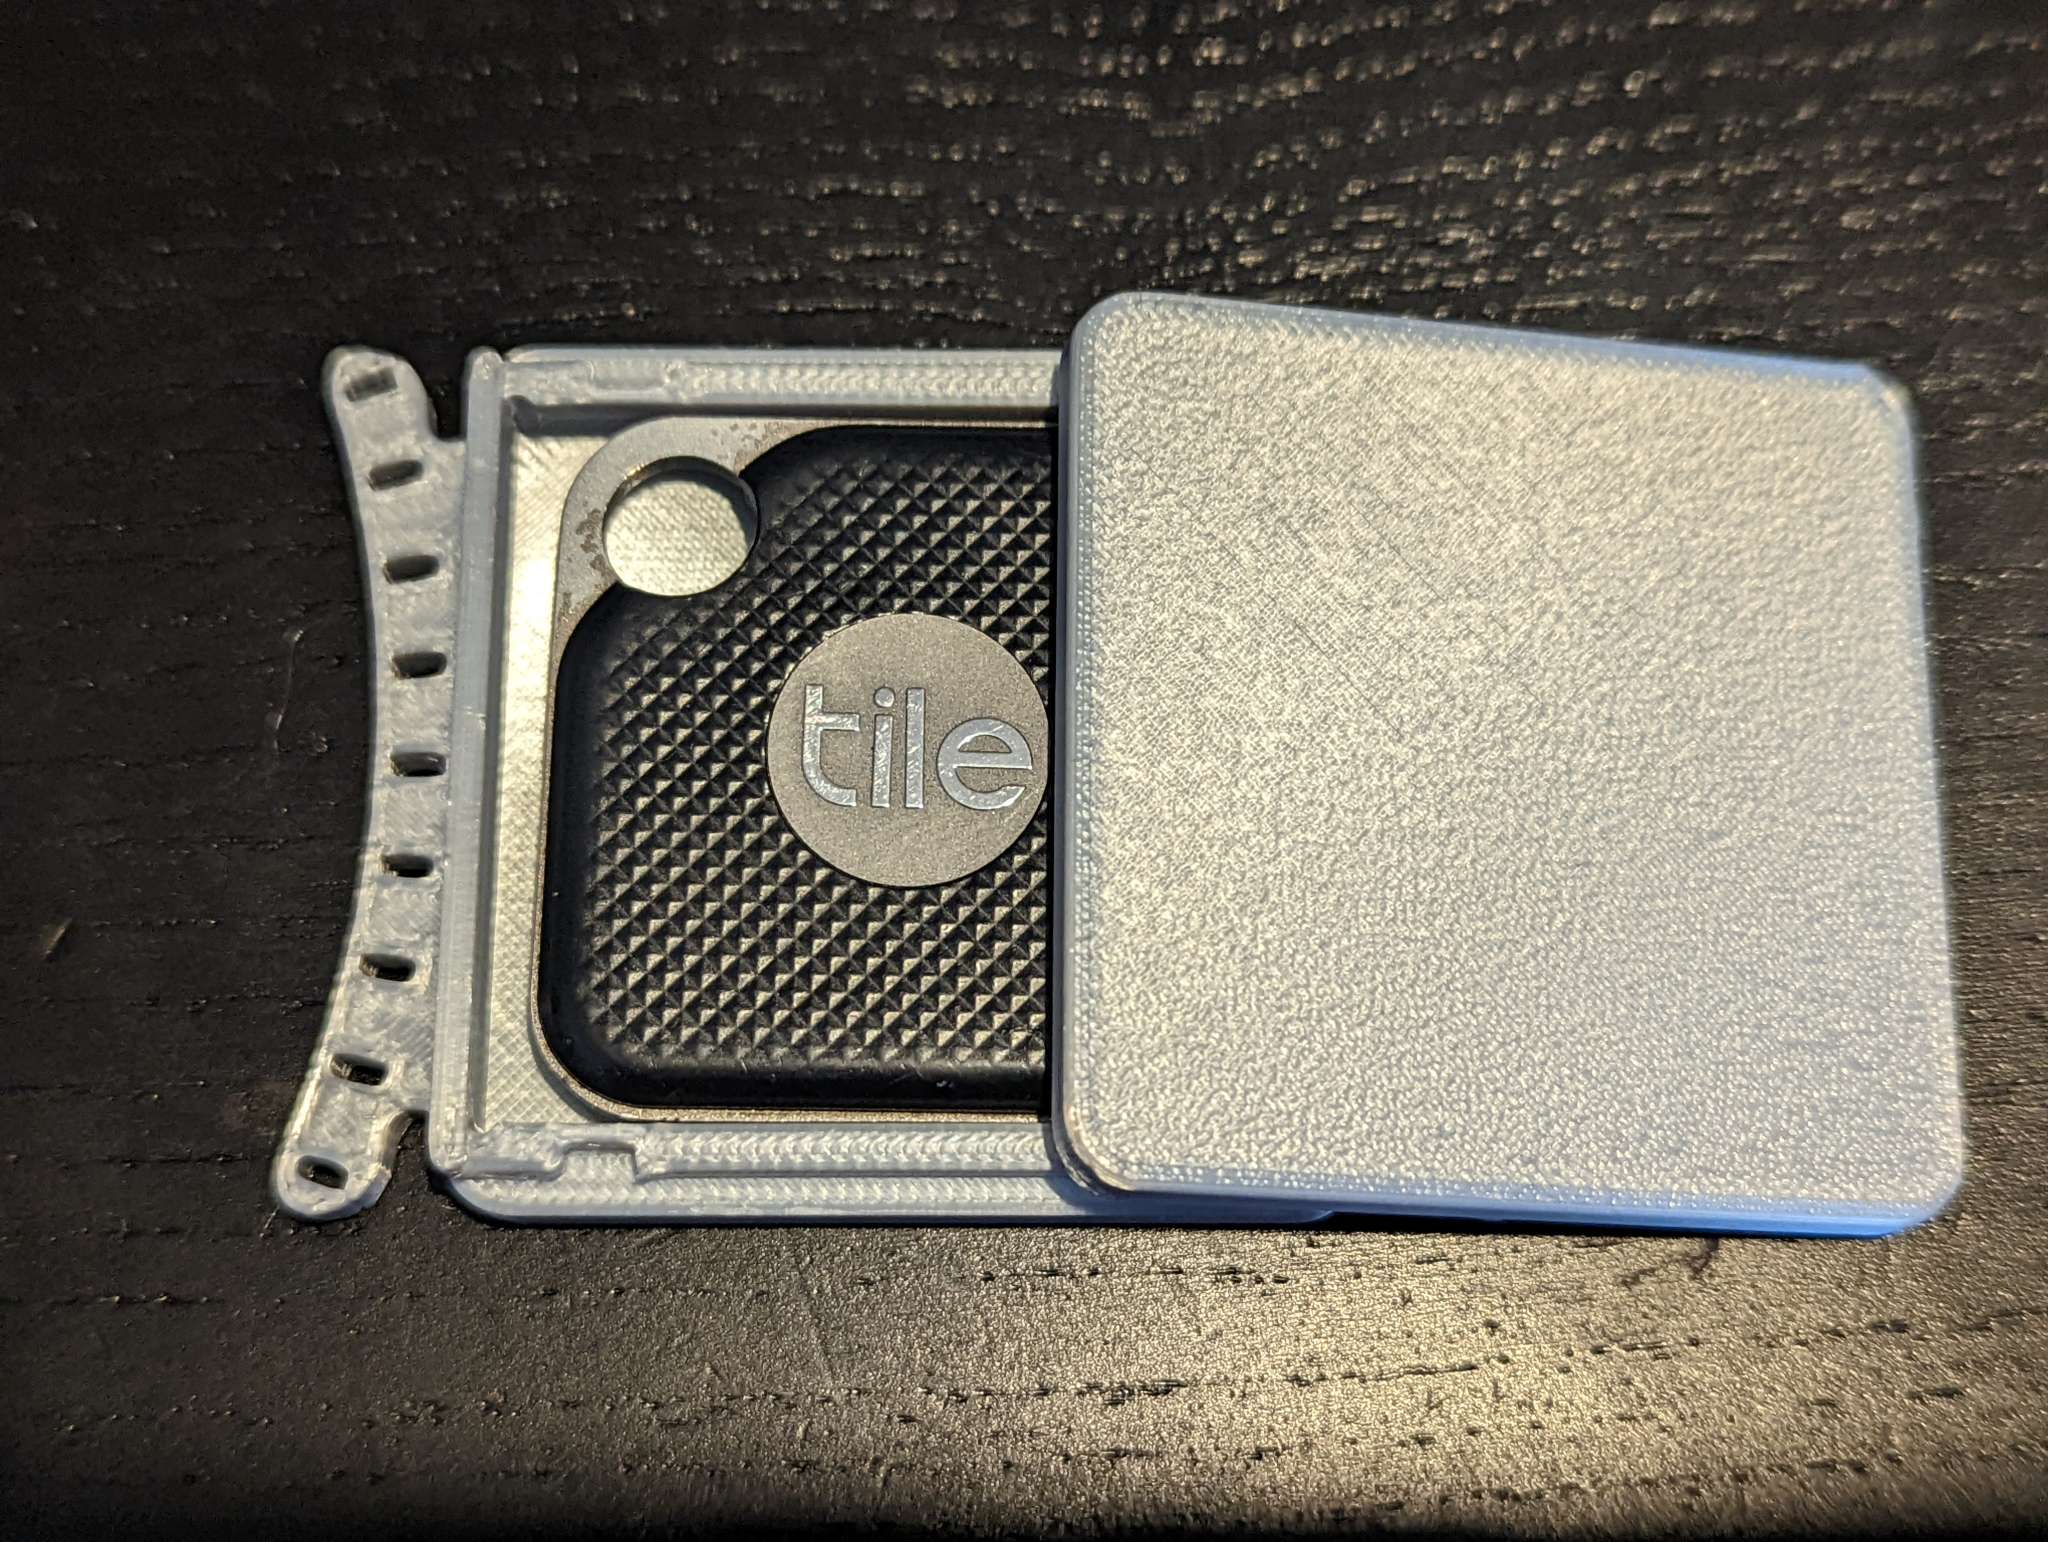
<h3>Wer Iz Mi Mount</h3><p>A<a href="https://www.thetileapp.com"> Tile bluetooth tracker</a> mounting harness for all bicycles. It is designed to fit under the core mounting assembly of the saddle, which is pretty much guaranteed to bring the cables in a proximity that it can attach to.</p><p>Because of the open case design the user can fit any tracker including <a href="https://www.apple.com/uk/airtag/">Airtags </a>and <a href=" https://chipolo.net/en-us/">Chipolo</a>. If a custon print is needed to stabilize third party trackers, the inside volume of the design is 47x43x5.7mm +-2% tolerances.</p><p>The design is loosely fitted so it can accomodate most tracker types (2022 are a bit bigger than 2022). It also made to be thin enough so the button can be accessed if needed.</p><p>Last but not least it is another proof of concept of my design for <strong>bubble supports</strong> which work exceptionally well, with lower fillament cost and easier cleanup compared to any traditional supports the slicers will try to place. </p><h3>Features</h3><ul><li>Prints in 57-59 minutes</li><li>No supports required</li><li>Minimal post processing</li><li>Fits most tile Mate and Pro Designs (up to 2022)</li><li>Easy to open and close</li><li>Versatile design with varried angle slots for mounting it in different bike types.</li><li>Thin and flexible top cover so the button can be pressed even when sealed.</li></ul><h3>Hardware Required</h3><p>Four <strong>2x1mm Cable Ties</strong></p><p> </p><figure class="image image_resized" style="width:50%;"><img src="https://media.prusaprinters.org/media/prints/89827/rich_content/c8443b00-ed02-43ee-850f-144110abf593/cabletie.jpg#%7B%22uuid%22%3A%22cda0b6cc-2da0-490e-8325-58504269994b%22%2C%22w%22%3A1020%2C%22h%22%3A570%7D"></figure><p>Let Me Google That For You Lnk: https://lmgtfy.app/?q=cable+tie+%20buy+</p><h3>Assembly</h3><p>After printing use an exacto knife or any sort of precision tool( small screwdriver, to pry the bubble supports off the 4 slots in the Lid and the Base. Fitting the tool between the wall and the support will greatly help in doing so. </p><figure class="image image_resized" style="width:50%;"><img src="https://media.prusaprinters.org/media/prints/89827/rich_content/7bff238f-88b3-4bdb-af99-2eef8c89d41b/supports2.jpg#%7B%22uuid%22%3A%22a76dd731-813e-44eb-a719-e11d6b34f57f%22%2C%22w%22%3A2048%2C%22h%22%3A1542%7D"></figure><p>Make certain to clean up any spare plastic since that is the heart of the locking mechanism.</p><p>Place the tile inside the case.</p><figure class="image image_resized" style="width:50%;"><img src="https://media.prusaprinters.org/media/prints/89827/rich_content/7ededfad-142a-4ab1-8144-81cf872f2341/cover2.jpg#%7B%22uuid%22%3A%221053995e-760b-46fc-a3e4-c05ed72bef2a%22%2C%22w%22%3A2048%2C%22h%22%3A1542%7D"></figure><p>Gently close the lid, by sliding the feet inside the slot. It should be a bit offset as shown in the picture. </p><figure class="image image-style-align-center image_resized" style="width:50%;"><img src="https://media.prusaprinters.org/media/prints/89827/rich_content/aca793b0-f646-4166-99c0-4441e8659025/offset.jpg#%7B%22uuid%22%3A%2269792489-e81d-4c8d-9f52-70790579d282%22%2C%22w%22%3A2048%2C%22h%22%3A1542%7D"></figure><p>Slide in the direction of the arrow, to align the base and the lid, sealing the case. </p><figure class="image image_resized" style="width:50%;"><img src="https://media.prusaprinters.org/media/prints/89827/rich_content/672a88e0-f3ff-4371-b0b9-bdf7b8fa5b2a/slide_on.jpg#%7B%22uuid%22%3A%2261aa0ebb-9c06-483a-888c-770dfa9b4764%22%2C%22w%22%3A2048%2C%22h%22%3A1542%7D"></figure><p> </p><p>In some cases with smaller tiles, and because the top is thin and flexible, you may need to use a knife to keep the edge over the lip.</p><figure class="image image_resized" style="width:50%;"><img src="https://media.prusaprinters.org/media/prints/89827/rich_content/4f6dcaa9-1ed8-45ad-bc55-9c348c526fbd/slide_raised.jpg#%7B%22uuid%22%3A%223e01e087-ffdd-480c-8a1f-09c2ba627ab8%22%2C%22w%22%3A2048%2C%22h%22%3A1542%7D"></figure><h3>Installation</h3><p>To install on the bicycle, remove the Saddle and flip it over. </p><p>Figure the slots that fit your saddle's design and thread the cable ties</p><p> </p><figure class="image image_resized" style="width:50%;"><img src="https://media.prusaprinters.org/media/prints/89827/rich_content/795245be-5a93-4c2d-8575-cb3609492aac/zipties.jpg#%7B%22uuid%22%3A%2200a79b17-47ca-4ca5-8ede-c138a814482b%22%2C%22w%22%3A2048%2C%22h%22%3A1542%7D"></figure><p> </p><p><strong>Please note the orientation</strong>. While it is possible to install it either direction, I recommend doing as shown, since it will protect the lid by pulling it towards the metal frame.</p><p>Fix the tracking mount on the saddle, by gently pulling each cable tie until it is balanced.</p><figure class="image image_resized" style="width:75%;"><img src="https://media.prusaprinters.org/media/prints/89827/rich_content/15276594-1b77-4abc-a752-75aece401e2f/mounta.jpg#%7B%22uuid%22%3A%22510c5825-c46e-4f5f-b2ab-5e08404db048%22%2C%22w%22%3A2048%2C%22h%22%3A1542%7D"></figure><p> </p><p><strong>Enjoy your new trackable mount!!!</strong></p>
With this file you will be able to print Wer Iz Mi Mount (Bicycle Tracker Harness) with your 3D printer. Click on the button and save the file on your computer to work, edit or customize your design. You can also find more 3D designs for printers on Wer Iz Mi Mount (Bicycle Tracker Harness).