WiFi-Connected Panic Button Parts
prusaprinters
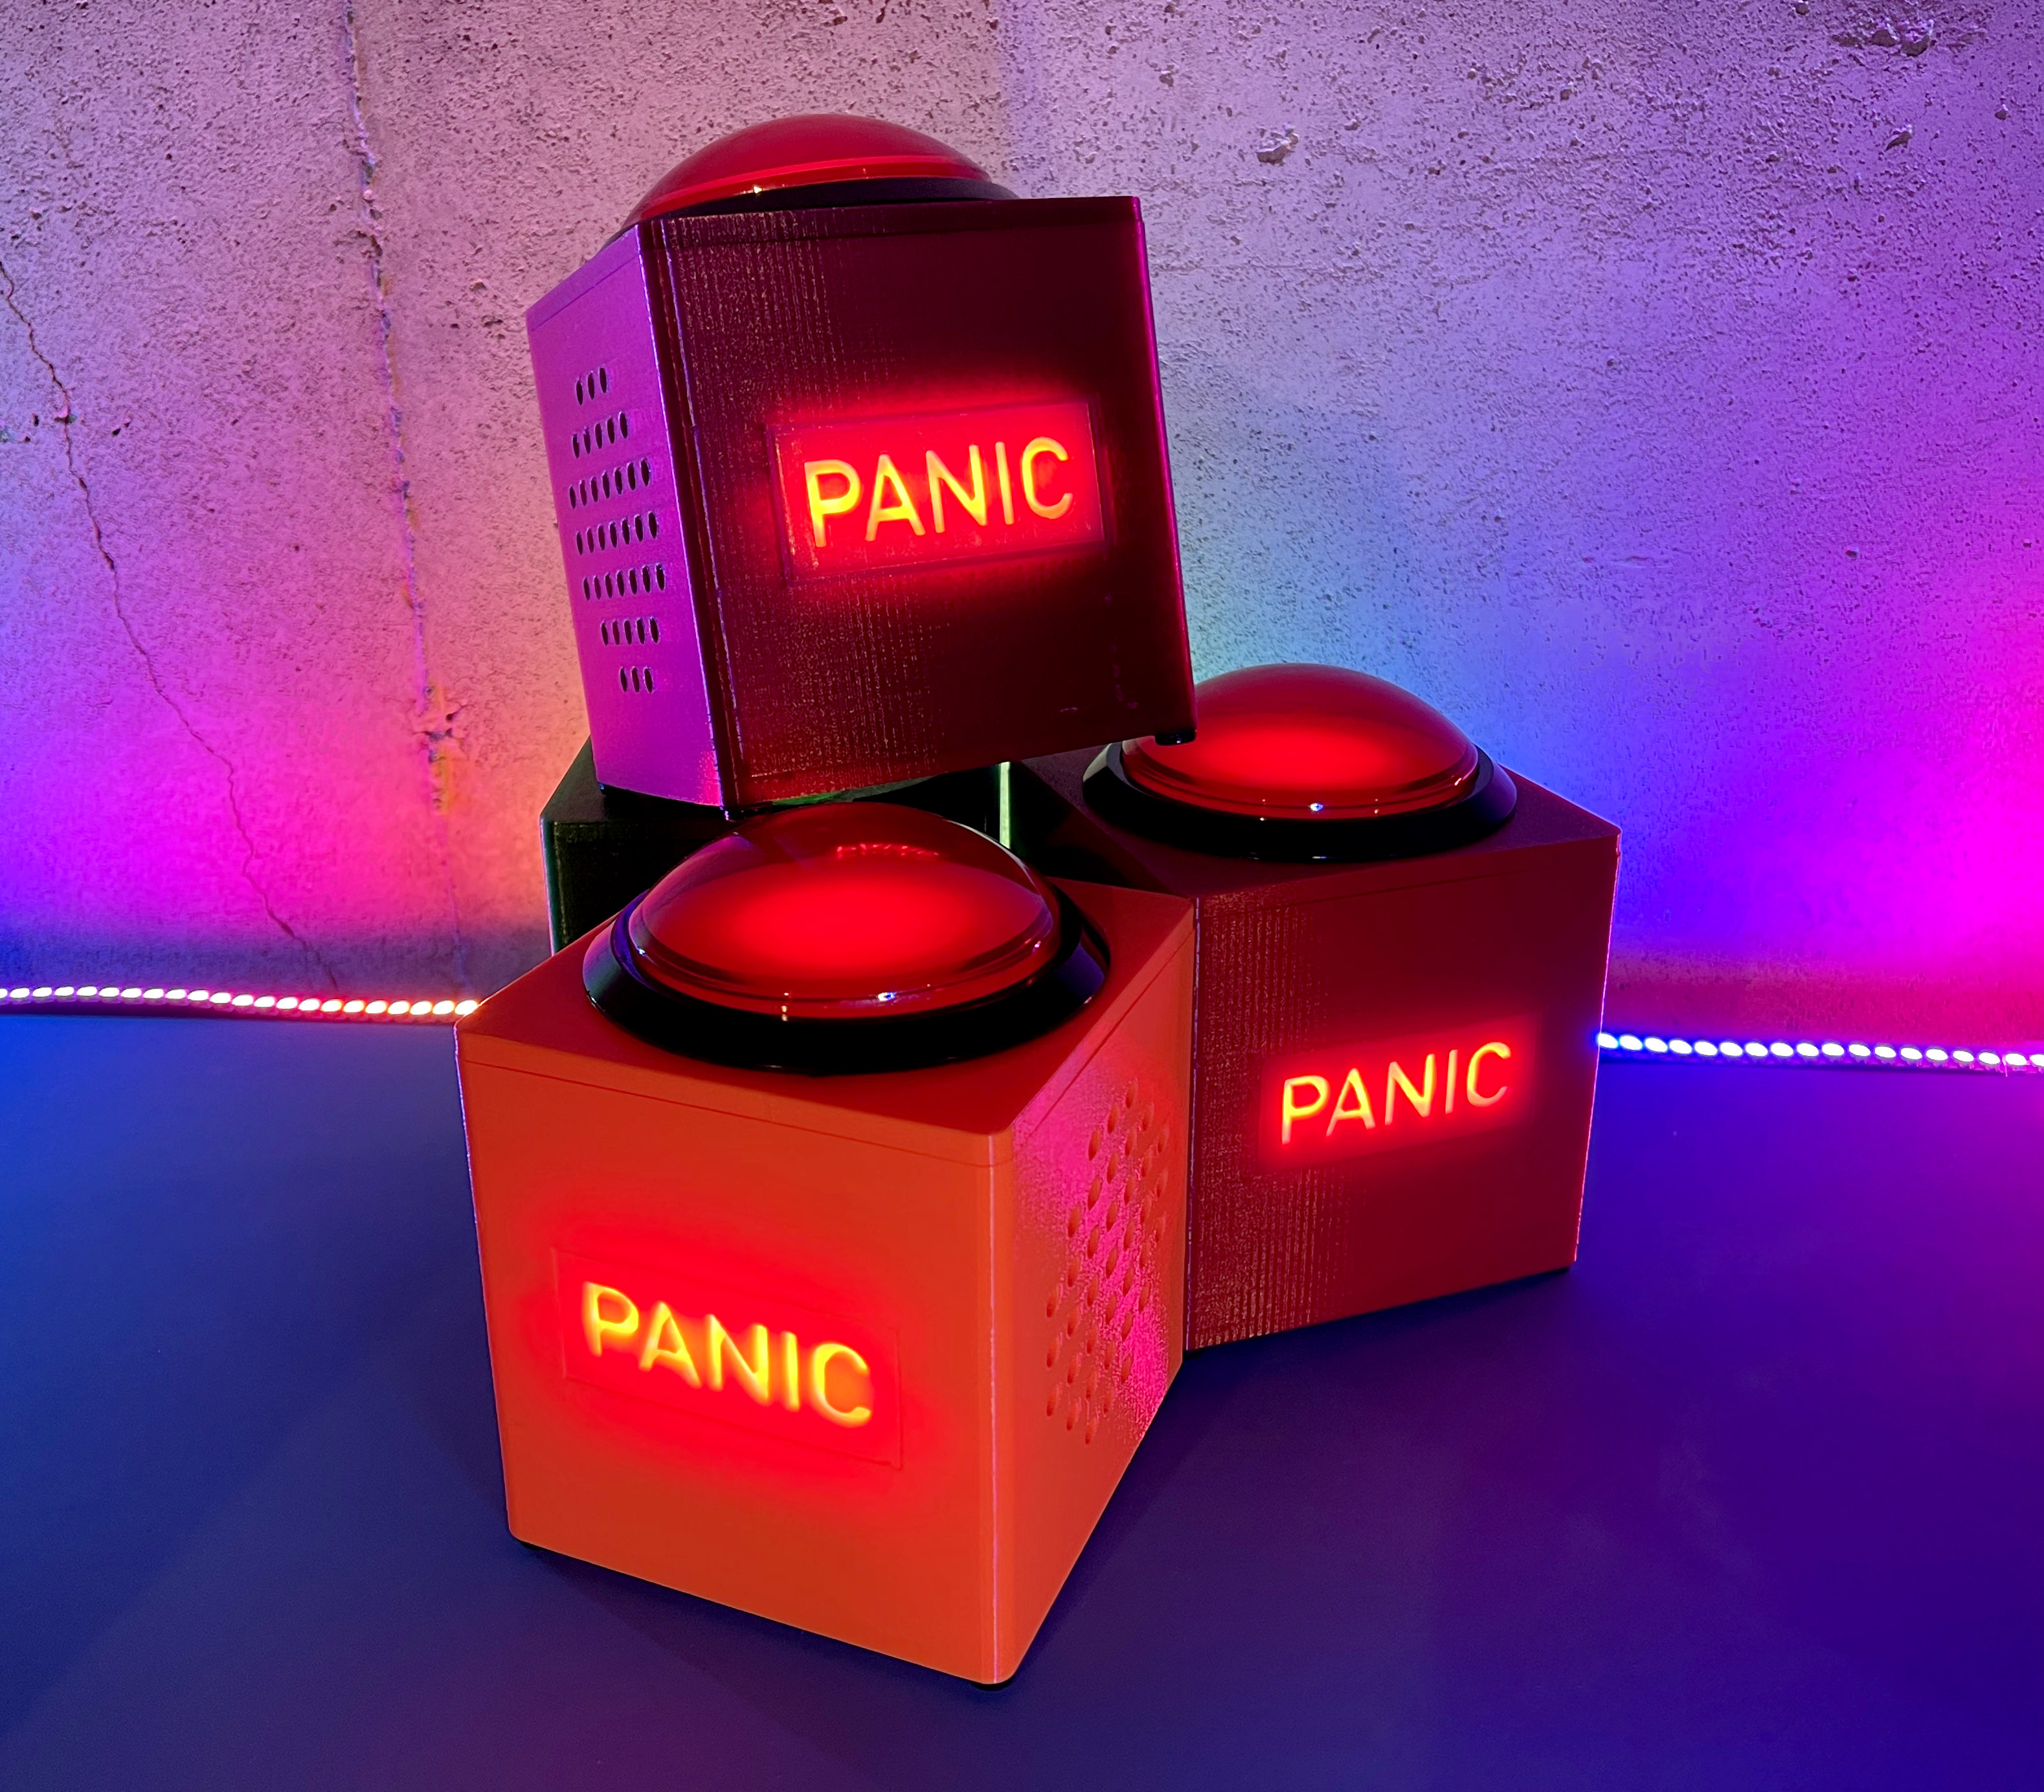
<h4>These are the 3D models required to build my email-sending, talking panic button. Full backstory available here and build instructions (including a list of required materials) can be found here.</h4><p>I've printed all of these parts in PETG and had reasonable success. The corners of the large parts tend to want to curl up so make sure your first layer is dialed in and your bed is clean. You will also need to flip the top half of the core in your slicer so it prints upside down.</p><p>Supports are necessary as follows:</p><ul><li>Core (both halves): <strong>support on</strong> <strong>buildplate only</strong></li><li>Shell: <strong>support everywhere</strong> (I've used paint-on supports to ensure only the bottom screw holes and the lithophane window get support material; the speaker grills should not need support).</li></ul><p>Additionally, I've found it helpful to set a solid infill threshold of about 35 sq. mm when printing the core halves to ensure that the mounting tabs are nice and solid. </p><p>For the lithophane, I like to set a filament change point one or two layers before the “shoulder”, using white for the base layers and the shell color for the top layers. This gives the text some good contrast both while backlit as well as not. Enabling ironing has also produced nice results for me when printing these.</p>
With this file you will be able to print WiFi-Connected Panic Button Parts with your 3D printer. Click on the button and save the file on your computer to work, edit or customize your design. You can also find more 3D designs for printers on WiFi-Connected Panic Button Parts.