Wifi controlled 160mm fan valve
thingiverse
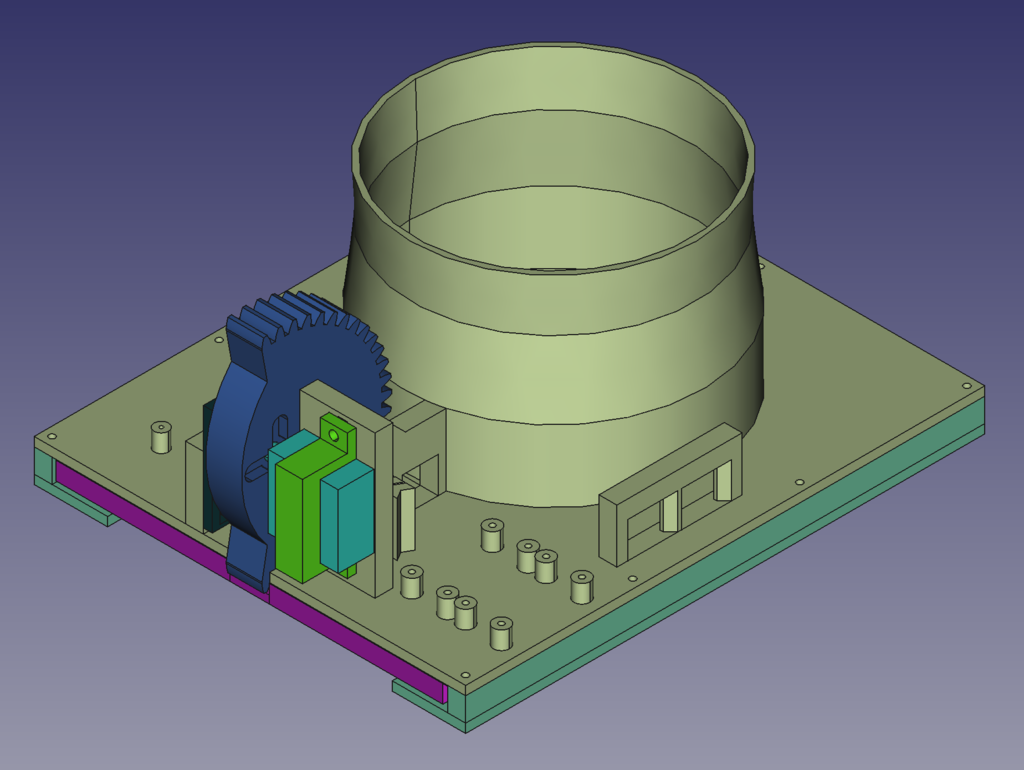
This is a wifi controlled switch and valve for the Helios RR 160C Centrifugal Inline Metal Fan. Check this video to see it in action: https://www.youtube.com/watch?v=deTICK_Bh04 Parts you need ------------------ - Printer with min 28x28cm print area - 1x Helios RR 160C Centrifugal Inline Metal Fan - 1x bearing 5x9x3mm. I used this here: https://de.banggood.com/Remo-B5509-Ball-Bearings-593mm-For-1621-1625-1631-1635-1651-1655-RC-Vehicle-Models-p-1450586.html - 9x M3 30mm screws and nuts to conetc top and bottom trays - otionally: 9x M3 0.5mm washers to put between top and bottom trays. I needed to add them for the tray to move freely because my printer is not very precise. - 4x M5 25mm screws and nuts to attach servo and sprocket to the top tray - 8x short M3 screws to attach relays - 4x short screws (M3 max) to attach valve to the fan - 4x short m2 screw to attach ESP32 - self adheasing sealing tape 12x3mm to seal the plate. I used this one: https://www.amazon.de/gp/product/B06XCK65QM/ - 1x ESP32 Dev board. I used this one: https://www.makershop.de/plattformen/nodemcu/esp32-board-stiftleisten/ - 2x Relays I used this types: https://www.amazon.de/dp/B07GRW83FR - sand paper to smooth out moving parts - optional: 1mm drill to strenghten the sprocket axle: I drilled it into the center of sprocket and cut it off (see photo) - Tower Pro MG996R Digital Servo 180° version. First i used a cheap clone which had not enough power and destroyed its gear, then I got the real one from here: https://www.roboter-bausatz.de/p/tower-pro-mg996r-digitaler-servo-motor-mit-metallgetriebe-1800 - 1x 5V power supply ith enough amps. I used a 2.5A version which is barely enough, would go for 3A if you can. - optional: 1x Capacitor 1000µF. I used one because my power suppy is not that great but a good one shouldn't need a cap. - thin copper sheet. I inserted 2 pieces of copper into the slots next to the sprocket to use them as power distribution - wires and jst plugs to connect everything Assembly ------------- - print all parts - glue the bottom ring to the bottom tray - screw bottom ring to the Fan - put bearing into the left sprocket holder and screw it in place - drill the 1mm drill into the center of the sprocket and cut it off so it stays in place - screw the cross head onto the servo, it will fit snuggly into the sprocket hole - screw servo and sprocket into its place - screw relays and ESP32 into their places Wiring --------- - servo data line goes to pin 13 on the ESP - servo ground goes to the power didstribution ground copper sheet - esp32 power and grond to the power distribution copper sheets - both relays DC+ go to the positive power distribution copper sheet - both relays DC- go to the negative power distribution copper sheet - left relay (servo relay) signal IN goes to pin 14 on the ESP - right relay (fan relay) signal IN goes to pin 27 on the ESP - wire the Helios RR 160C Centrifugal Inline Metal Fan according to the manual - In germany the brown wire in the outlet cable is called Phase (L) and this is what the fan relay is going to switch. So it goes from the outlet to the COM port on the fan relay and from NO into the fan. Check how this works in your country. - servo red wire goes from positive copper power distribution sheet to servo relay COM port and from servo relay NO port into the servo - 5V power supply positive wire goes to the positive power distribution copper sheet and negative wire to the negative sheet. - If you use a capacitor solder it between the sheets with correct polarity ESP32 Setup ------------- - install arduino ide and configure it for your ESP32. - download arduino project from https://github.com/FieserKiller/valvecontrol/tree/main/esp32_project - edi wifi credentials and a device name in the "wifi settings section, flash it to the ESP and it should just work - it listens to POST /open, POST /close and POST /status http calls and does what you commanded it to do. closing takes 20 seconds because the fan needs time to speed down - If tests show that your servo does not make a full 180° movement you can play with servomin and servoMax values until it fits. Webinterface/App Setup -------------------------------- - the webinterface is written with pywebio and needs some device in your network to run on - google how to install python3 and pywebio library - download script from here, enter your ESPs corrent url into the "url =" line: https://github.com/FieserKiller/valvecontrol/tree/main/pywebio_project - run the script - enter the machines IP in any browser on your network and the webif should run - enter the url into your smartphone browser and it should run as well. This is a progressive web app and you can add it to your home screen. How to do that depends on your browser and phone OS. **Support my work** If you have some Magic Internet Money to spare drop me some Bitcoins: 153HHsR9gZdiDTUgzSZks4uuU141zKcsSe Or if you prefer a fancy Bitcoin Lightning tip jar: thosebetty84@walletofsatoshi.com Thanks a lot, your appreciation is what drives me! Like always, FreeCAD files are included, modify everything to your needs! Additionally there is a github page with coude and ressources or this project: https://github.com/FieserKiller/valvecontrol/
With this file you will be able to print Wifi controlled 160mm fan valve with your 3D printer. Click on the button and save the file on your computer to work, edit or customize your design. You can also find more 3D designs for printers on Wifi controlled 160mm fan valve.