Wii U Large Battery Case
thingiverse
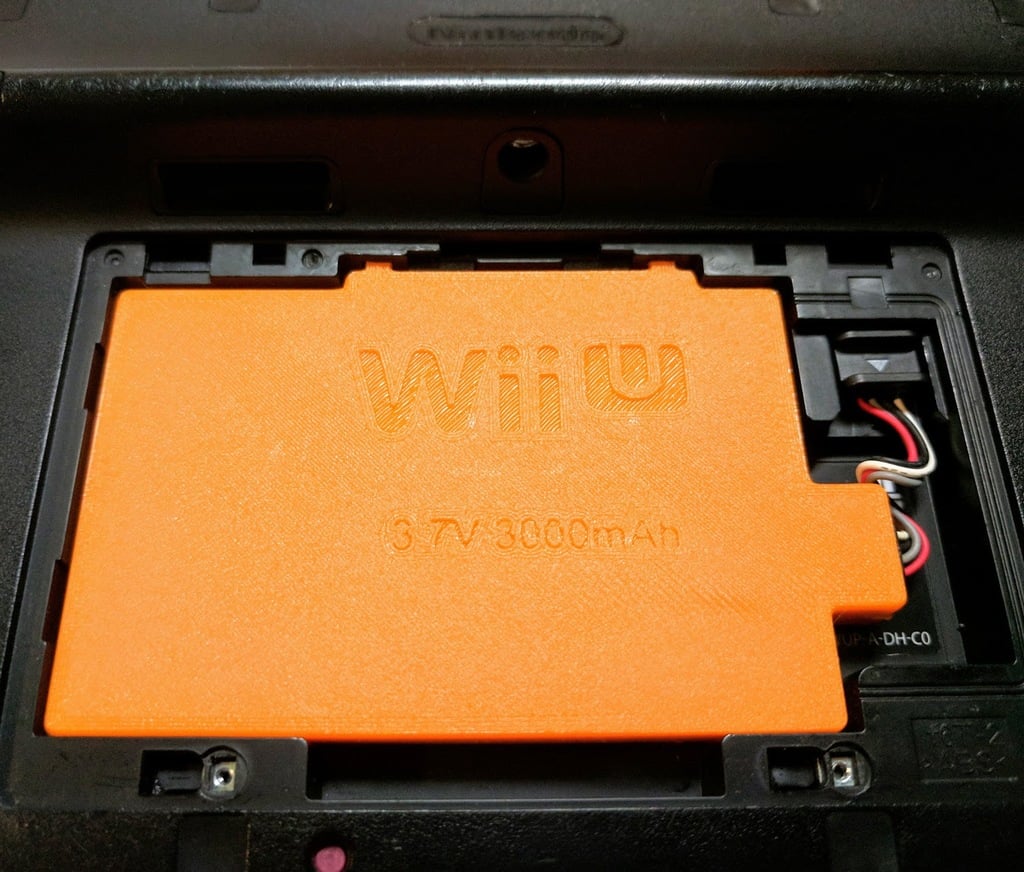
My original Wii U gamepad battery started dying in an hour, so I wanted to get a new battery. Nintendo used to sell a larger battery for the gamepad, but they stopped doing that long ago and there's no point buying a used one since it probably won't last long either. So then I considered getting an after market battery. After reading reviews it seems like those are hit or miss with some brands lasting for less time than the original small battery. Ultimately, I decided to just make my own. The largest easily available battery I found that can fit inside the gamepad is a 605080 LiPoly 3000mAh 3.7v Battery. These can be found anywhere online through either amazon or ebay or even aliexpress. The beauty of this is that even if this battery doesn't last for very long you can always just make a new one for a few bucks. The next thing you'll need is the charge control board from the original Wii U battery. This is definitely the hardest part of this upgrade since you need to actually open up the casing of the battery. You need to be extremely careful to not puncture the battery inside! This can be really dangerous so I recommend you do this outside with a bucket of salt water handy incase something goes wrong. I started by cutting the corners with a pair of flush cutters. Then slowly work your way around the seam until it's free. Then you can just snip the metal tabs off at the board. LiPoly batteries normally have their own safe charging circuits installed from the factory. Initially I tried just keeping that circuit in and soldering the wires coming off it onto the wii u board, but that didn't work as it ended up outputting 0 volts. So you'll need to take the battery's charge circuit out. Most batteries just have kapton tape securing it, so it's easy to peel off. Then just pry the metal tabs off the circuit. Finally, solder some small wires onto the tabs and then onto the wii u charge board, minding the polarity. Now you can assemble the new battery! Fit everything together and make sure nothing sharp is touching the battery. I used a small piece of double sided tape on the bottom of the battery to ensure it wouldn't move around. Everything fits snug, but it's just a bit of added security. After test fitting everything, I went around the perimeter with some super glue and then snapped the top on and let it set. That's it! You've now got a brand new high capacity Wii U gamepad battery for a fraction of the cost of an aftermarket one! This new battery lasts for way longer than the original. It charges and plays perfectly as well. A lot of the aftermarket batteries have false advertising saying they've got 3600+mAh batteries, which is just not possible. When you take the time and make your own, you have the flexibility of choosing a reputable battery and knowing for sure that it is the correct capacity specified. Hopefully this helps you out!
With this file you will be able to print Wii U Large Battery Case with your 3D printer. Click on the button and save the file on your computer to work, edit or customize your design. You can also find more 3D designs for printers on Wii U Large Battery Case.