Wind Powered Electric generator
thingiverse
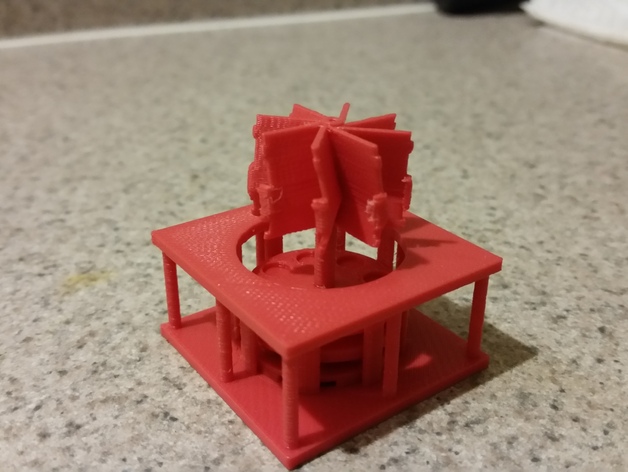
Wind Powered Electric Generator This model was created using Tinkercad. Print this model to enjoy and get excited about wind energy and electricity! Update (2-16-2016): Files are now A LOT BIGGER. The picture shows what the original size was. Sorry for those that downloaded the originals. I made everything bigger, especially the sails. Comments are appreciated! Peace! Print Settings Printer Brand: Stratasys Printer: uPrint SE Plus Rafts: Yes Supports: Yes Resolution: .235 mm Infill: 10% How I Designed This How I designed This The idea came to me when I was thinking about a simple electric motor I would show to kids while I worked at a children's museum. The electricity flowing through the coils would create a magnetic field which would push a coil against the magnetic field of a stationary magnet. Now lets flip this idea and have the coils stationary and the magnets moving. Good teaching tool for showing how wind turbines work! Project: Learning electricity from the wind Objectives Learn how a wind powered electric generator works Learn how build a simple wind powered electric generator Learn how magnets create electricity Advanced Objectives Learn how to connect different components Learn how to rectify the voltage Audiences Middle school and older High school classes learning about renewable energies High school/college electronic classes Preparation Students will need a basic understanding of electricity. Instructor should be comfortable answering electricity and component questions. Print out all the pieces. (assembly instructions are forth coming) It is helpful to have students form into working groups of two or three so that they can collaborate on the building process. Be sure to have all the components ready before the students arrive. Lesson 1: Building the model Have each group of students work together on building the model. Things you will need: Super glue Spool of fine magnet wire Small circumference and height neodymium magnets (4-16) LEDs (4) Resistors (33ohmx4) Voltmeter (optional) Tweezers (optional) Step 1-1 Print all the pieces. Step 1-2 Sand the edges of the two disc pieces. Not too much, but enough so that when you spin the spinning mechanism, the edge causes little to no friction on the inside diameter of the base. Step 1-3 Use super glue to secure small magnets in the grooves under and on top of the disc pieces. Step 1-4 Now would be a REALLY good time to start coiling the magnet wire around the coil fixtures, top cover and the base. Trust me, it is a lot easier to do it now than when you have the whole thing super glued shut. You should be able to get about 10 loops for every fixture. When I say fixture, I mean one of the four fixtures on the bottom of the top cover and ditto on the bottom of the base. The tighter and more loops you make, the higher the voltage across the wire (BUT YOU KNEW THAT, RIGHT?). Step 1-5 Place both discs in the free space in the base. They will be attached later. Step 1-6 Slide the top cover as shown in the final model. Secure with super glue. It will definitely be a tight fit, sand if you would like a better fit, but it should be snug. Be sure to wire the opposite side loops together so that you can get a more visible response when you plug in LEDs and resistors into the circuit. Step 1-7 Slide the pointed end of the spinning mechanism into the hole of the top cover. This should align with the center holes of the discs also. Step 1-8 Slide and secure the two pieces that will be printed with the spinning mechanism as shown in the final model. Secure with super glue. It may take some force, but trust me, it fits. Using tweezers here will make it easier to maneuver the discs. Step 1-9 Wait for the glue to set. Step 1-10 Teach those peeps about mother loving ELECTRICITY! Lesson 2: Applying the coils and magnets Coils and magnets will show the students how electricity is formed in electric generators. Be sure to teach the fundamentals of magnetism and electron flow. The LEDs will create a visual for those students. Advanced Lessons: Further teaching Add an Oscilloscope to show how the motion of the fan causes electricity to be created in the coil. Teach about AC and DC electricity. Teach about rectifier circuits (full wave, half wave, etc). Lesson Results At the end of this project, each group of students should have: A functioning 3D printed wind powered electric generator Notes on the basics of other wind powered generators An understanding of all electric generators Advanced Results At the end of this project, advanced students or group of students should have: A wind powered electric generator that regulates the input of power An understanding on voltage regulators An understanding on the difference between AC and DC voltages Circuit designs based on the amount of energy created. Notes on improvements or additions
With this file you will be able to print Wind Powered Electric generator with your 3D printer. Click on the button and save the file on your computer to work, edit or customize your design. You can also find more 3D designs for printers on Wind Powered Electric generator.