Wire loom tool With Locking Mechanism - No Supports Required
thingiverse
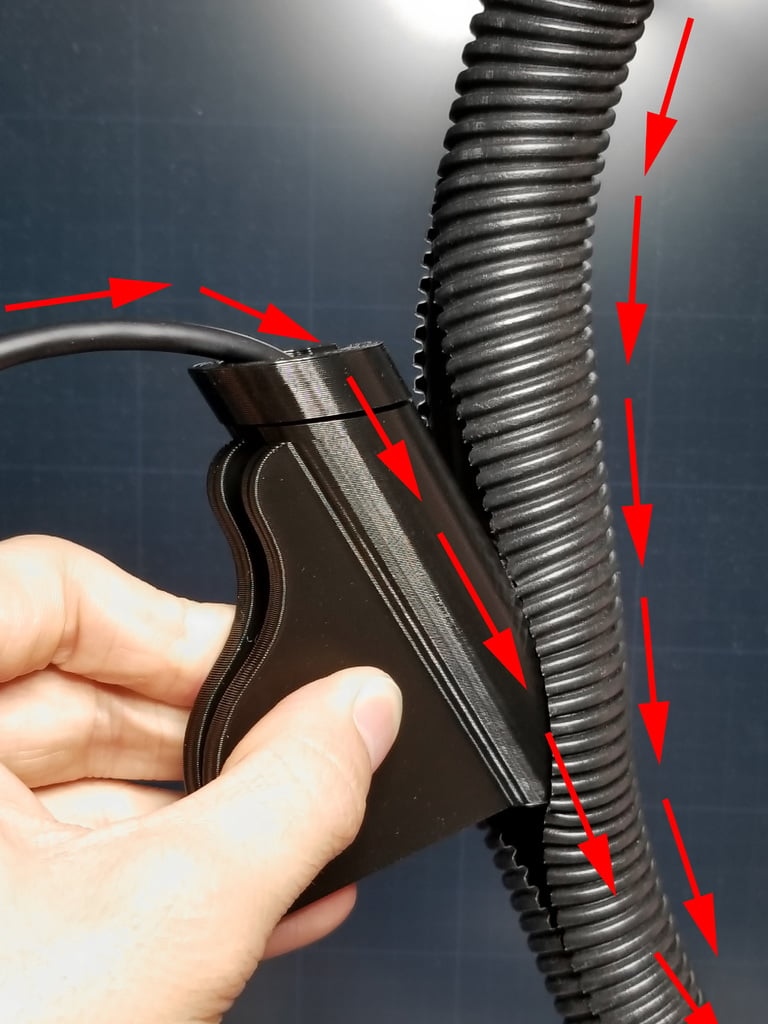
I really loved R4C3R's design, it was a nice design. I tried to avoid using supports whenever possible and I thought it needed a cap or insert to hold the wires in place, so I remodeled it so that you don't need to use supports and added a cap. So that it doesn't get confusing, let me clarify something - from now on, I will refer to this tool as the "loom tool" or the "loom", and the actual loom (that covers the wires) as "sleeving". Here's how it works, also see photo instructions: 1. The cap slides into the main loom tool with the open section of the cap in line with the open section of the loom tool. 2. Slide the wires in through the gap and then rotate the cap 180 degrees and slide it in till it looks like what's shown in the photo. 3. With the wires locked in, pinch the handles on the loom tool (tightens around and holds the cap in place), put your sleeving over the nub of the loom tool, hold your wire and the sleeving and pull the loom tool - this will sleeve the cables in a snap. 4. When you're finished sleeving the cables, pull out and rotate the cap 180 degrees again to where the open face is in line with the open face of the loom tool and slide the wire out. Alternatively, you can do these same steps but instead of twisting the cap 180 degrees, you can insert the wire into the loom tool and then into the cap separately and then slide them together to lock the wires in place - it's basically the same general concept, but might be a little easier. I've included some pre-scaled versions ranging from 10-30, but if you need a specific size, just scale down the "Wire_Loom_100_Group" (or "100" version separate files [loom and cap]) to whatever size you need. For instance, if you need a 45, just set the scale of the 100 loom to 45. None of it needs supports of any kind. I did infill %0 for the main parts/loom tools and infill %50 (fast honeycomb) for the caps - seems to work really well. NOTE: I'm using a 0.8mm nozzle and used 3 outer layers and 5 top and bottom layers with S3D's internal thin Wall Type set to "Allow Single Extrusion Fill" to fill small gaps. Be sure to check out the new Facebook group called "3D Printing Useful Things!" - where you can find lots of other useful 3D prints: https://www.facebook.com/groups/608845186127310/.
With this file you will be able to print Wire loom tool With Locking Mechanism - No Supports Required with your 3D printer. Click on the button and save the file on your computer to work, edit or customize your design. You can also find more 3D designs for printers on Wire loom tool With Locking Mechanism - No Supports Required.