Wire Spool Holder Bracket
thingiverse
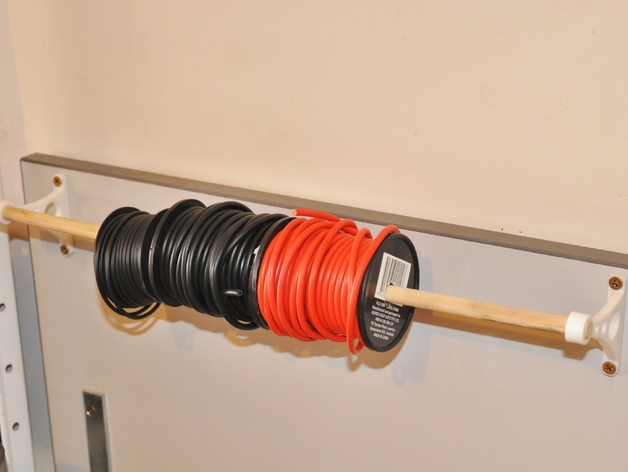
Sick of all those small wire spools lying around? Have a stick of dowel and a 3D Printer handy? Then get them up off the bench and somewhere accessible! Instructions You Need! Min. 2x Wire Spool Holder Brackets. The dowel support is thru hole, so you can print more to support the dowel mid span if you need to. 1x Length of wooden dowel. Default size is for 9.5mm dia dowel. Source from your local Hardware Store. Min. 4x Screws. Sized for 8G Chipboard screws. Select screws for what material you are mounting the brackets to. The mounting hole is diameter 4.5mm in case you wish to check your screws fit. Source from your local Hardware Store. Printing! Add however many brackets you need to your plate and print them all at once. The brackets are asymmetrical in order to print properly without needing support. My Print Settings: 0.15mm layer height, but 0.2/0.25mm should be fine. 2 perimeters 4 Top layers, 4 Bottom Layers 25% Infill I used the above settings and my brackets are quite strong. Customisation: The default bracket size is for 9.5mm diameter dowel. If you have different dowel sizes handy, no need to curse me. Just download the Wire_Spool_Bracket_Blank file. That prints with a 3mm diameter dowel hole. Print that and then drill through it to the appropriate diameter of your dowel. Be careful when drilling through the support as the inside will be mostly hollow due to the infill settings. If you can adjust your slicer's minimum Solid Infill Threshold Area, set it to 200mm^2 and it'll print that section (and probably the others..) solid. Assembly! Find a nice clear space to mount your spool holder. Cut length of dowel to size. Mount brackets onto the dowel. Place the brackets against the wall, and mark hole centres. Use a level to ensure it is straight & level, or just eyeball it. Remove brackets. Drill pilot holes for your screws. (I used a 2mm drill for the 8G chipboard screws) Place brackets back on the wall & drive screws home with a screwdriver. (You can use a power drill for the bottom holes, but make sure you have the clutch setting on low (~1-4) otherwise you might power through the bracket and snap the plastic. You will need a screwdriver for the top holes as the bracket is in the way. Slide wire spools onto the dowel. Bend brackets slightly and feed dowel into the supports one end at a time. It might help to feed it further through the first bracket so you don't have to bend the other end as far. Stand back and admire your new spool holder, and how clean your bench is.
With this file you will be able to print Wire Spool Holder Bracket with your 3D printer. Click on the button and save the file on your computer to work, edit or customize your design. You can also find more 3D designs for printers on Wire Spool Holder Bracket.