Wire Straightener
thingiverse
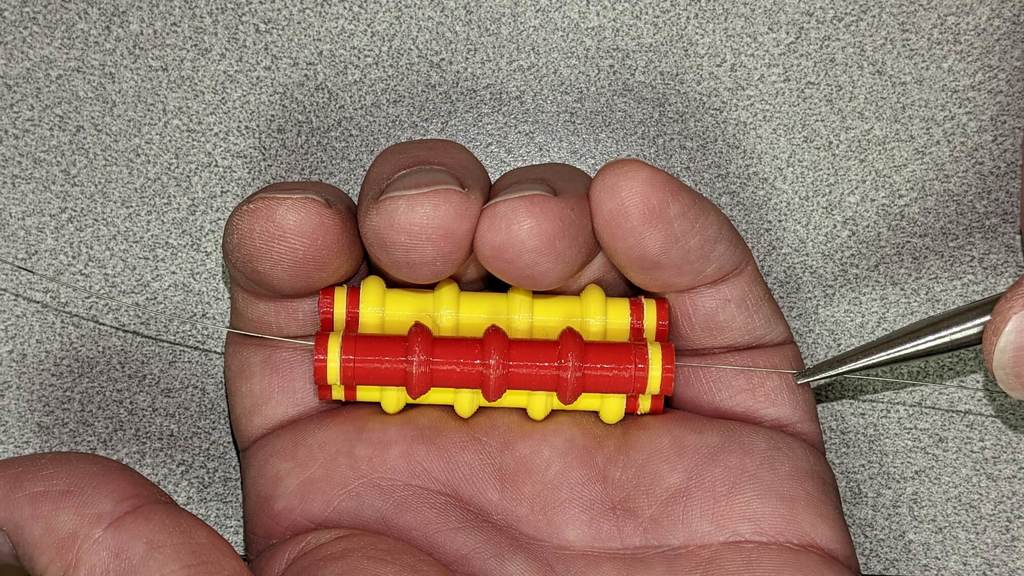
Wire straightening hand tool. Two colors are shown for clarity. All press-fit parts. No supports are needed, but I did use a 3 mm brim. Also, I placed the three "rollers" close together so their brims touched. The idea is to create an even larger adhesion layer. There are two roller styles. "Wire Straightener-Roller-3" has three "doughnuts." "Wire Straightener-Roller-4" has four. Notice in the photos that one of the two Roller-4s is flipped compared to the other. There are two link lengths. Print only one of the lengths. "Wire Straightener-24-30 AWG Link" holds the rollers apart just far enough that the doughnuts don't touch. "Wire Straightener-18-24 AWG Link" holds the rollers a bit farther apart to fit larger gauge wires. These two lengths were determined empirically (by trial and error) using a very small sample of wires. Your printer's characteristics and the insulation variations of your wires will likely affect performance. Print List - (1) Roller-3 - (2) Roller-4 - (4) Links (of the same length) - (4) Washers - (6) Pins Assemble as shown in the photos above. Use washers to keep links straight. The order of the rollers is not important, I put the 3-doughnut roller in the middle. What is important is that the two 4-doughnut rollers are assembled in the opposite orientation. I found that a fingernail file (sandpaper on a stick) works great at removing burrs from the pins. This makes assembly easier. The straightener is super easy to use. Open the straightener, lay the wire across the rollers lengthwise, close the straightener and pull the wire through. There are plenty of videos demonstrating the procedure. Just search for "wire straightener."
With this file you will be able to print Wire Straightener with your 3D printer. Click on the button and save the file on your computer to work, edit or customize your design. You can also find more 3D designs for printers on Wire Straightener.