Wiring Pen
thingiverse
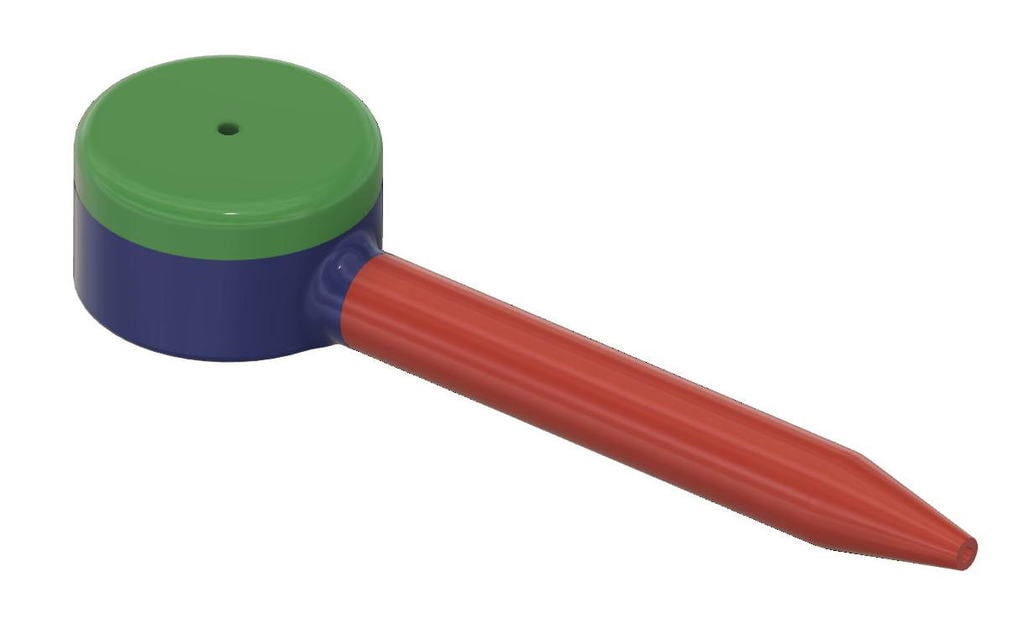
When you're wiring up an electronic circuit you can use a perforated board but still need to connect many points together. A printed circuit board does this for you but perf board doesn't, you have to add your own connections and that's where this tool comes in. The wiring pen supplies thin "magnet wire" from a spool held in the spool holder, the wire is insulated and if you buy the correct type you can solder these wires without stripping the wire. This makes for very quick and easy connecting up a complex circuit without worrying about the lines that cross and touch each other making electrical contact. Its a lot like wire wrapping without the long sockets and without the wrapping tool. You solder the end of the wire to one point then pull the wire out to the next point you want to connect, cut the wire then solder the end down. No stripping and only the tip that you solder makes contact. The wire is so thin you can pass it through PCB vias or the perf board holes. In fact, if you're careful, you can solder the wire down to multiple points without even cutting it. The pen is great for repairing corroded or burnt tracks too. neelanden has a nice [instructable](https://www.instructables.com/Wiring-Pen/) Also [andypugh](https://www.instructables.com/PCB-Prototyping-With-Verowire/) And the classic extreme example from [elm-chan](http://elm-chan.org/docs/wire/wiring_e.html) [Detailed video](https://www.youtube.com/watch?v=i5MNLTc7YhY) IMPORTANT: The trick is to use "solderable" polyurethane coated wire because it can be soldered, not just some wire you found on a transformer or relay, these may work but are more likely coated with a heat and sovent resistant polyamideimide coating. The solderable wires are usually a reddish colour or may be green or other colour. The orange gold coloured coating is usually not solderable. Just search online for "magnet wire solderable" and you'll see the options. Use wire that is about 0.2mm thick (32G) for a resistance of 0.5 ohms per meter, this is excellent for electronics where the currents are less than 100mA. For higher power circuitry you may want to increase the wire thickness. For wiring BGA or QFN parts you may want to go thinner. The Spool holder holds a common bobbin around which the wire has been wrapped. The bobbin shouldn't rotate too easily, the wire will unwind, use some paper discs or felt under the bobbin to add some resistance to rotation. The Cap can be screwed down with a small screw, mine snaps on tightly and didn't need the screw until I dropped it and the spool spilled in one direction, the pen in another. Rewinding the spool is tedious so I now use a screw to keep the Cap on, glue would also work. The Bobbin can be printed or you can buy one, they aren't expensive. The top will be a snug fit but it should be glued, the windings can add quite a bit of pressure when there are a lot of turns. Alternately you can design and print a bobbin from [Cymen](https://www.thingiverse.com/thing:2770475) or [elliotboney](https://www.thingiverse.com/thing:2402210) or one of the many others on thingiverse The pen part can be printed but it is not very practical, its much better to use a ballpoint pen or a "fineliner" that has a steel tip which is much finer and stronger than the fat printed PLA tip. You can also use a syringe type point. I used a fineliner but a ballpoint pen works well if you can get the ball out by sanding the tip around the ball. Throw the tube away and wash the ink out with some solvent. Make sure the metal tip is smooth so that the coating is not scraped off as it leaves the tip. This includes the inside edge of the tip.
With this file you will be able to print Wiring Pen with your 3D printer. Click on the button and save the file on your computer to work, edit or customize your design. You can also find more 3D designs for printers on Wiring Pen.