Wizard's staff
thingiverse
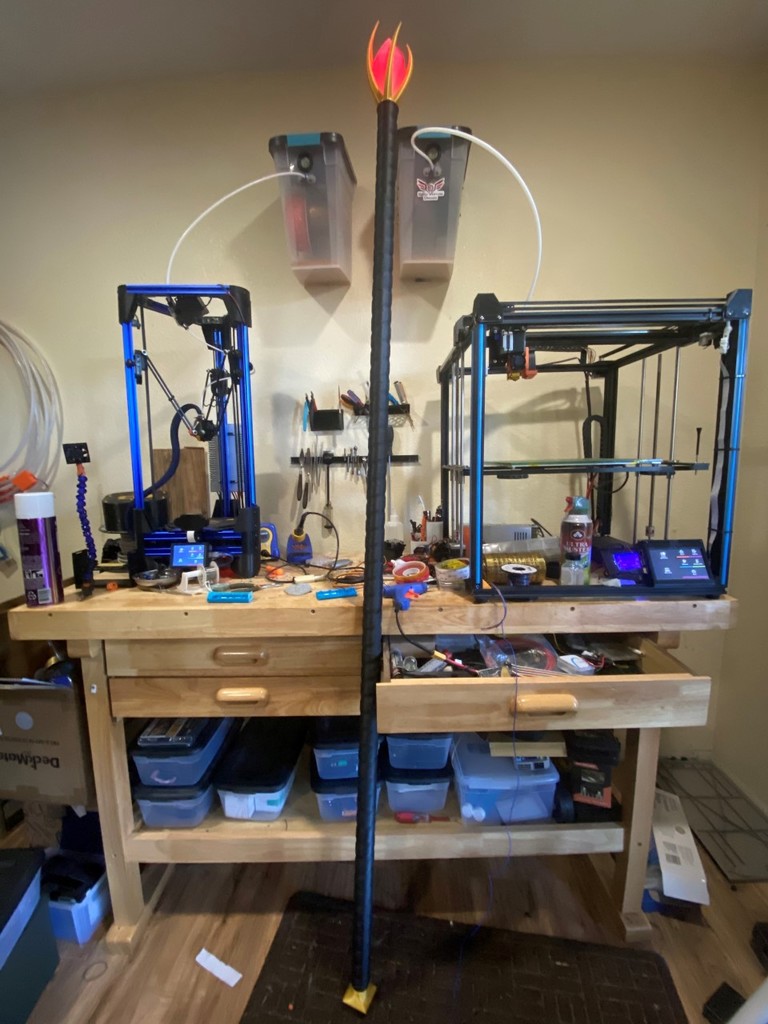
I've never done cosplay, but was bored over Thanksgiving and started this as a way to play with NodeMCUs running WLED. I also plan to adapt this for yard torches this summer. Also my wife really liked it but didn't want a saff, so I made another with only the top shaft as a short wand. # Parts: ## Random - Wire (6ft for the staff, but more for various bits) - Hot glue - Super glue - E6000 glue - conformal coating ## Main Staff: - 1x CrystalLEDJig - 1x StaffCrystal - 1x Crown - 1x StaffTop - 9x shaft - ~71" 1" schedule 40 PVC (dirt cheap from HomeDepot) - 10x Individually Addressable LEDs (https://www.amazon.com/ALITOVE-100pcs-WS2812B-Addressable-Arduino/dp/B01D1FFVOA) - 1x NodeMCU (standard 8266 fits 1", but ESP32 DevKitv1 does not. Other ESP32 boards are smaller. 8266 is plenty for this project though and dirt cheap) (https://www.amazon.com/KeeYees-Internet-Development-Wireless-Compatible/dp/B07S5Z3VYZ) - 1x 18650 battery (salvage or buy from Amazon) - 1x lithium battery charger/discharger 5v (https://www.amazon.com/MakerFocus-Discharge-Integrated-Charging-Protection/dp/B07PZT3ZW2) ## Pommel USB charger - 1x USBPommel - 1x USB port (I ripped one off ... um.. some electronic doo-dad) - [Optional] magnetic tip USB cables (glue into USB port. Glue tip into USB port to make things easier) (https://www.amazon.com/TOPK-Magnetic-Charging-Compatible-iProducts/dp/B087LZTD9C) ## Pommel standard/Wireless charging coil - 1x Pommel_coil - 1x Pommel_coilCap - 1x wireless inductive charging set (https://www.amazon.com/Adafruit-Inductive-Charging-Set-ADA1407/dp/B00SLYAIG8) ## Wireless Charging Base - 1x WirelessChargerCenterCup - 1x WirelessChargerCenterRing - 1x WirelessChargerBase - 1x 5.5mm barrel jack - 1x 12v power brick with standard 5.5 jack. (1.5A should be plenty though I'm using 5A simply because it's what I had laying around) (https://www.amazon.com/Pigtail-Female-Connectors-Security-Adapter/dp/B07C7VSRBG) # Printing Tips ## Crown - Print the Crown with high infill and with strong filament. it's fragile so... I'm planning to re-print mine in PLA+ or PETG. Wife already broke the first one I made for her wand version of this. I reprinted with 70% infill and so far it's holding up. ## Crystal - I printed with 3 walls and 0% infill which gives good diffusion of the light. I'm not sure it would look good with infill... but then I didn't try it so.... maybe I'm wrong? # Assembly ## LED jig/Crystal - LEDs are wired in three parallel strands. 2 are 3 LEDs long and one is 4 which is the LED at the top. E6000 holds really well and is clear so I used at lot here. - Glob some E6000 onto the top LED and shove it into the crystal with a stick or really anything just to push it all the way in. Leave it that way for a few minutes until the E6000 holds it. I also gluded the wires at the bottom of the crystal and added a JST connector for ease of assembly/disassembly and because I had them... but that's totally optional. - Use Hot Glue to hold the crystal into the crown. It is easy to break the crown and while E6000 can be removed, hot glue holds well enough and is just easier to remove for disassembly if you need to. ## USB Pommel - Look up the pin out on a micro USB connector. Basically the outer most pins one side is 5v and the other is ground. - Feed the wire into the hold in the base first. I inserted a magnetic USB charger end thing into the USB port at this point, but it's optional. I then globbed E6000 (because this area will hit the ground a lot and E6000 is more durable than hot glue) and pushed it all the way into the pommel letting it dry. ## Shaft - Top shaft first with some glue (I used superglue, but you could use epoxy or whatever. I was test fitting a lot, so I didn't want something as strong as epoxy (and I didn't have any on hand) but if I was to make this again, I would probably go with a thin epoxy. - Add shaft sections one at a time, adding glue, aligning and letting dry. I tried alignment pins but they were more trouble than they were worth.
With this file you will be able to print Wizard's staff with your 3D printer. Click on the button and save the file on your computer to work, edit or customize your design. You can also find more 3D designs for printers on Wizard's staff.