WonderSwan Flash Masta Cart Shell
thingiverse
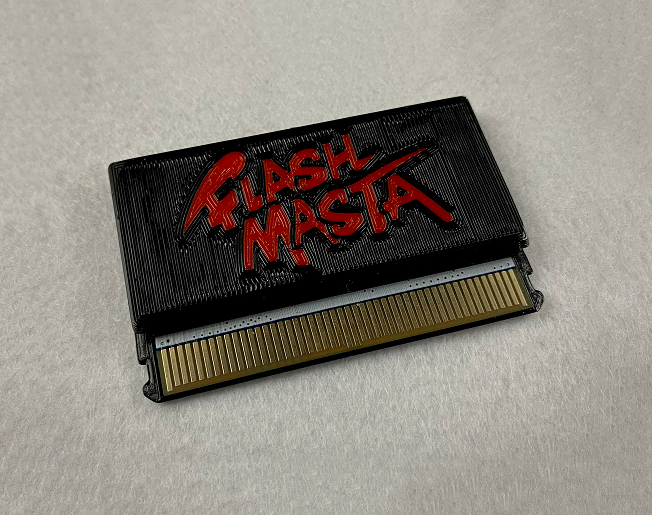
A cartridge shell for the Flash Masta. The video https://youtu.be/jEgatODxV5g I will update the model(s) and provide 1 or 2 more different versions soon. *I've updated the model(s) since the video, so now there are 2 versions. 1 is squared off as in the video, and the other has rounded edges. It's just a slight difference, but I very much prefer the rounded version. -v1.3 increases strength in a couple spots and lessens the force needed to unsnap one of the snaps -v1.4 increases space above MicroUSB input so the shell closes correctly, and again lessens the force needed to unsmap one of the snaps. Also the rounded edge of the front shell half (pin side) has been reduced slightly to allow better printing. v1.5 fixed oversight that caused incompatibility with some WonderSwan units -vNoNumber added a couple models. The single 'Back' is used for all versions. The 'Logo' model is designed for multicolor prints with the 'FrontLogoBody' being one color and the 'FrontLogoLetters' being the other, but MAY look ok in one color. I haven't tried that yet to see though. Both the 'Logo,' and 'WithLEDs' models have thin walls areas near the LEDs which are toward the rear of the WonderSwan to help the light shine through (depending on material opacity). They both also have openings facing upward for light pipes. I've had great success using clear filament (I use PETG for all materials in these models, but other material MAY be fine). I cut the filament to size and then melt the end on the inside of the shell to fix it in place. Finally the 'BasicNoLEDs' model is fairly complex; it's basic, aaaaaaaand,... it doesn't have LEDs :) -Updated 'back' to tighten things up on more accurate printers -Updated all but 'back.' I lined up the LED light pipe openings a little better. I thickened the logo letters slightly; my slicer didn't recognize .4mm as 2 .2mm layers for some reason so I'd only get 1 layer there. Now the model is .6mm so I get 2. If you get 3 layers at .6mm I still think that's pretty good. The light will not be as bright shining through the 'F,' but I don't think that's bad. I Also lessened some of the rounding on the edges for better printing. I've been printing quite a few of these, so I'm getting the settings dialed in pretty well for good results. Also I've been post processing them so I've worked out a decent way to clean them up for good fitting and for adjusting the snap force; the little variations in printing can cause the snaps to be a little too strong sometimes. I've left them this way for now to error on the side of being too strong though since a little, and I mean LITTLE, bit of filing on the snap points will dial that in where if the error was them being too weak there isn't much you'd be able to do. I may upload my settings/strategy for printing these and/or a quick video of the cleanup. That's all nothing special really, but it may help someone out :)
With this file you will be able to print WonderSwan Flash Masta Cart Shell with your 3D printer. Click on the button and save the file on your computer to work, edit or customize your design. You can also find more 3D designs for printers on WonderSwan Flash Masta Cart Shell.