Wooden inset floor vents
thingiverse
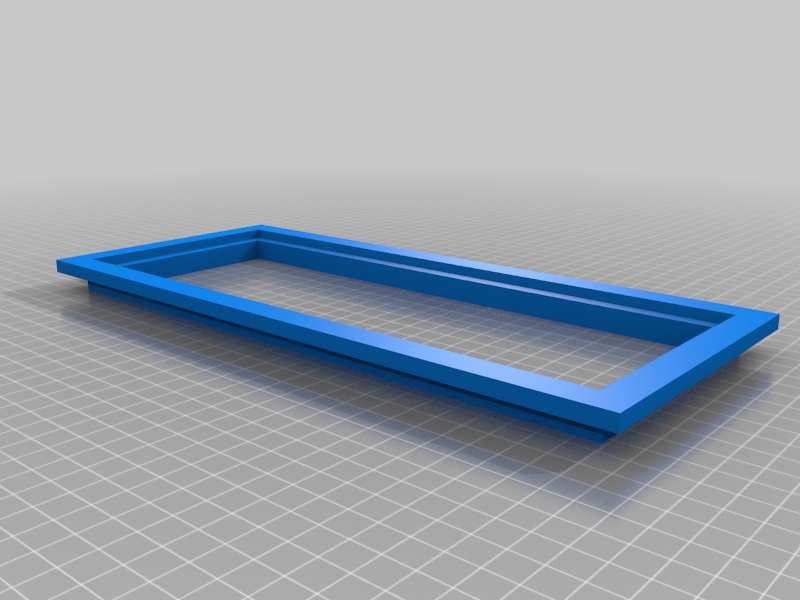
### What This is a floor vent frame and insert to be CNC'ed out of wood. These are sized to fit MY floor vents. You will need to measure and make adjustments to allow them to fit in your floor. ### Included I included a frame, an insert with a "grate" design (subtle Star Wars flavor) and an insert that is blank (blocked). I 3D printed these to ensure the fit was right but found that sun and heat from the furnace caused the PLA to warp up, causing a tripping hazard. ### Process Wood floors through the first floor needed to be resurfaced and re-stained. Floor originally had wood floor vents. Company doing the floors couldn’t sand and stain floor vent inserts. Floor vents aren’t standard to anything on the market today. Modeled a replacement that could have interchangeable grates so I can have fun with the design and we can do seasonal stuff with it. Printed test versions out of PLA. They warp in the sun and heat. Swap to the CNC mode and use model to carve replacement wood versions out of the same red oak as the floor. Stain with same stain, problem solved and floor upgraded!! - This is a 2-sided process. Bottom Side: ~4.5 hours, Top Side: ~2.5 hours - Using a Flat-end, single flute snapmaker bit - Using Fusion 260 for tool path generation - Combination of 2D contour passes and 2D Adaptive Clearing - 1mm stepdown with multiple passes - Allowing fusion to automatically place the tabs about 30mm apart 10mm wide X 4mm high - When marking the center point on one-side, I drilled a hole as straight through to the other side as I could with a hand held drill but then ended up repeating the corner-to-corner center marking on the other side to ensure center alignment when flipping - Alignment posts (marked in photo): Are there to ensure similar alignment on the board after flipping the stock for the pass of the opposite side - Mounting Screws (marked in photo): Since my vent just barely fits into the stock I have, I can't simply use the surface clamps directly onto the scrap board, there's not enough clearance to get a good hold and keep the clamps away from the milling head. So instead I'm using some scrap 1x4 and attaching the stock to the 1x4 from the back using some wood screws in the center of the piece, which is being removed anyways. This lets me use the surface clamps as expected from above while keeping them away from the milling head. - Since I'm centering the design in the stock, all I have to do is flip the stock, remount it, call up the file for the other side and start it again using the same Origin mark from the alignment on the other side.
With this file you will be able to print Wooden inset floor vents with your 3D printer. Click on the button and save the file on your computer to work, edit or customize your design. You can also find more 3D designs for printers on Wooden inset floor vents.