Word clock
prusaprinters
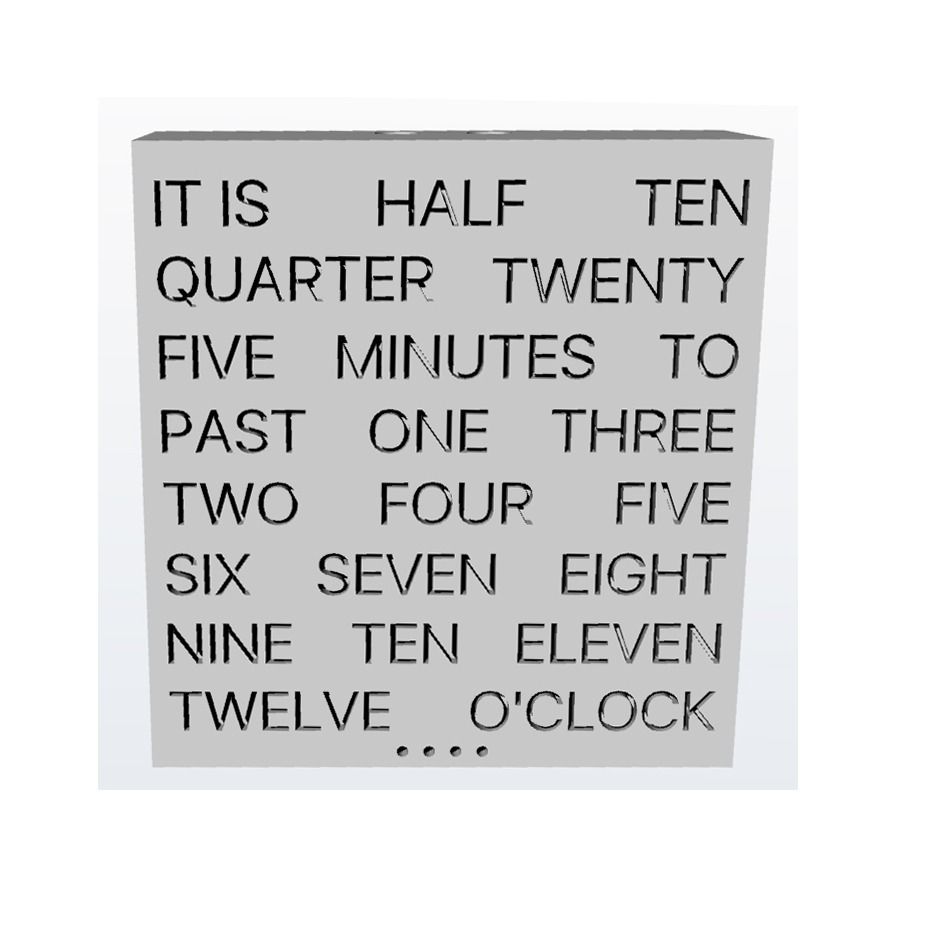
<p>Word clock kit.</p> <p>Inspired by the two tutorials by drj113 at www.instructables.com:<br/> <a href="http://www.instructables.com/id/The-Wordclock-Grew-Up">http://www.instructables.com/id/The-Wordclock-Grew-Up</a><br/> <a href="http://www.instructables.com/id/The-Word-Clock-Arduino-version/">http://www.instructables.com/id/The-Word-Clock-Arduino-version/</a></p> <p>To build this you will need 8 M3 screws, zip ties to secure the led strips and glue to secure the diffusers. The top of the case two holes for two 12mm push buttons to adjust the time.</p> <p>For the electronic part, follow the supplied tutorials but bear in mind that if you want to use the four leds on the bottom to display the minutes you will have to modify the code supplied by drj113, as I'm still waiting for all the bits to assemble this I have yet to start messing with the code.</p> <h3> Instructions</h3> <p>Print the case and back cover with dark filament to stop light bleeding trough. The diffusers should be printed with transparent or translucent filament. Place a drop of glue on the sides of the diffusers before inserting them in the corresponding slots on the case. The loose parts of the letters (o, r and a) use the diffusers to attach to the case so use a drop of glue on them before inserting them.</p> <p>Secure the led strips with zip ties to the light support. Route the cables to the back using the supplied holes. Place the light support in the case.</p> <p>Secure the electronics to the electronic support. Zip ties should do the job, but the spacing between the bars allows for m3 screws if you prefer to use them.<br/> For the four leds on the bottom use a drop of glue to secure them to the support or use sleeving on the leds and simply twist the legs on the back of the support.<br/> Use four m3 screws to attach the electronics support to the case.</p> <p>Insert two 12mm push buttons in the two corresponding holes in the top of the case, and connect them to your electronics.</p> <p>For power simply pass the charger cable trough the hole in the back cover and connect it to you electronics (probably an arduino).</p> <p>Place the back cover over the case and secure it with four m3 screws.</p> <p>Connect it to the mains, ajust the time and enjoy it.</p> Category: Decor
With this file you will be able to print Word clock with your 3D printer. Click on the button and save the file on your computer to work, edit or customize your design. You can also find more 3D designs for printers on Word clock.