WorkBench Fume Extractor Fan
thingiverse
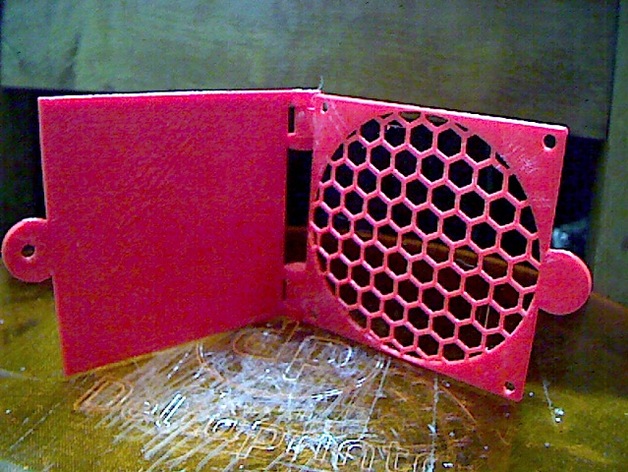
After many years of breathing solder fumes and ending up with lung damage, finally this is what I've come up with. Both sides of my work bench have fans on the end of 90mm PVC pipe. The other end is outside and has a 120mm fan. Each bench fan has the flap held in the closed position with small disk magnets. When one is opened, it is held in then open position by the disk magnet holding on to a screw on the side of the pipe. The cover flap operates a microswitch to turn on the fan. Countersink the holes to screw the part1 to the fan. As the power supply in physically towards the big fan end of the pipe, the big fan is turned on by a PNP power transistor. The transistor is turned on by either or both of the bench fans drawing current via the base/Emitter junction. On the hinges, the holes may need to be drilled out to suit your selected hinge pins. I drilled the outside hinge parts on part "1" and both hinges on part "2" to 3mm and used a couple of M3 screws slipped in and screwed into the plastic on the inner hinges on part "1" Also, drill the magnet mounting hole on the flap to suit your magnets. Thank you to.. "airforce" for the original fan cover. I couldn't be bothered drawing my own as that one is very good. http://www.thingiverse.com/thing:892548 EDIT: There are some more photos to show closer details. Print Settings Printer Brand: Deltaprintr Printer: Deltaprintr Kit Rafts: No Supports: No Resolution: .3mm layers Infill: 100% Notes: I printed these at 100mm/sec using PolyMax PLA.
With this file you will be able to print WorkBench Fume Extractor Fan with your 3D printer. Click on the button and save the file on your computer to work, edit or customize your design. You can also find more 3D designs for printers on WorkBench Fume Extractor Fan.